Module 3 Formstorming
Weekly Activity Template
Cerin Noupbaev
Project 3
Module 3
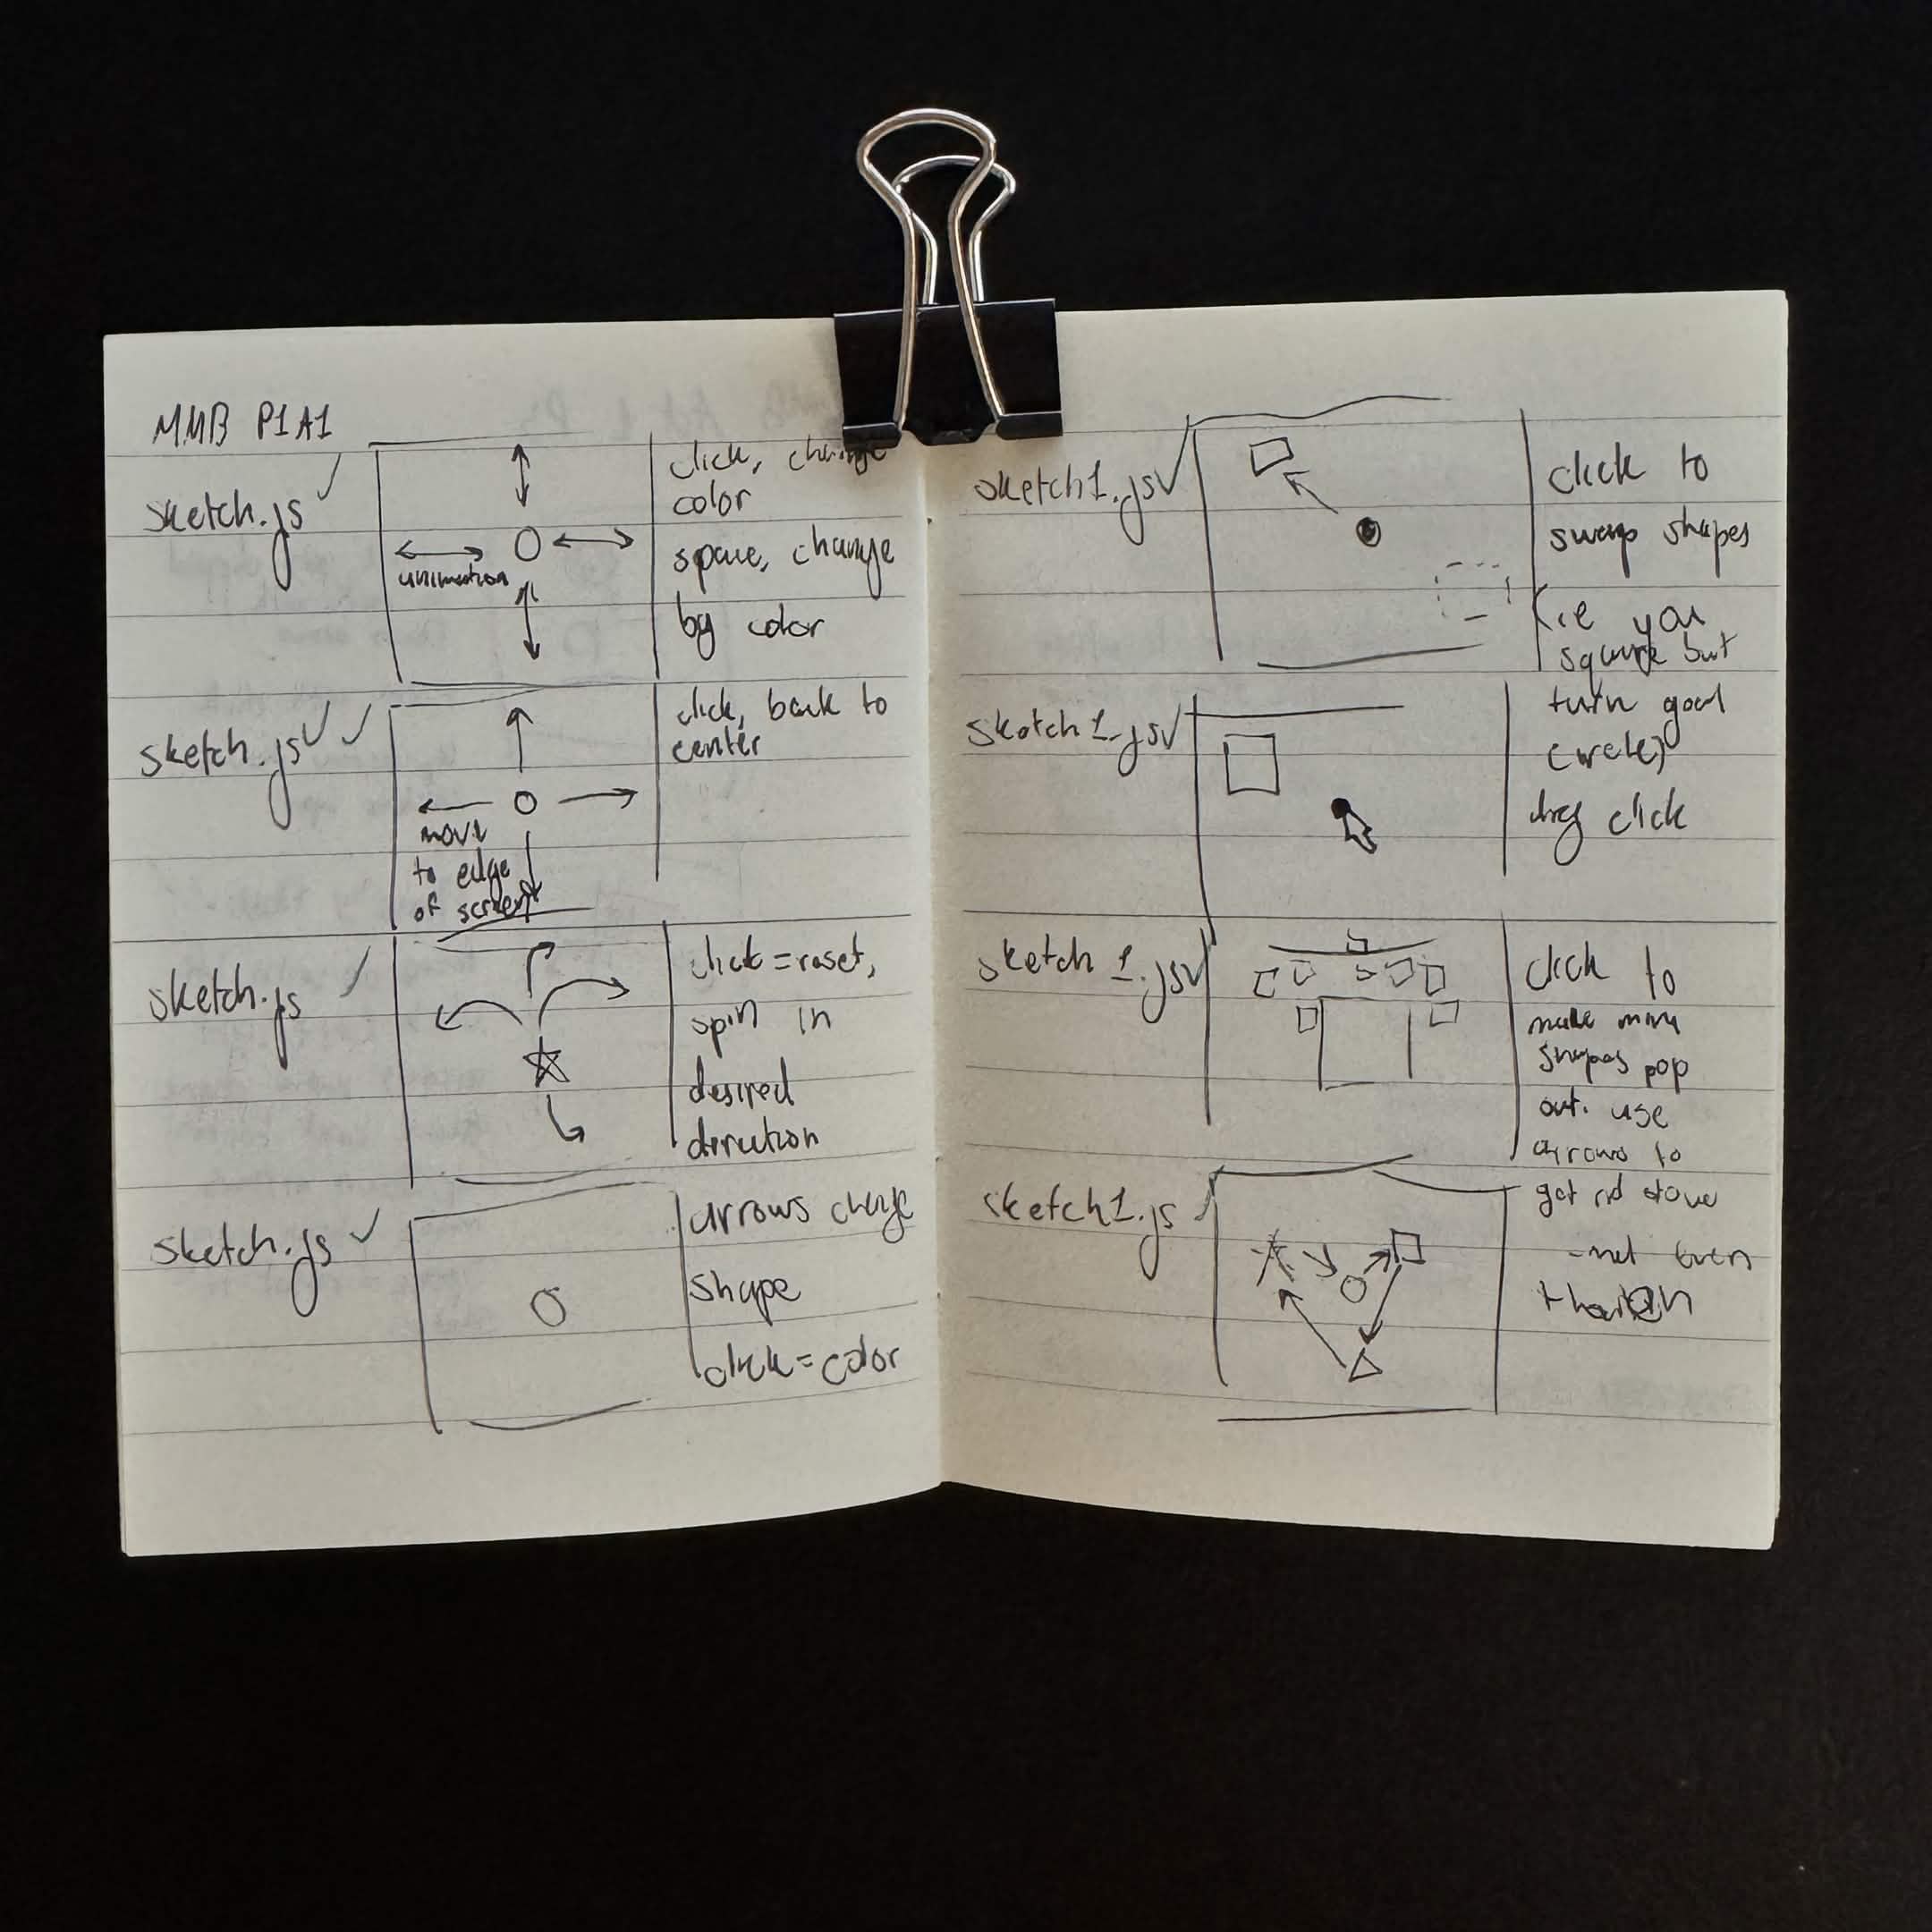
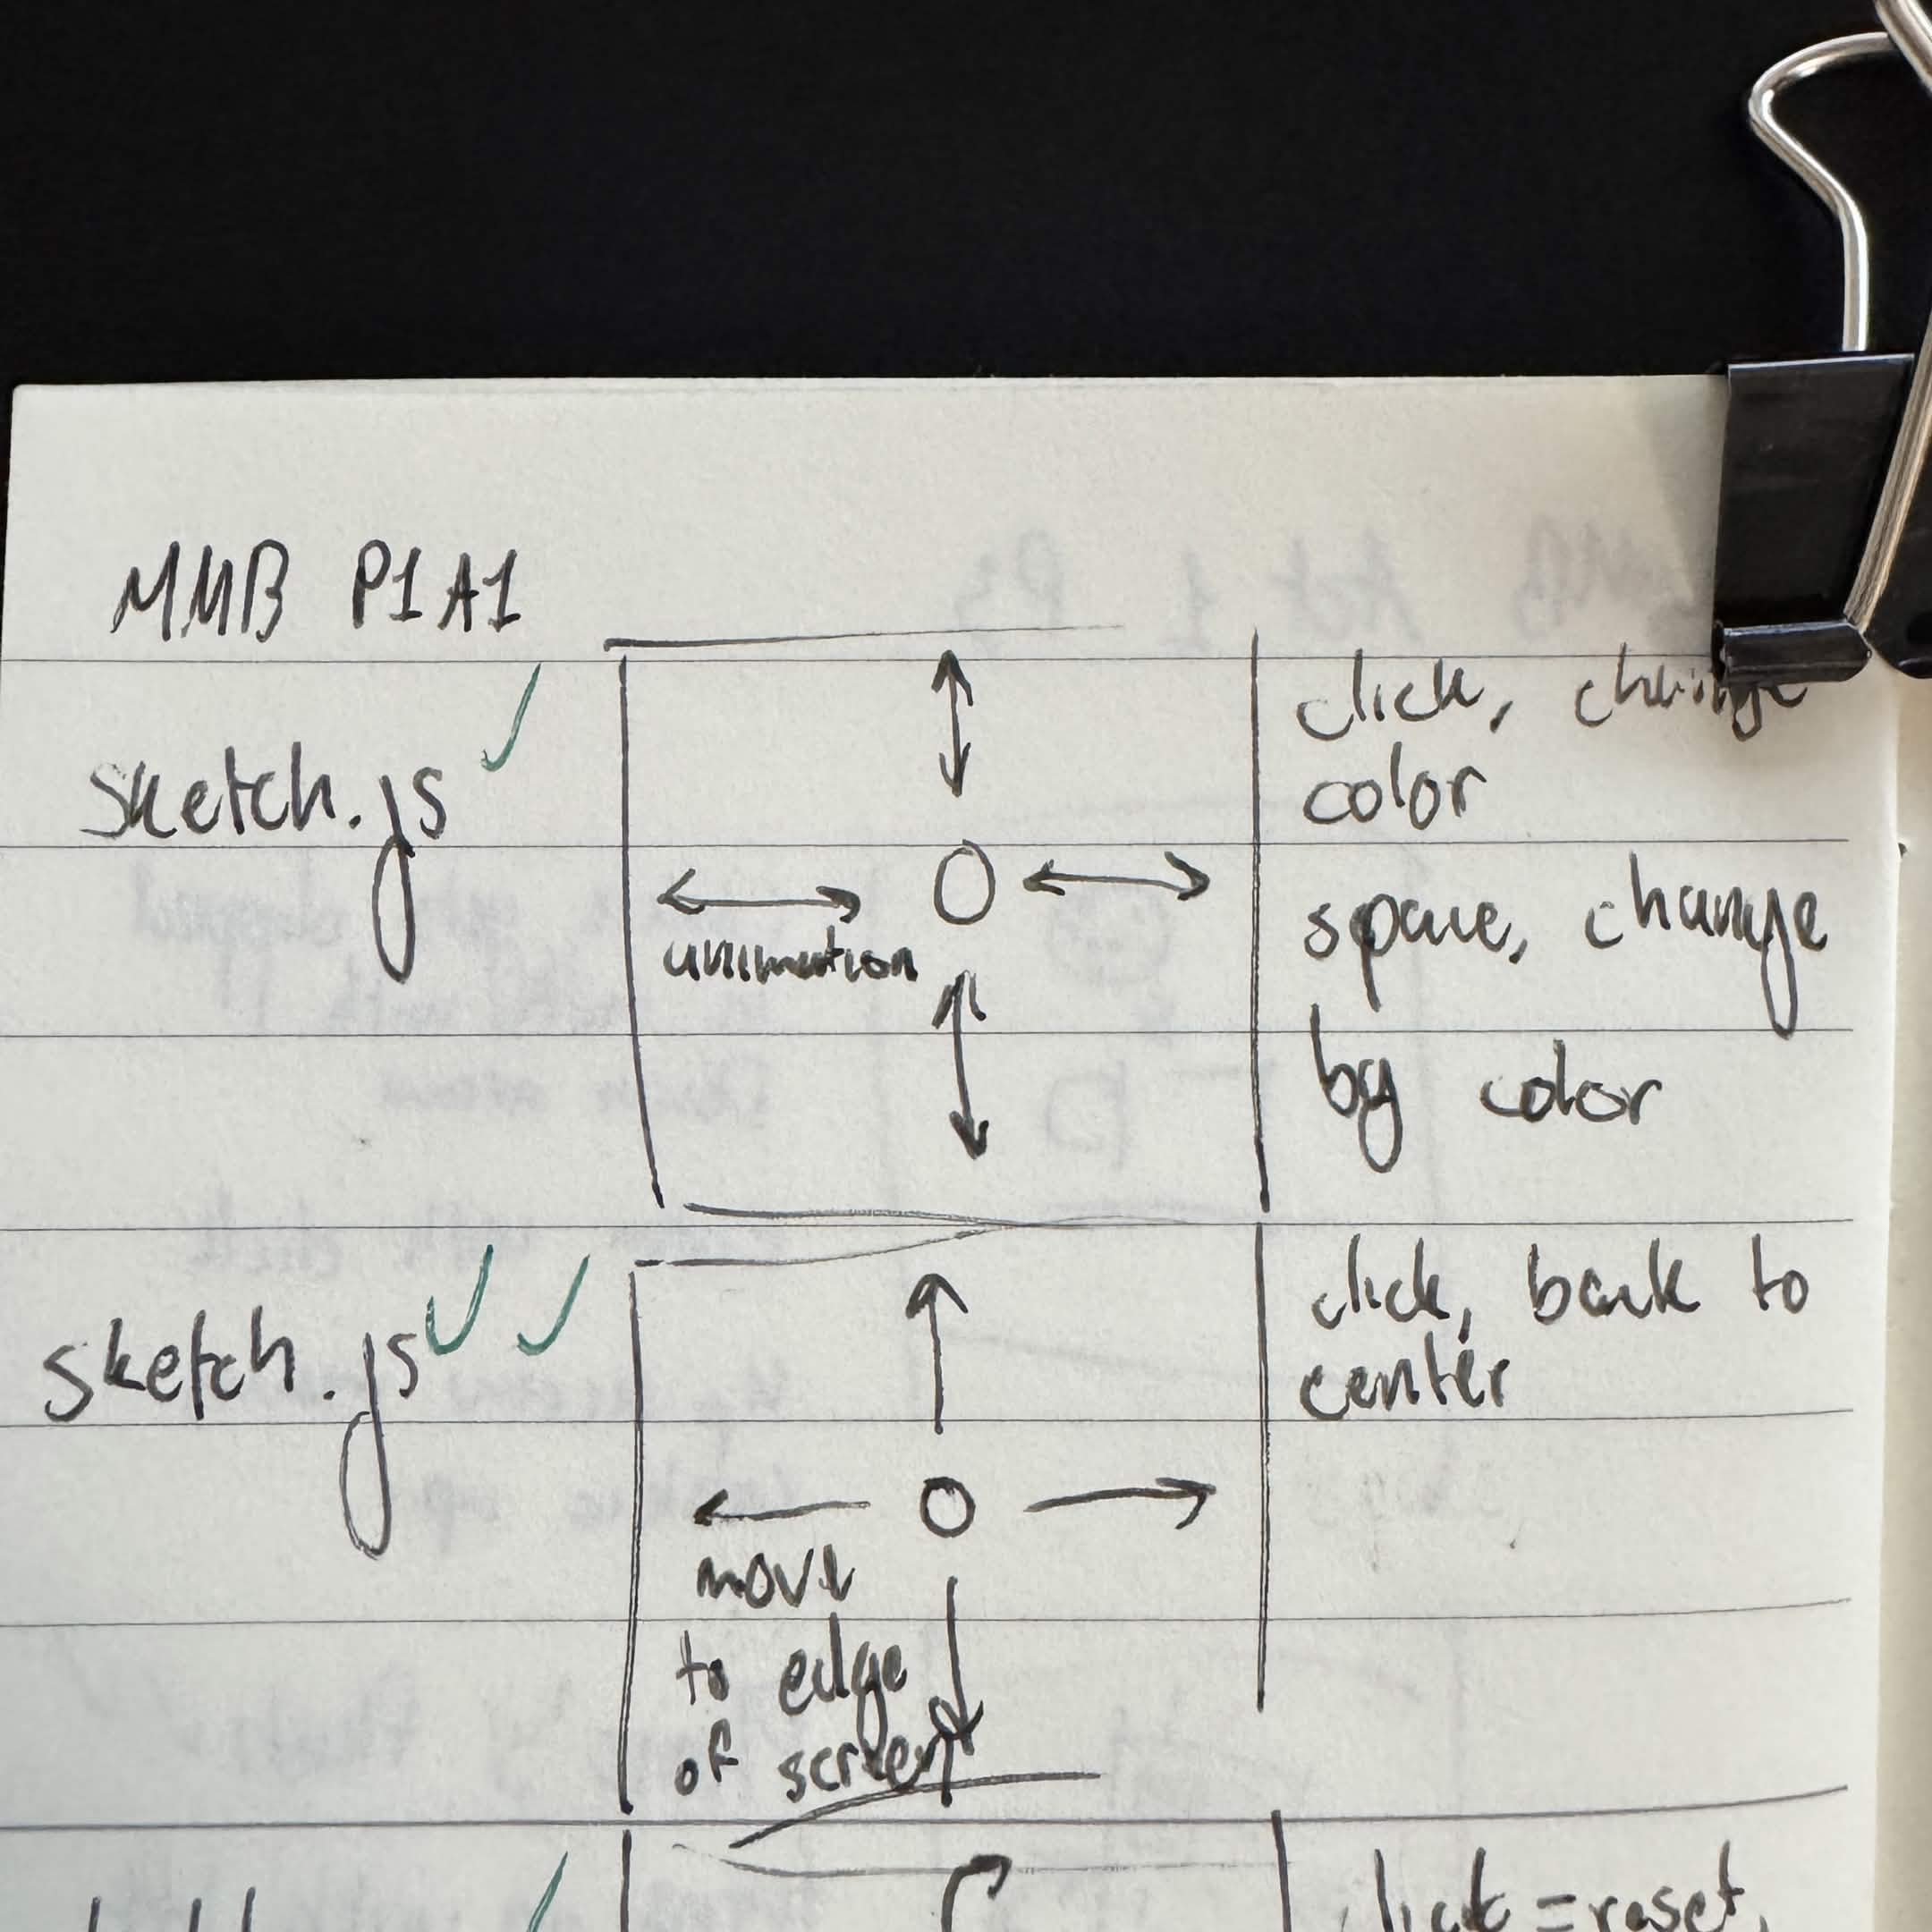
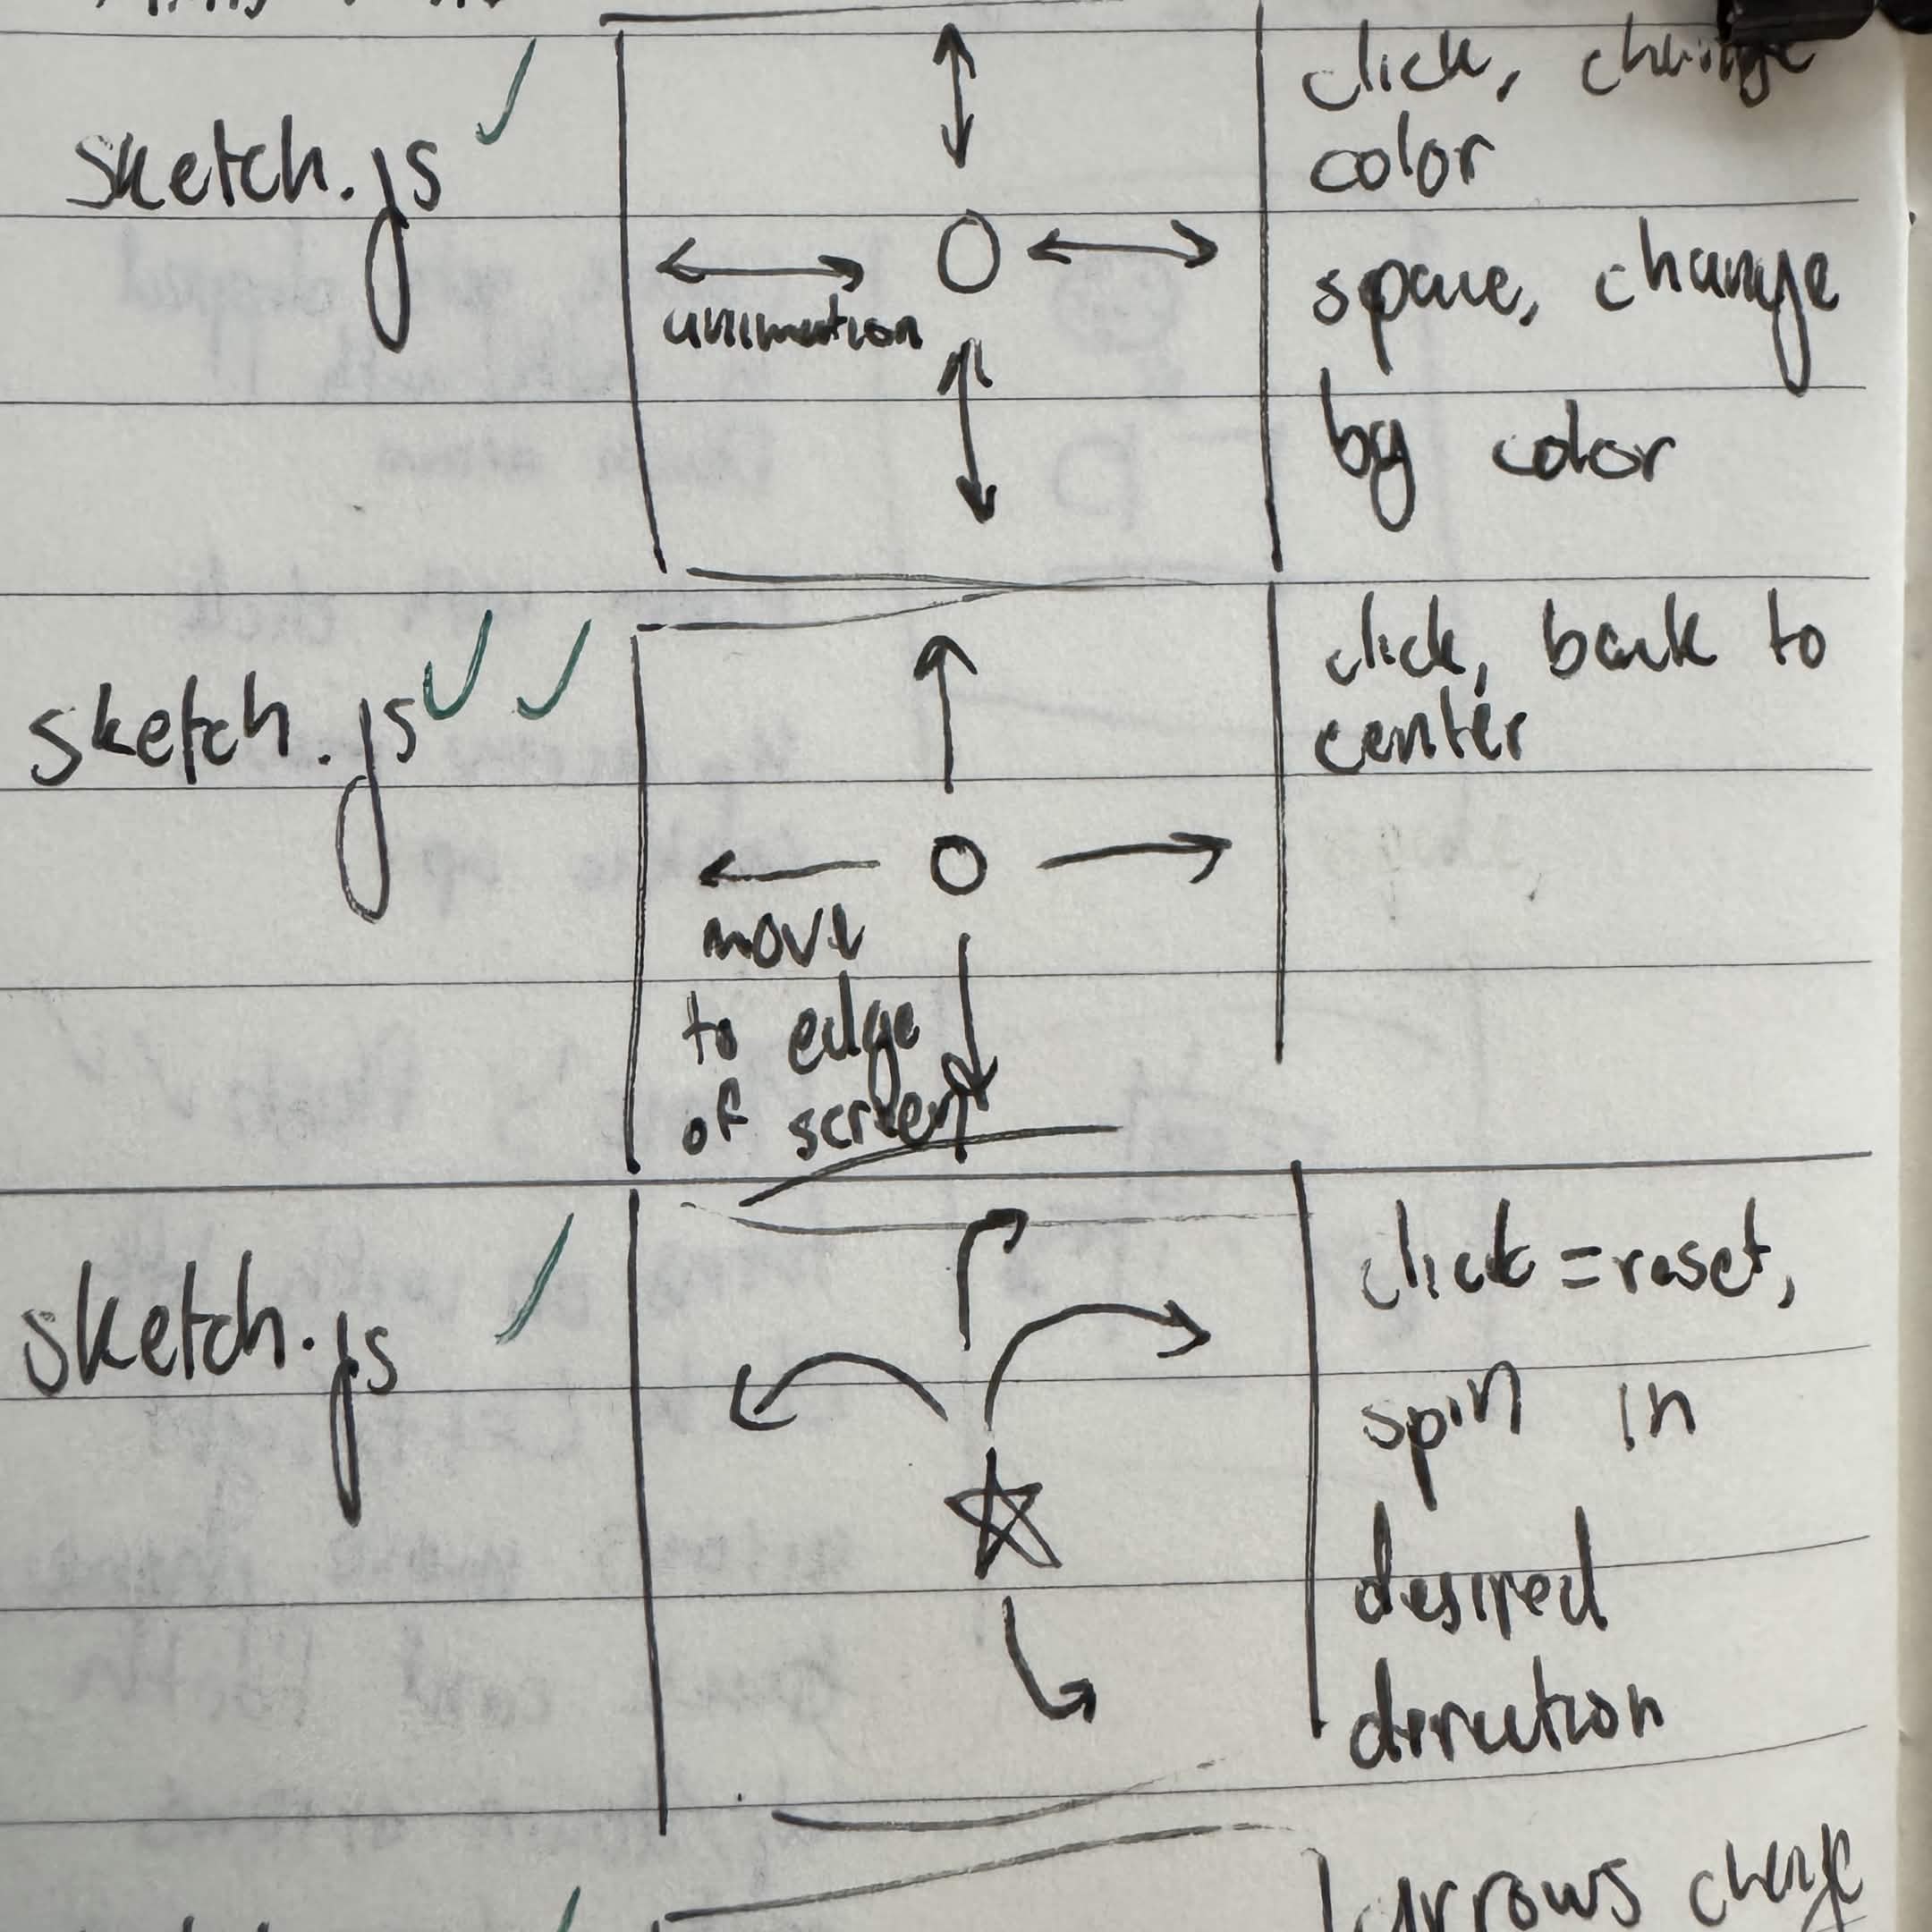
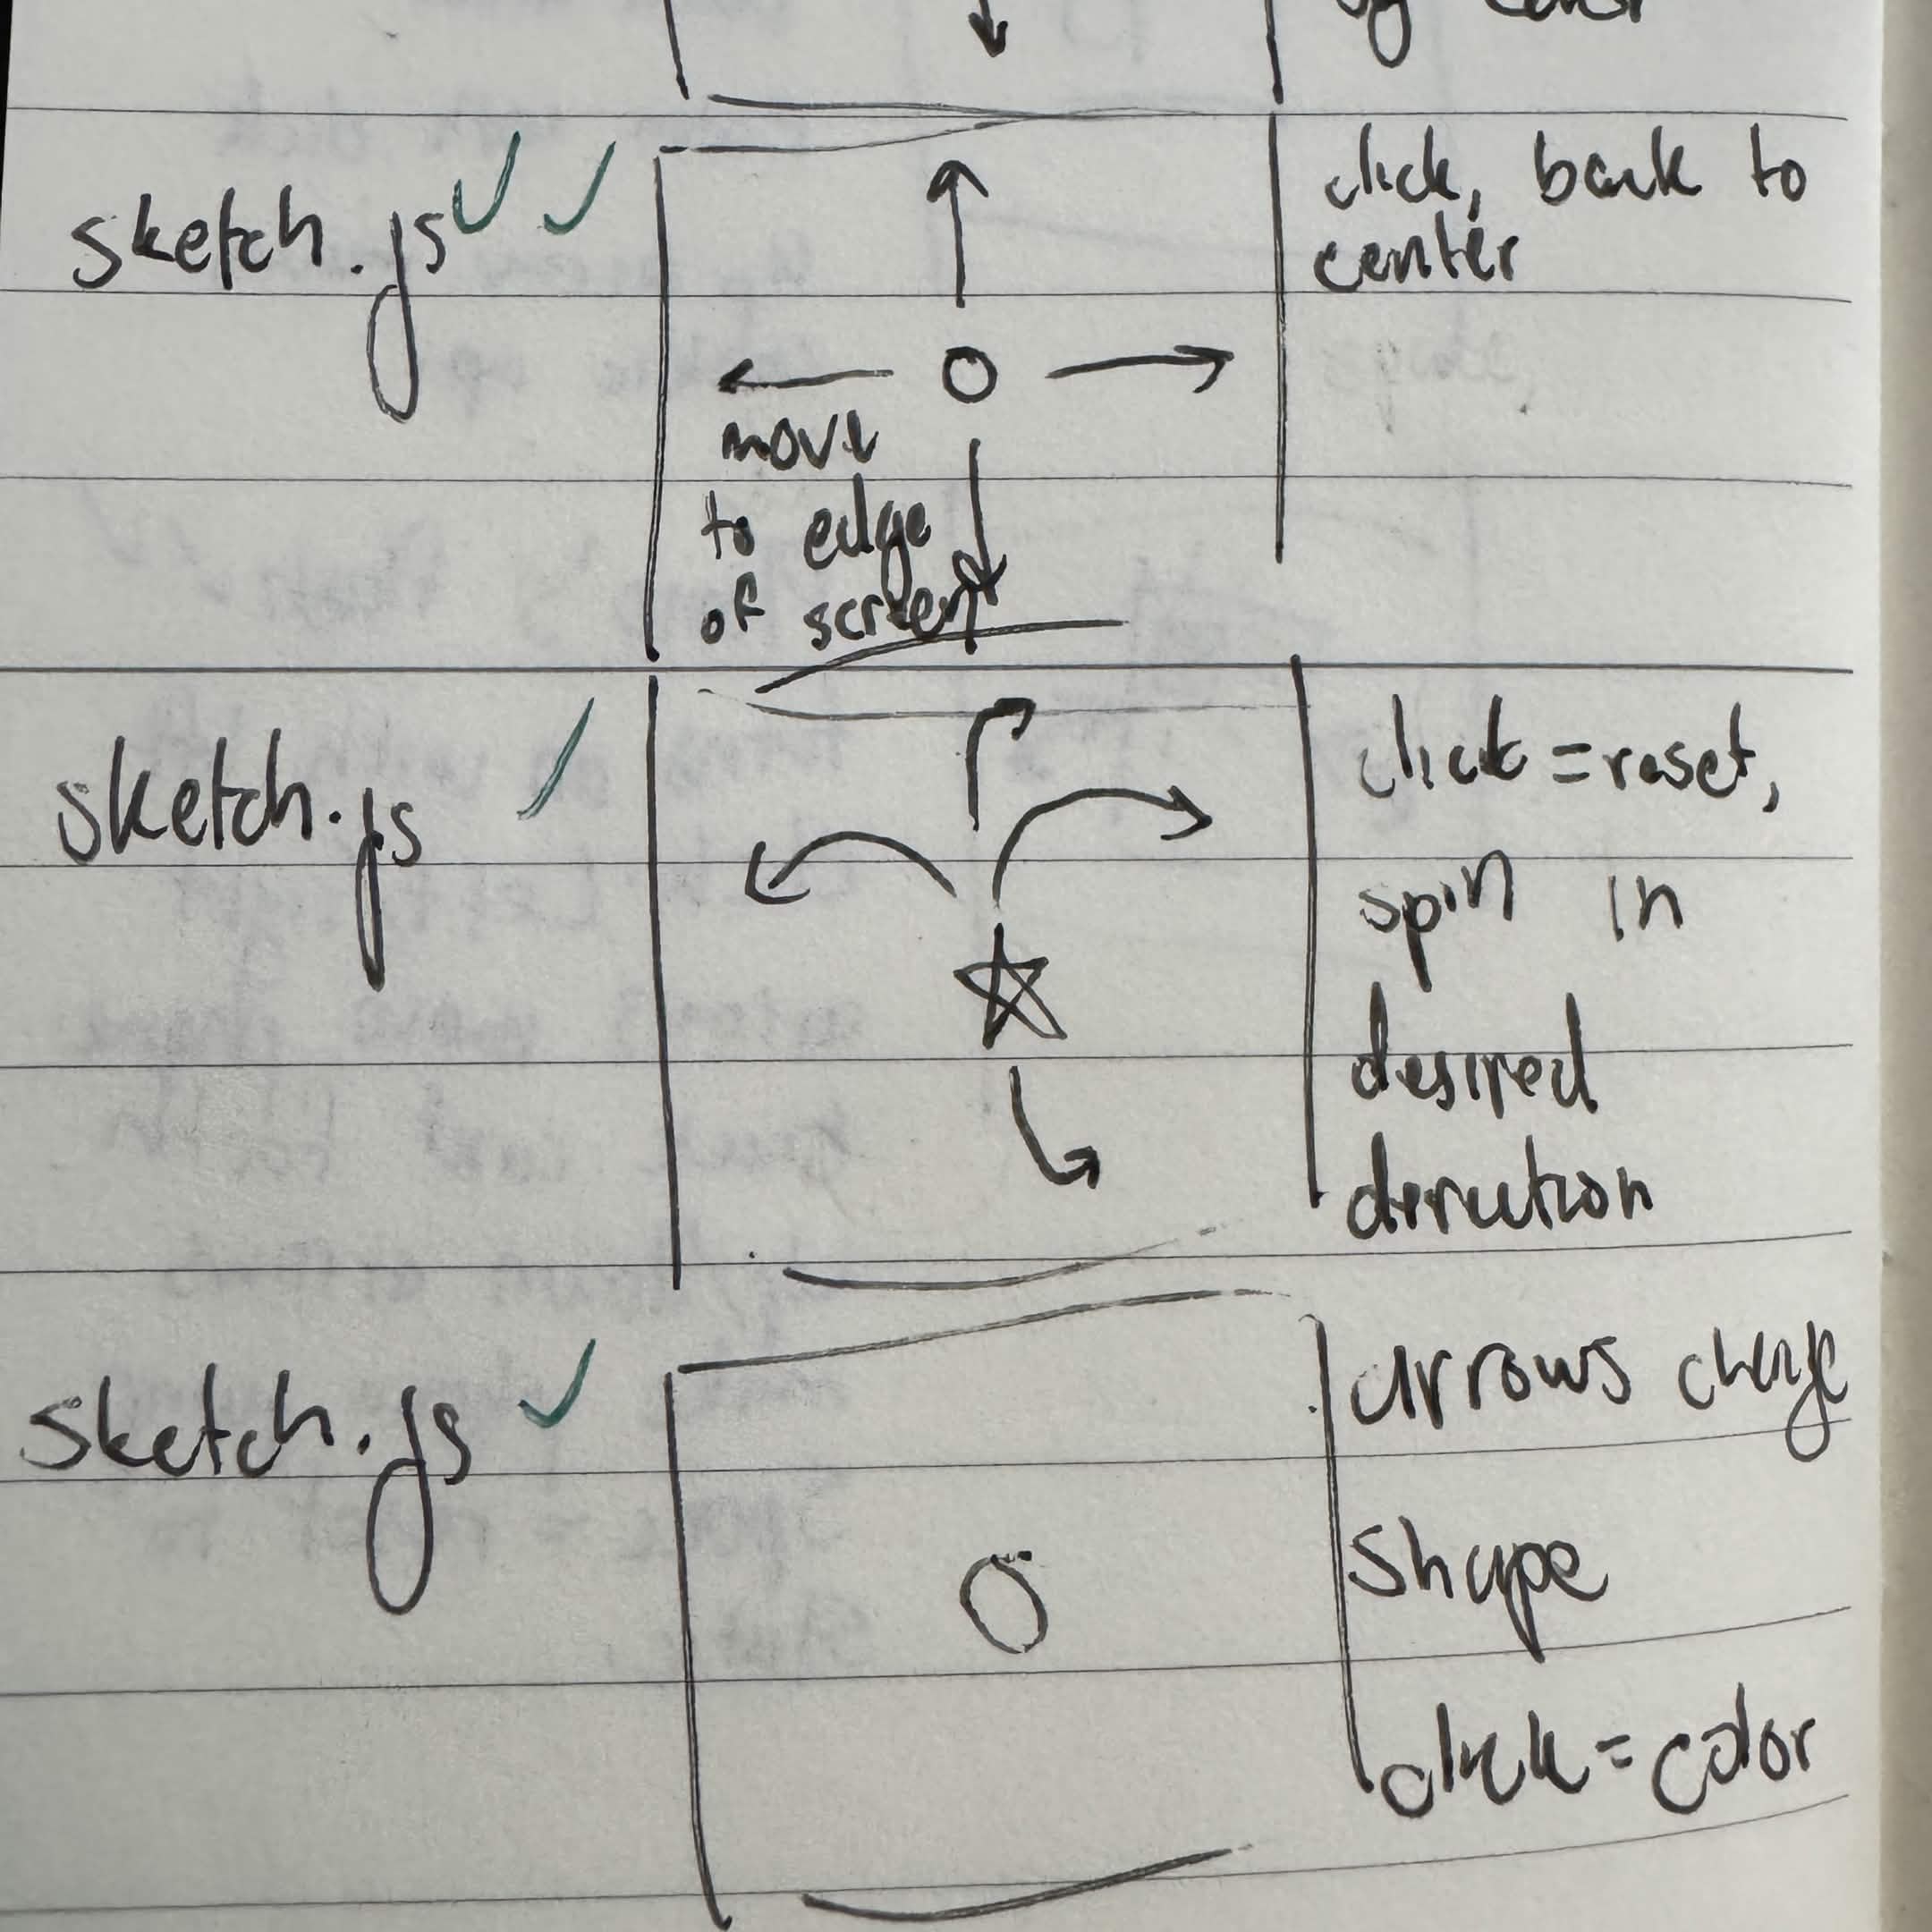
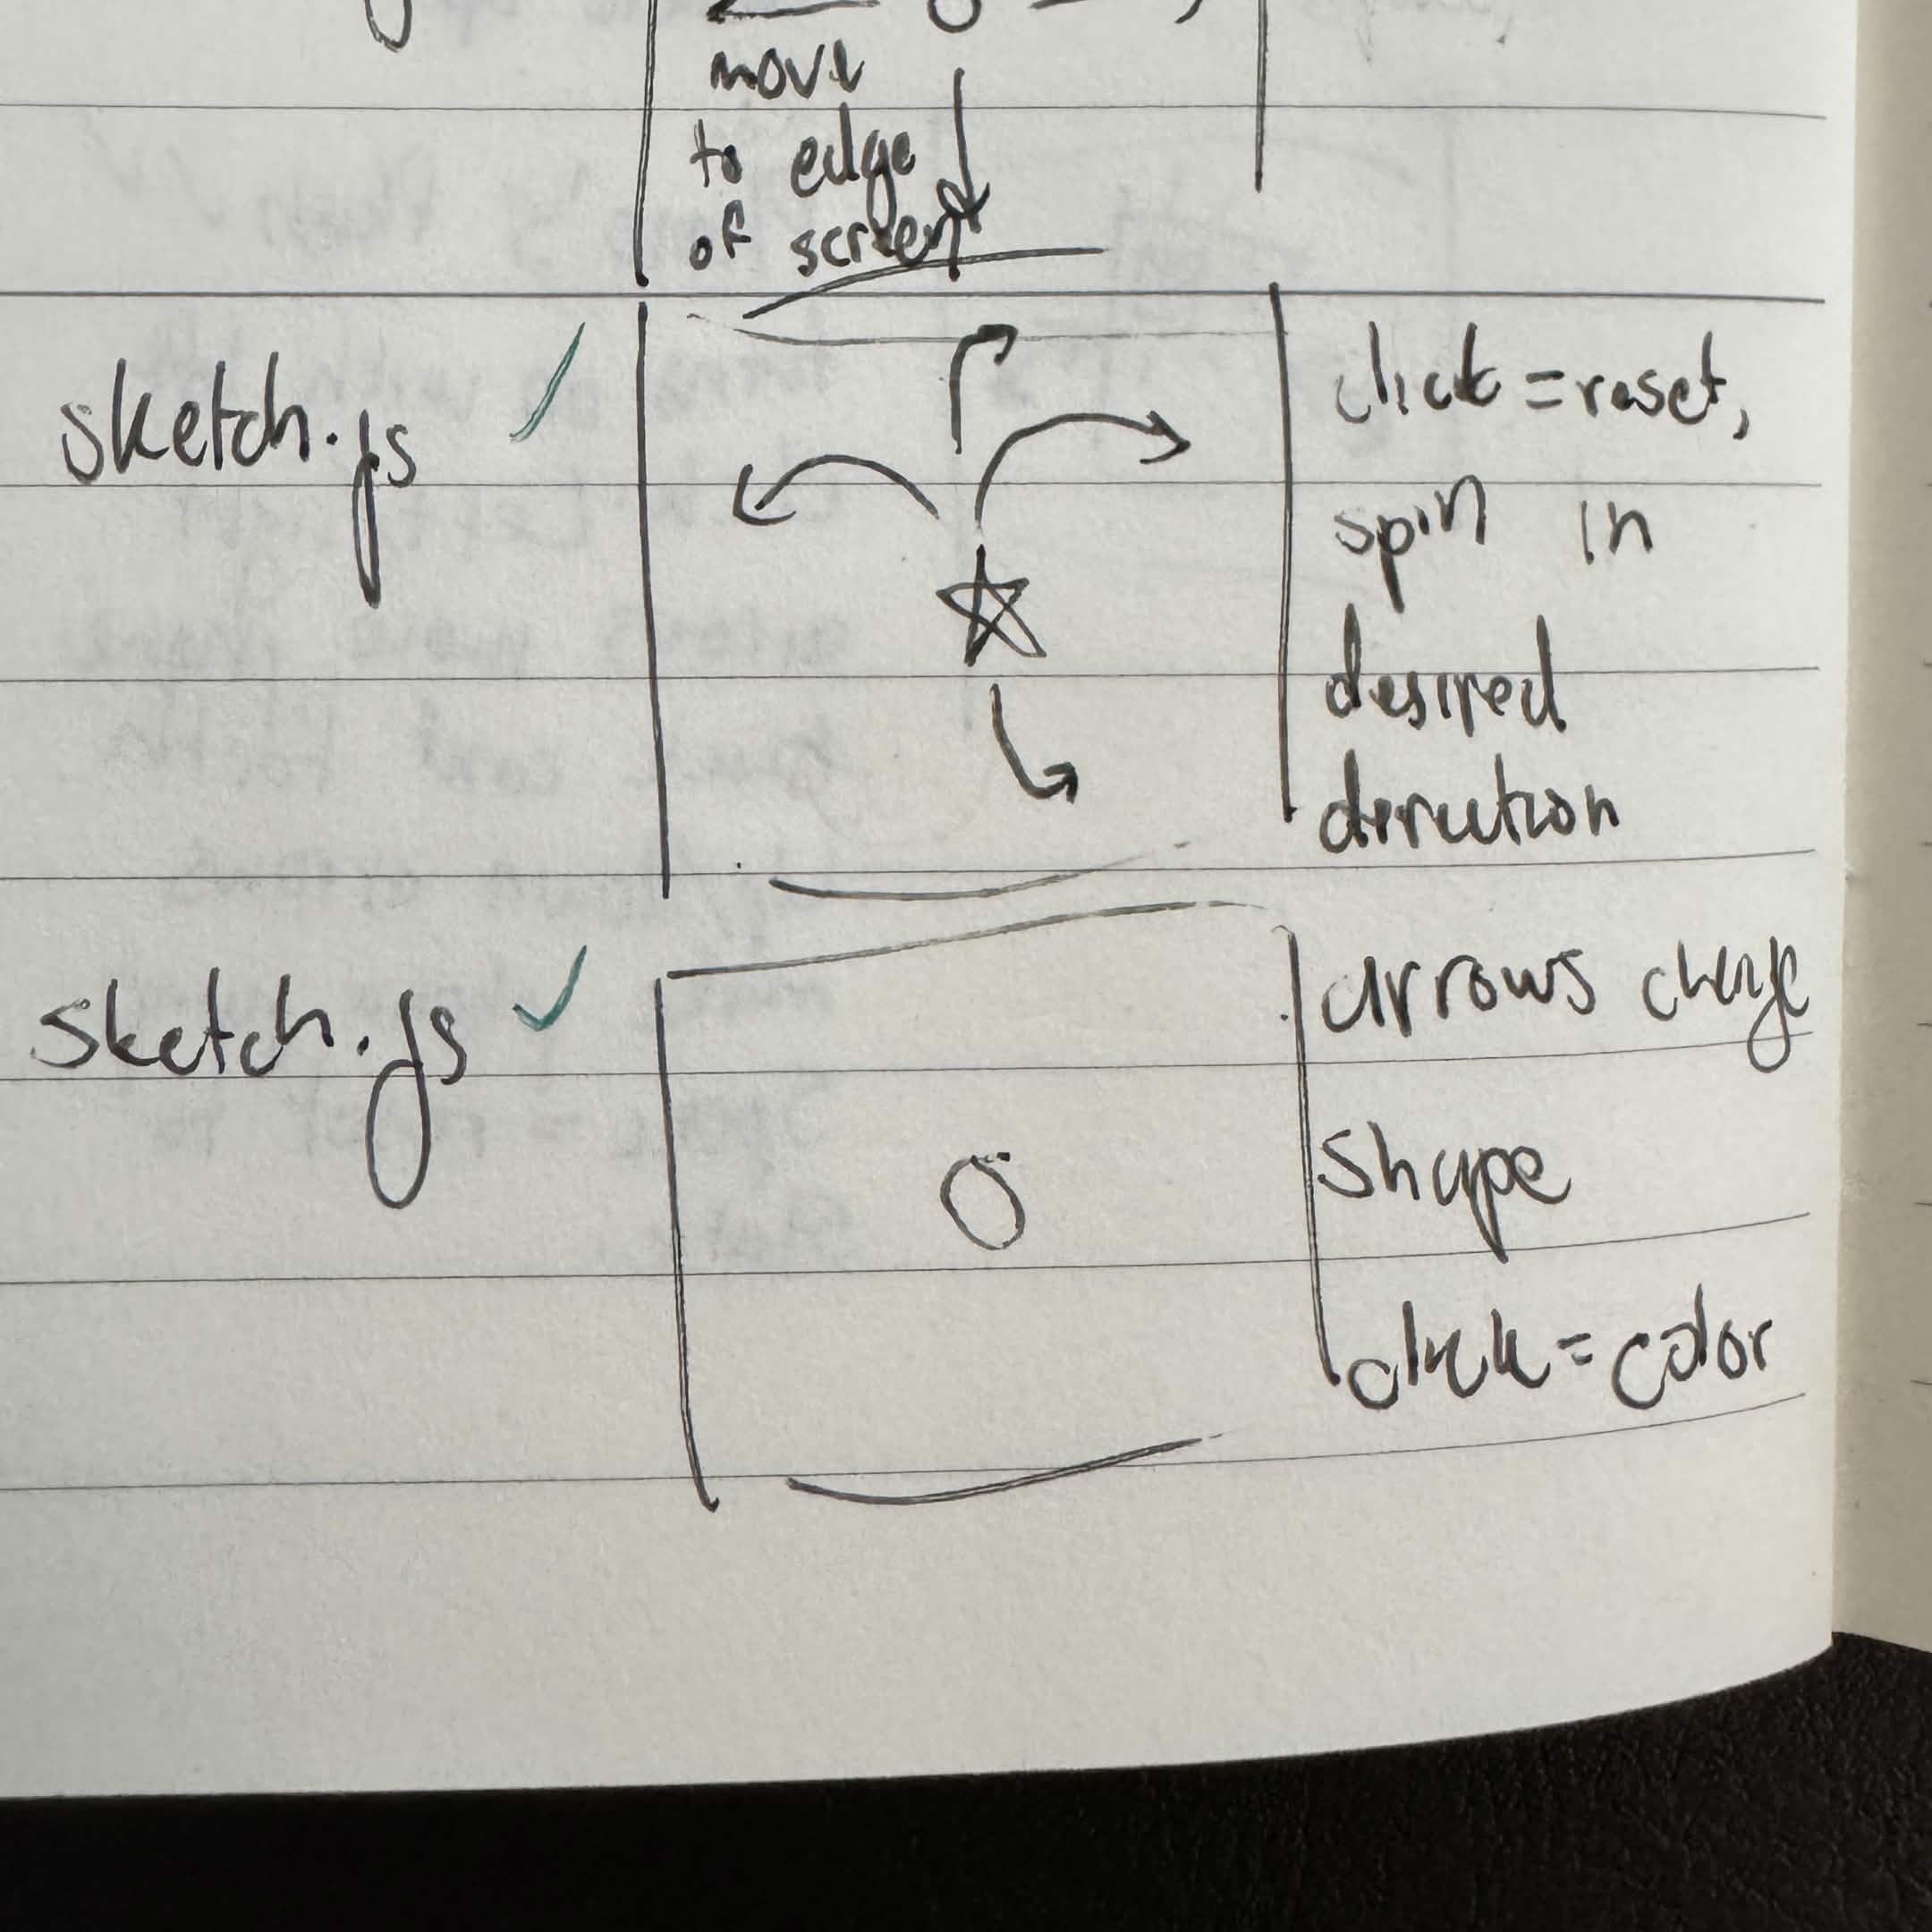
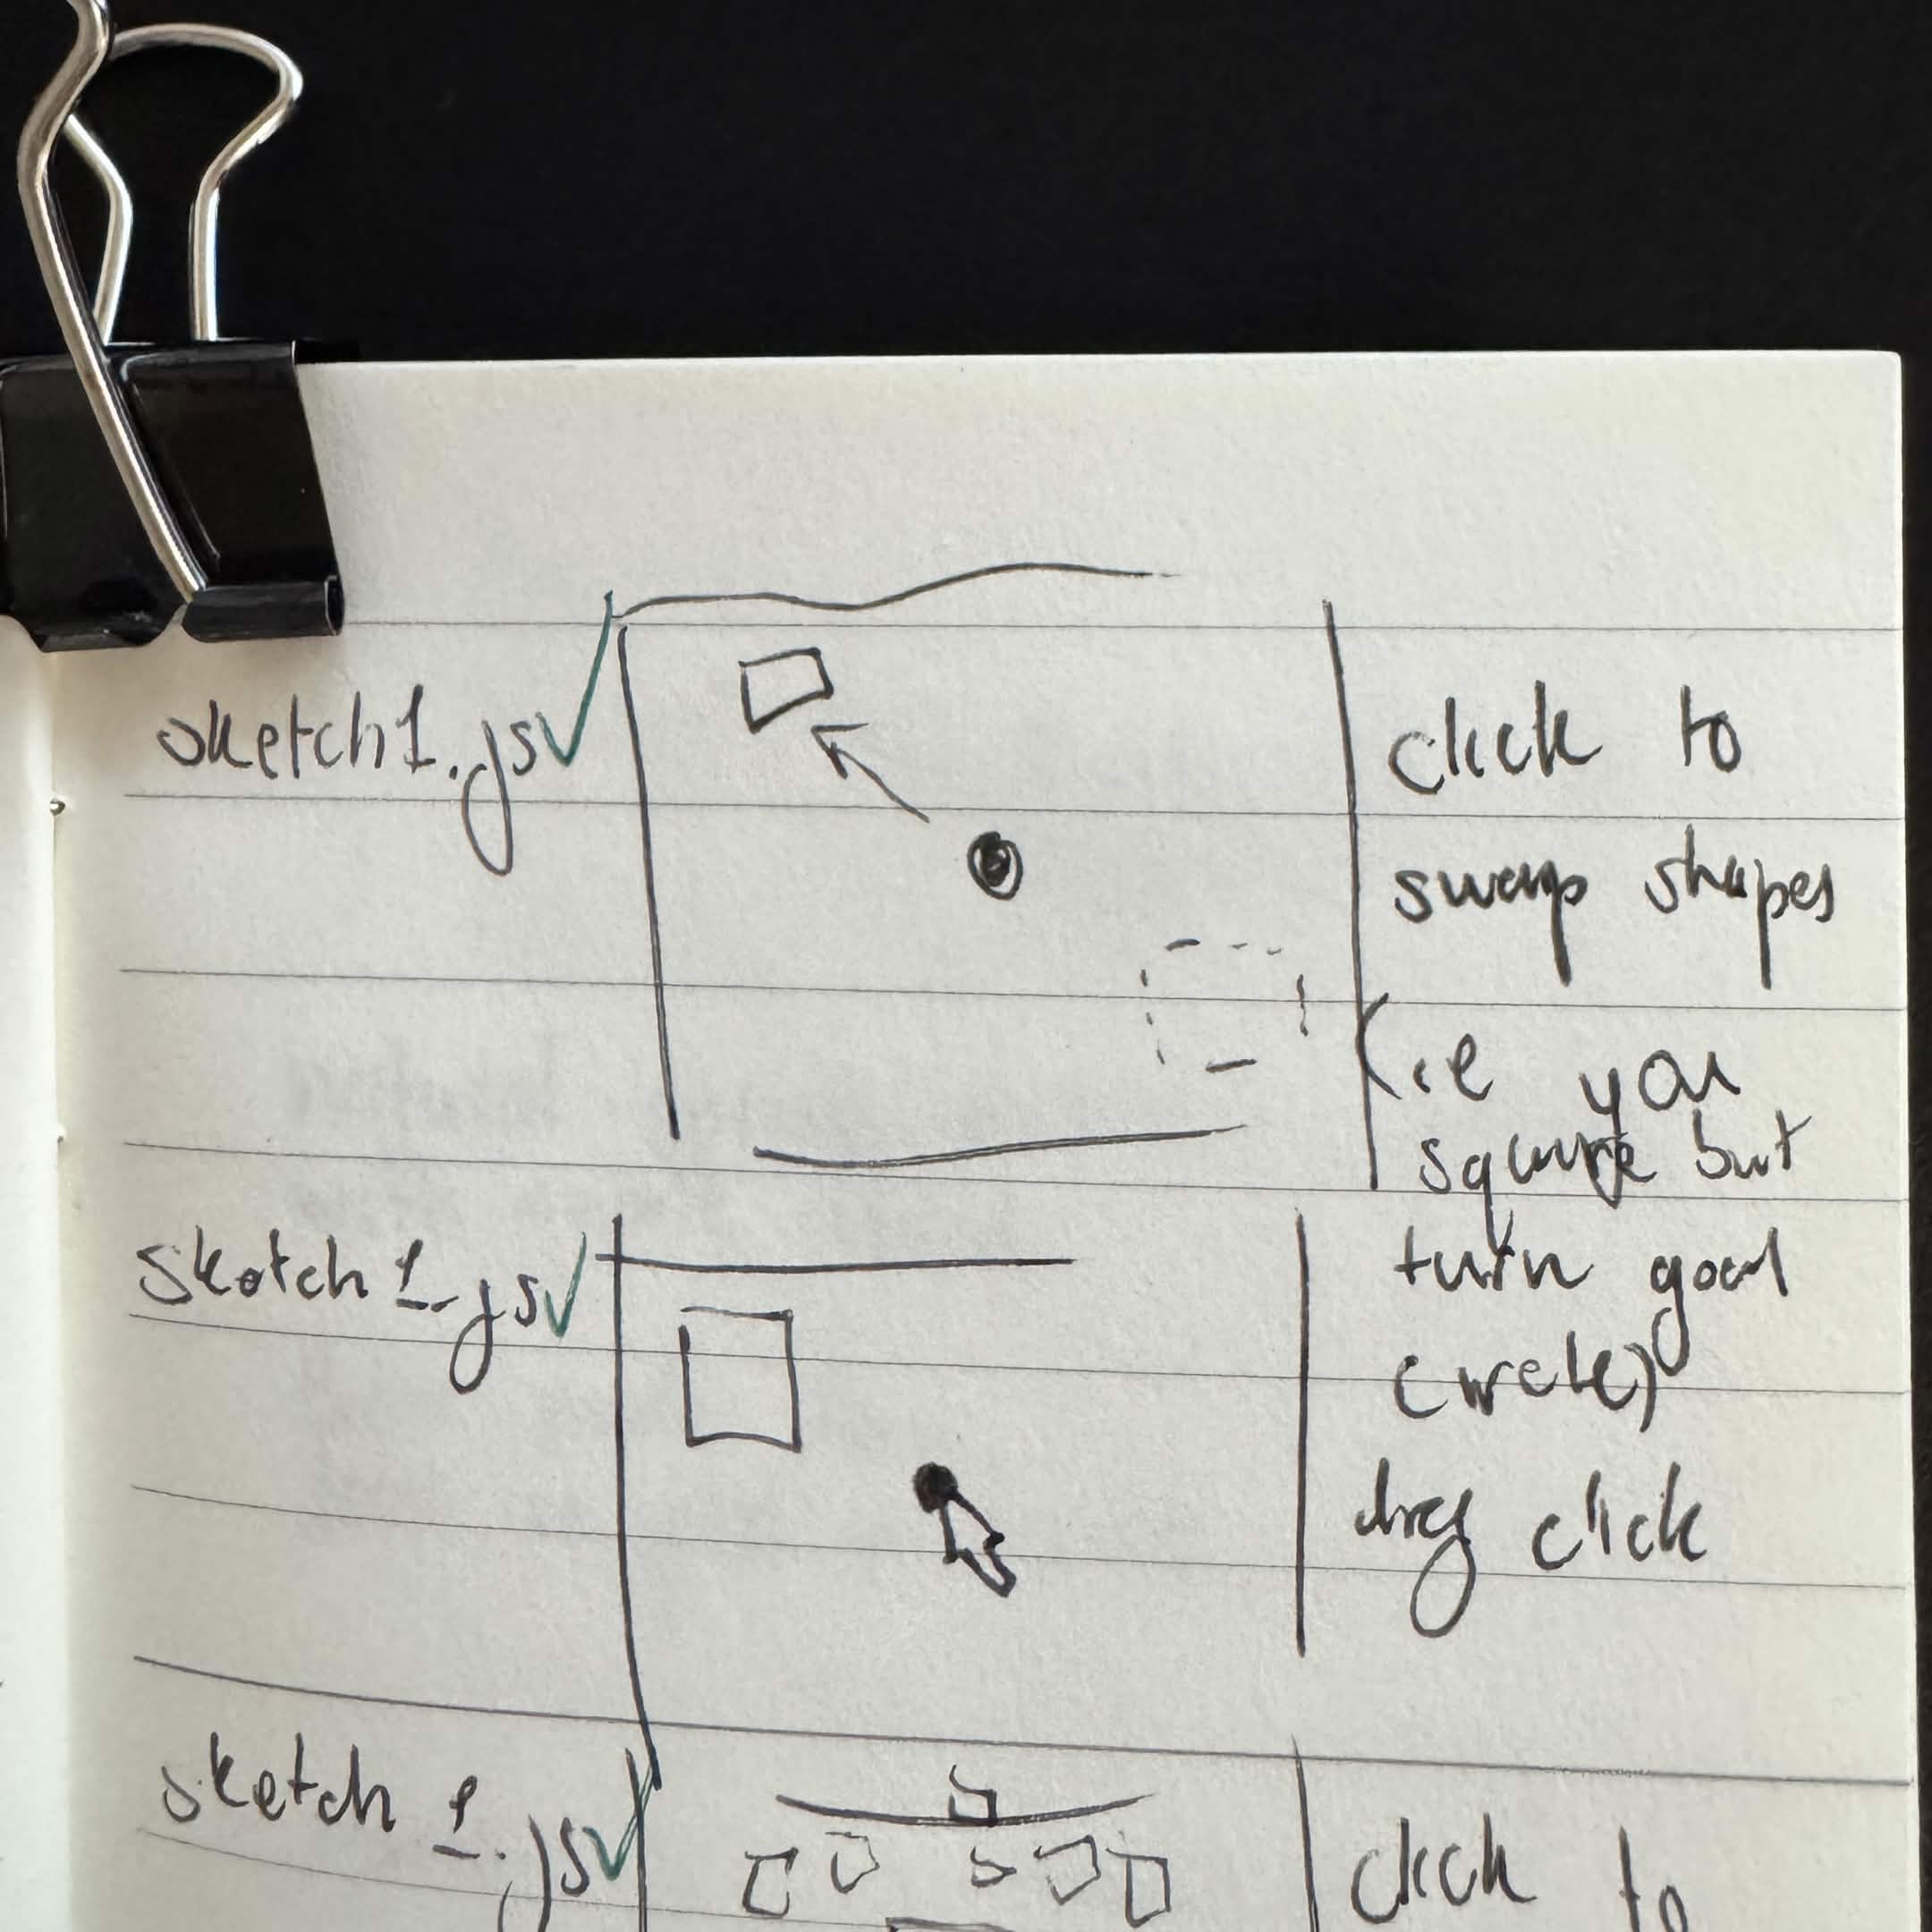
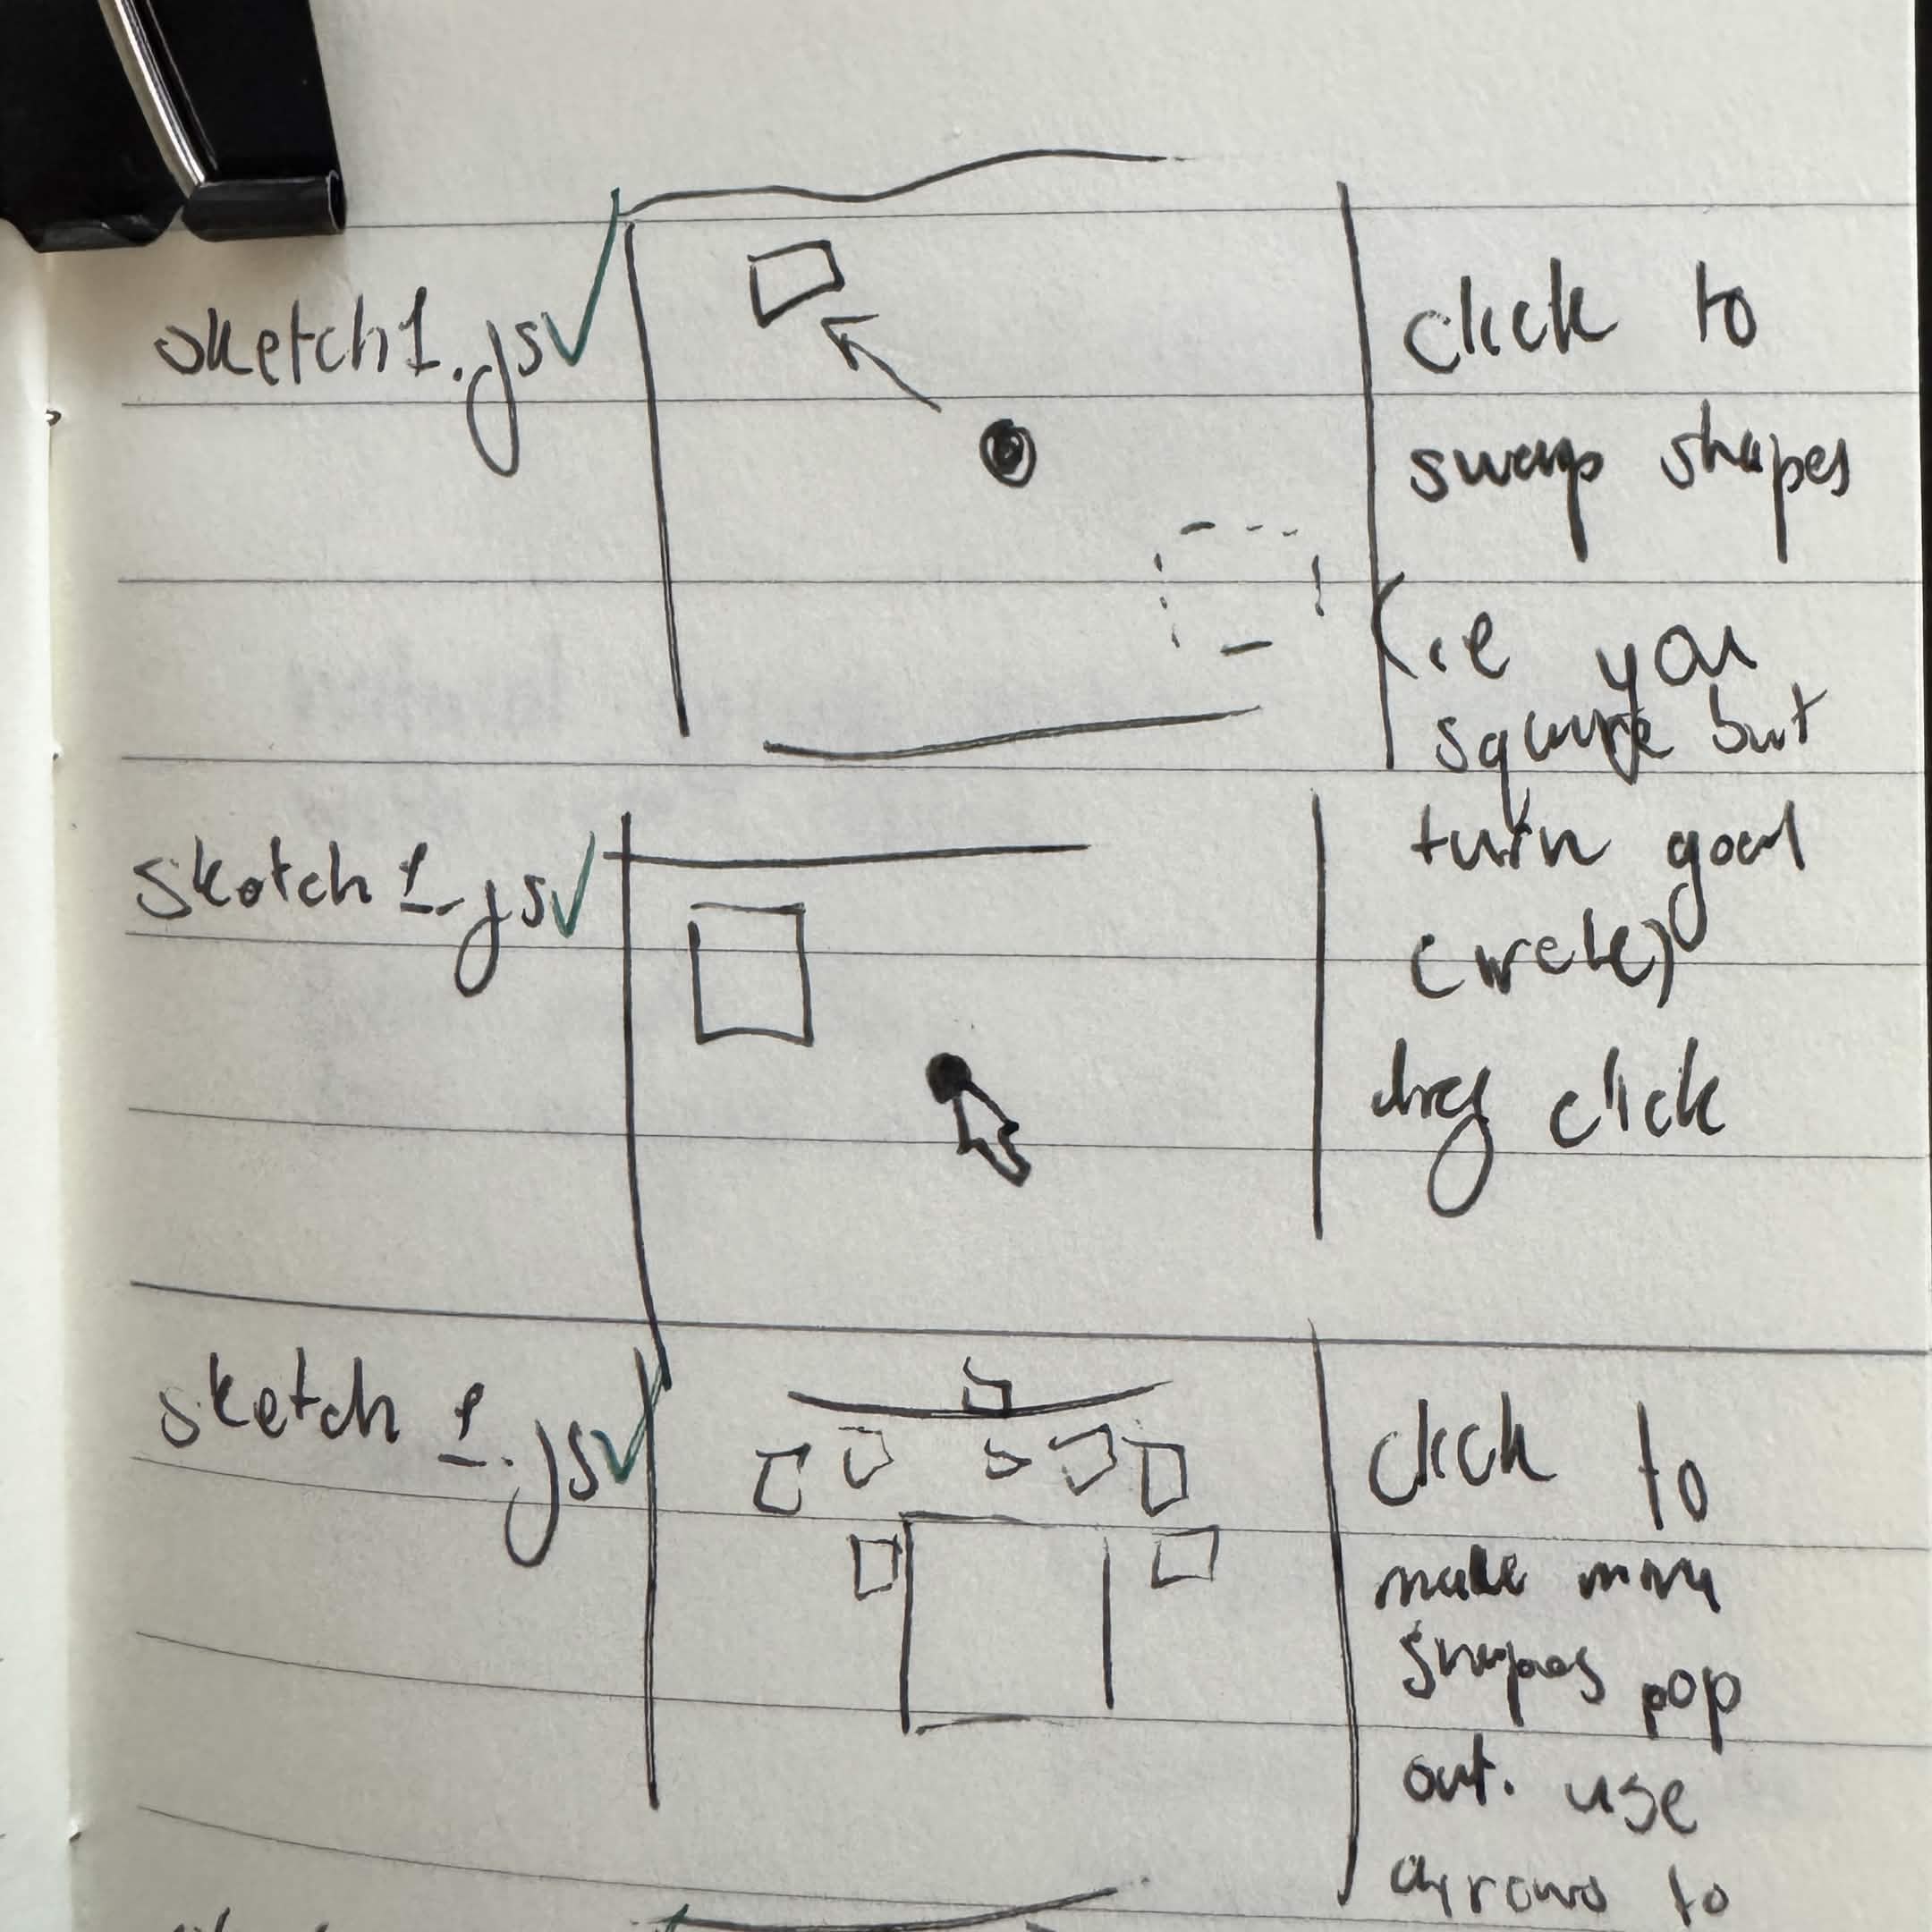
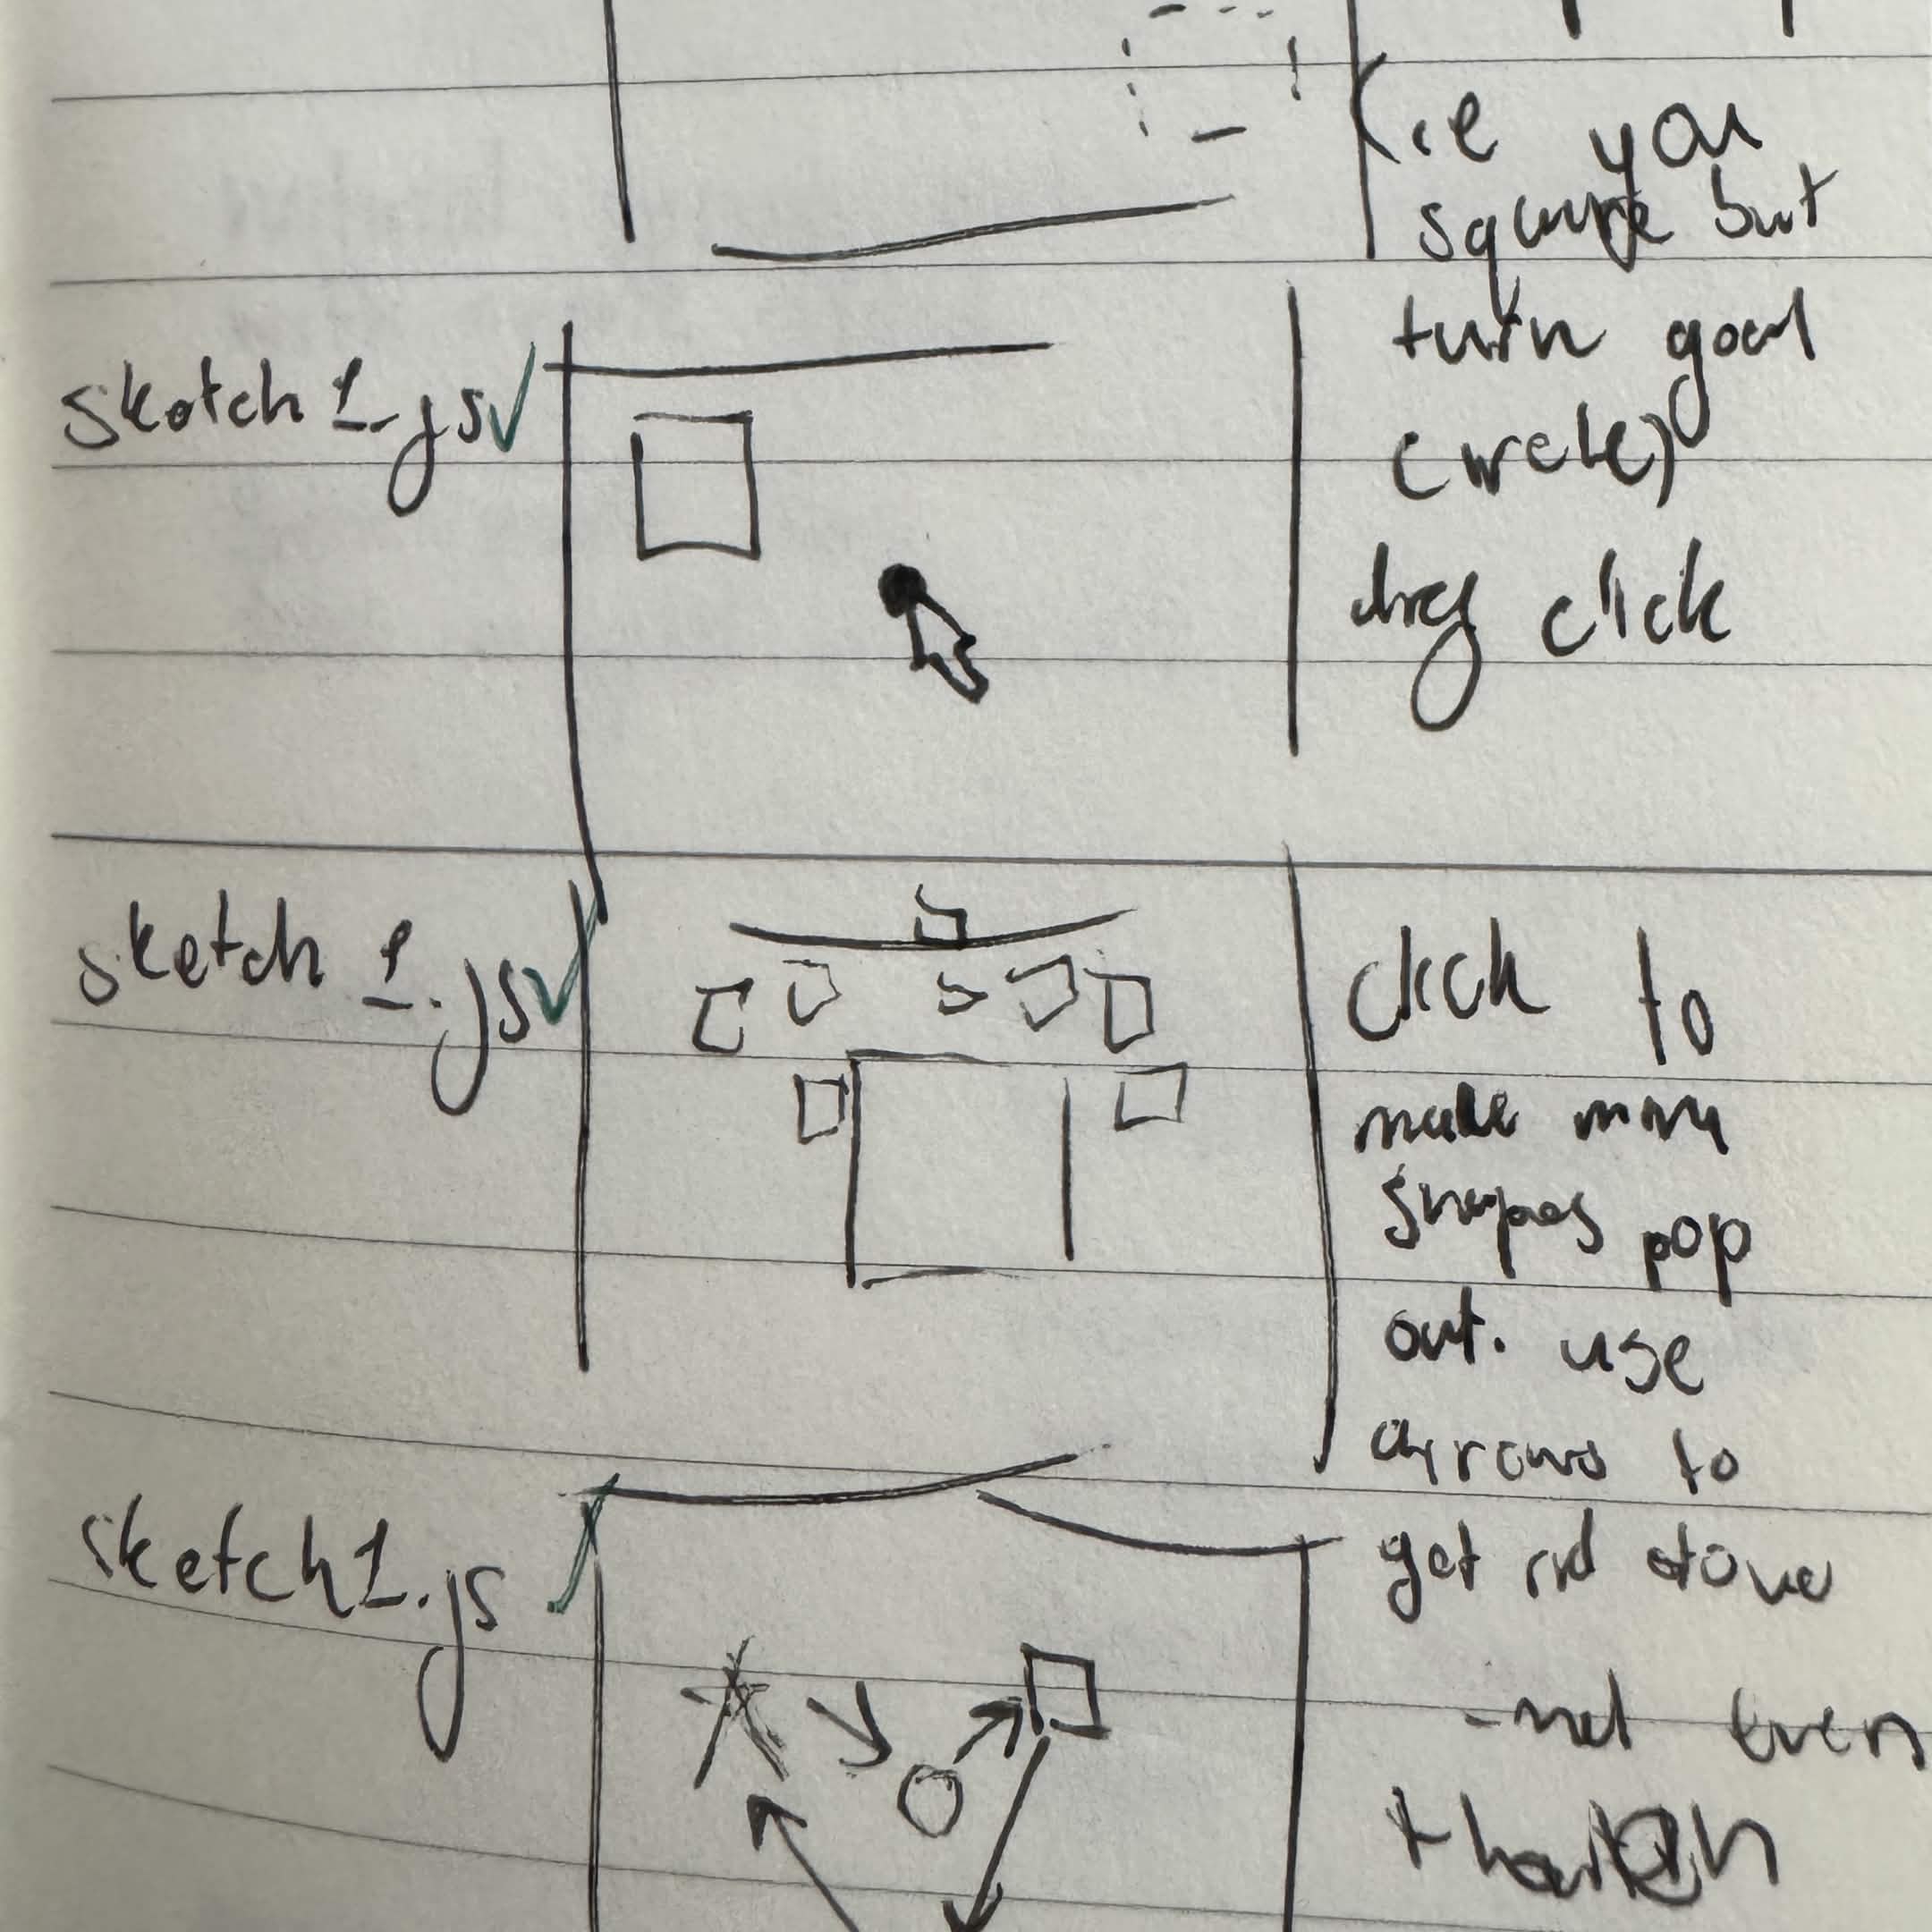
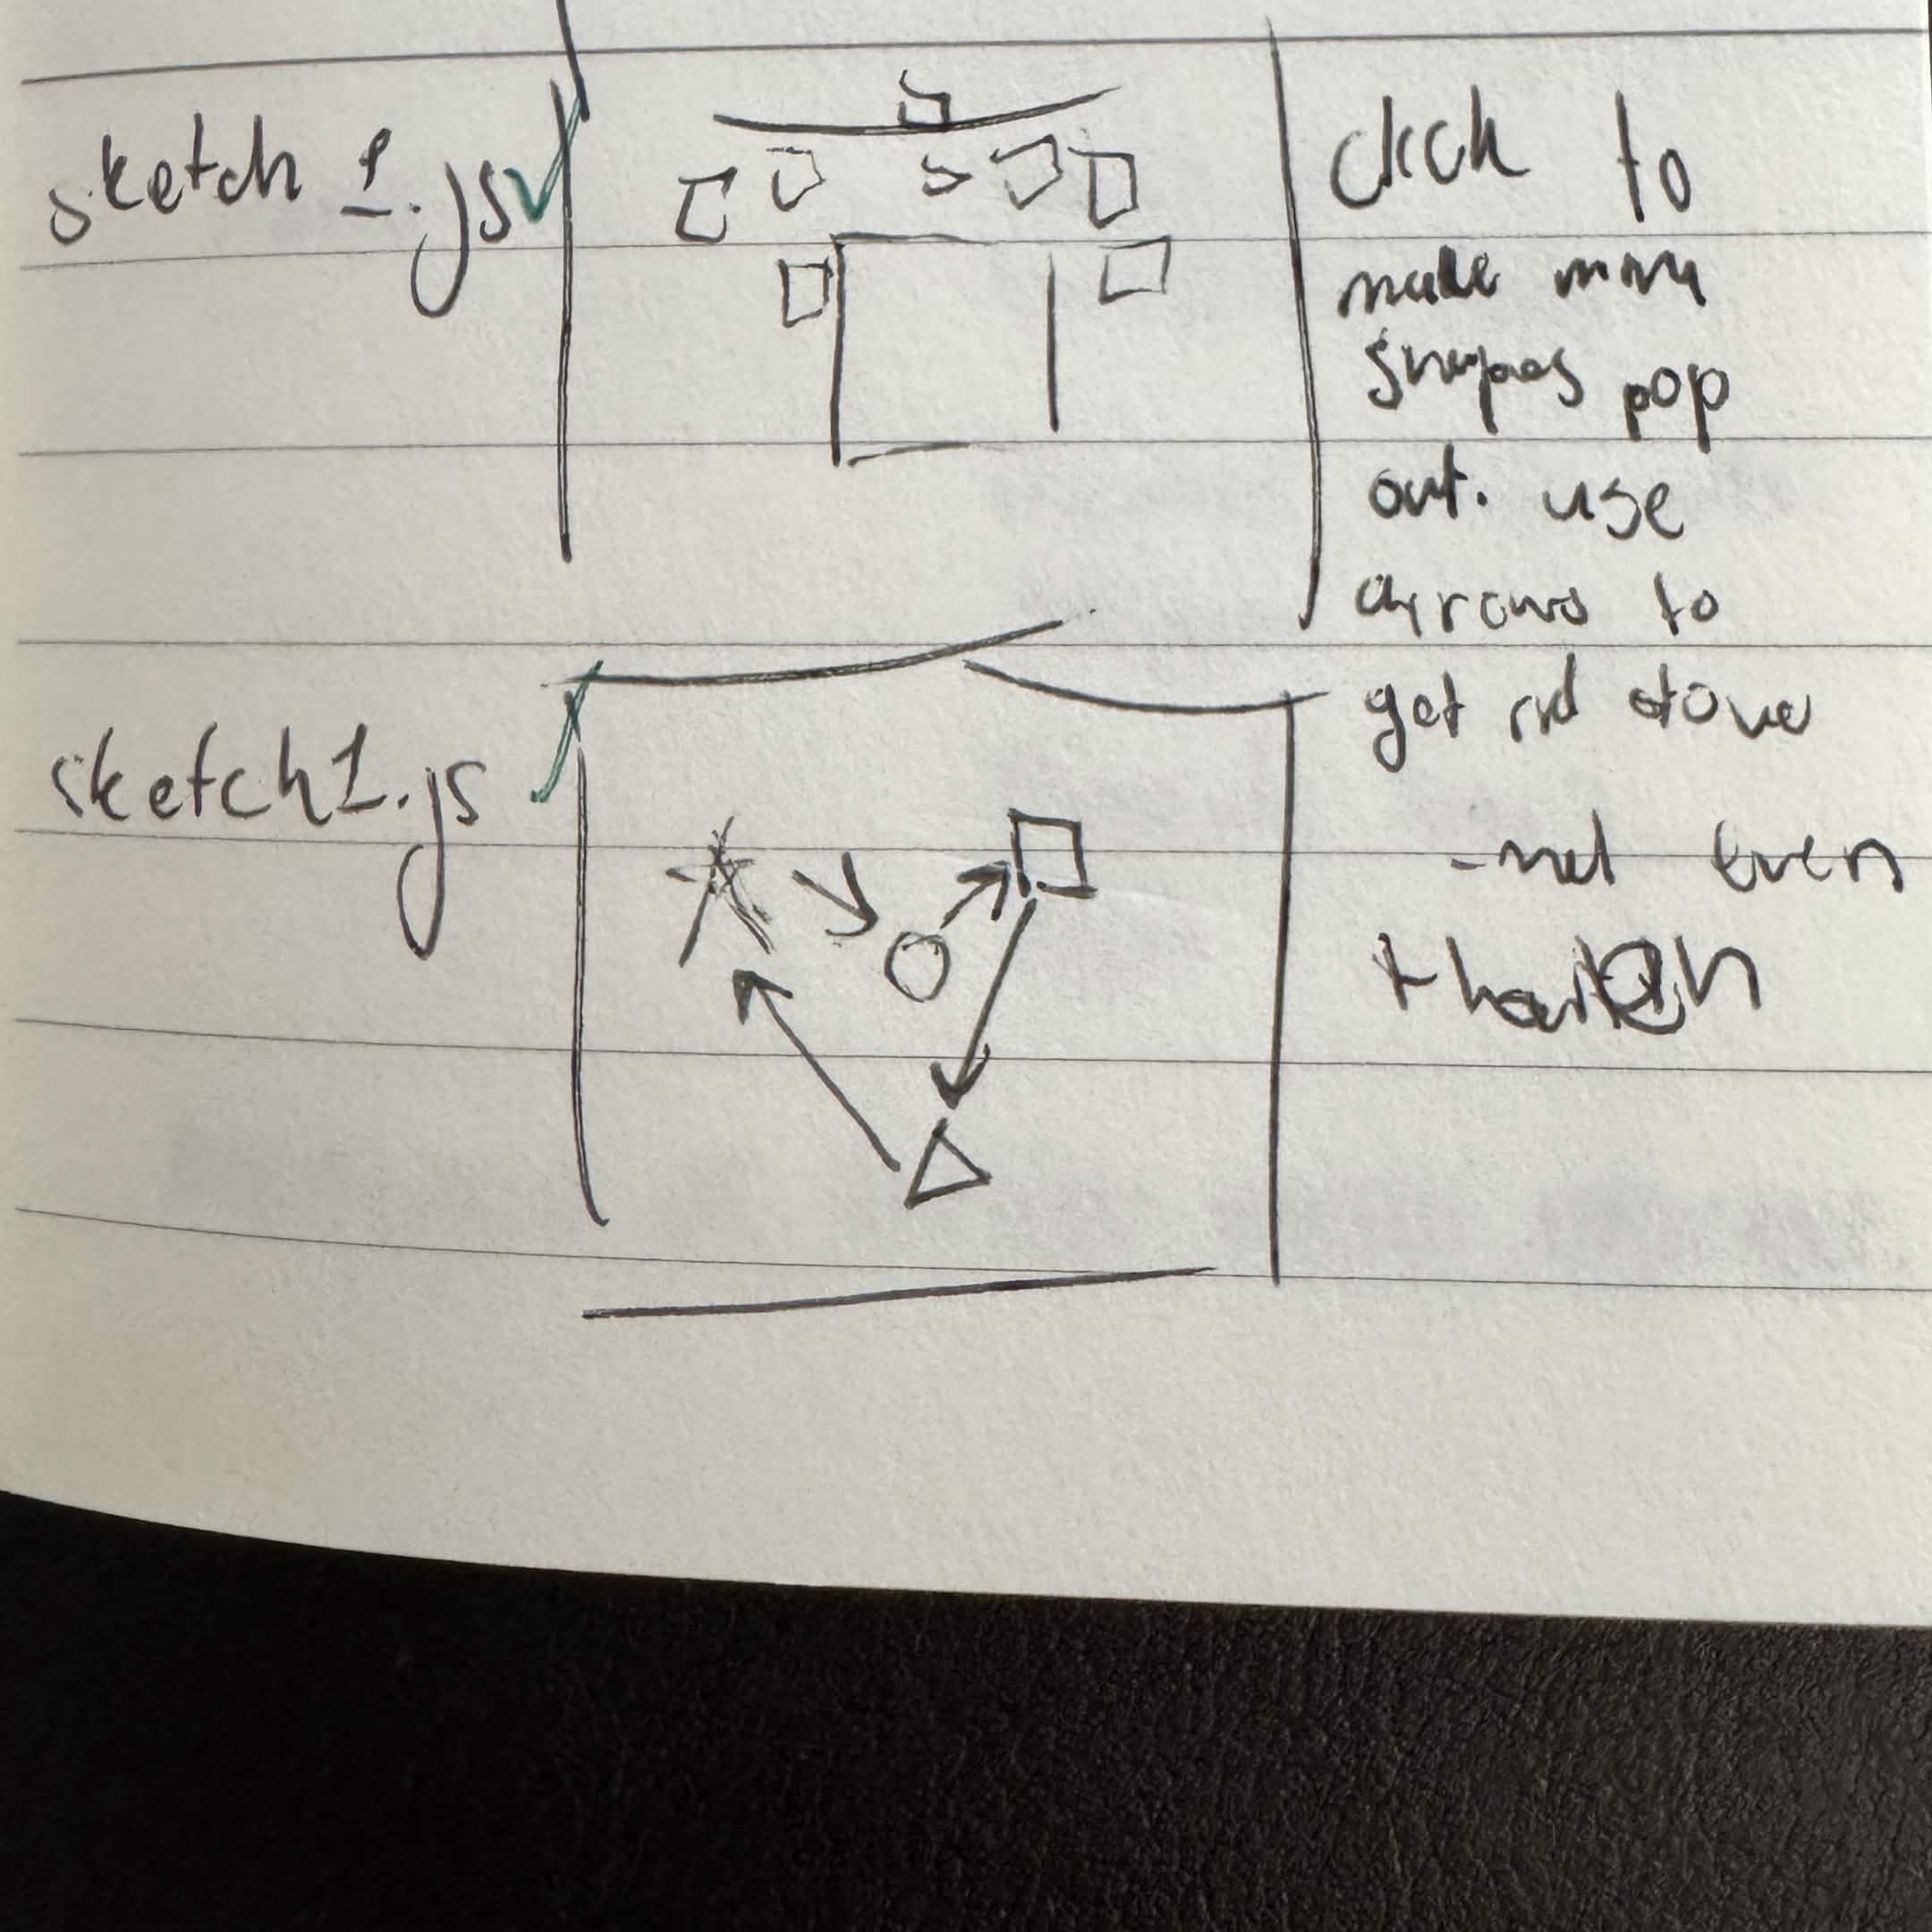
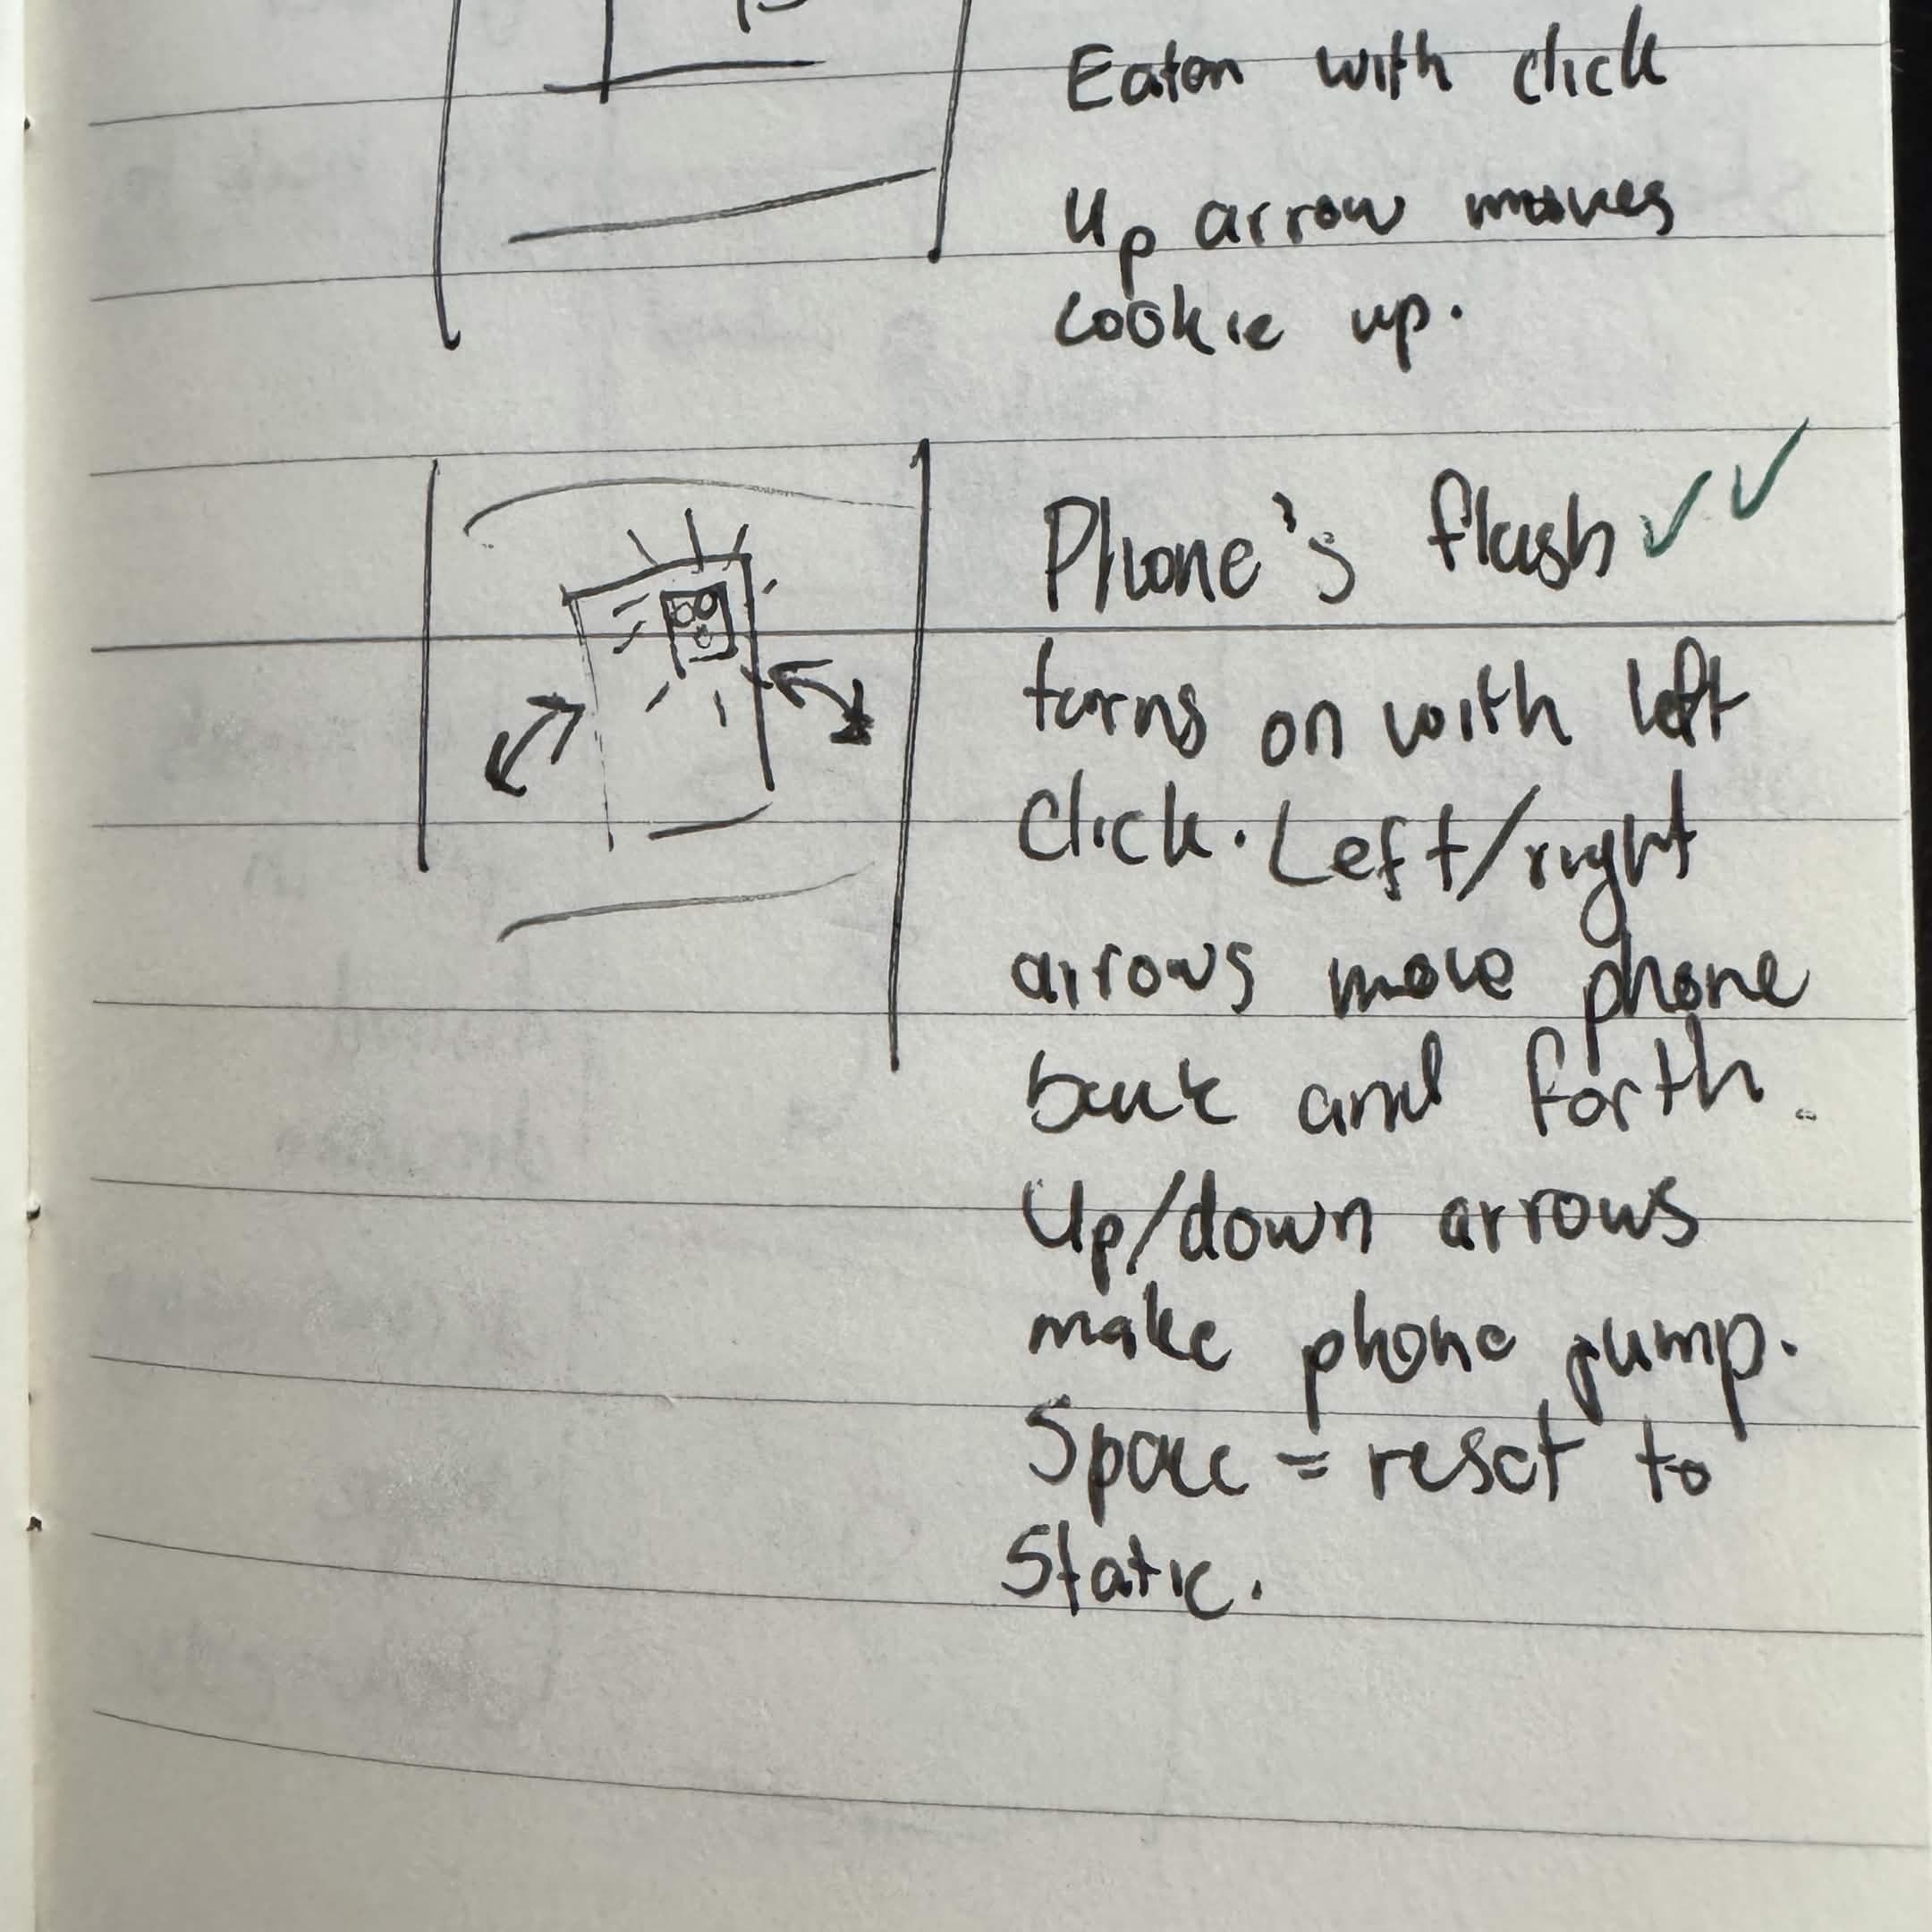
For activity 1, I mainly followed Module 3 Tutorial 1. Each GIF has a hyperlink to the appropriate website in the description. Click on it to experiment yourself!
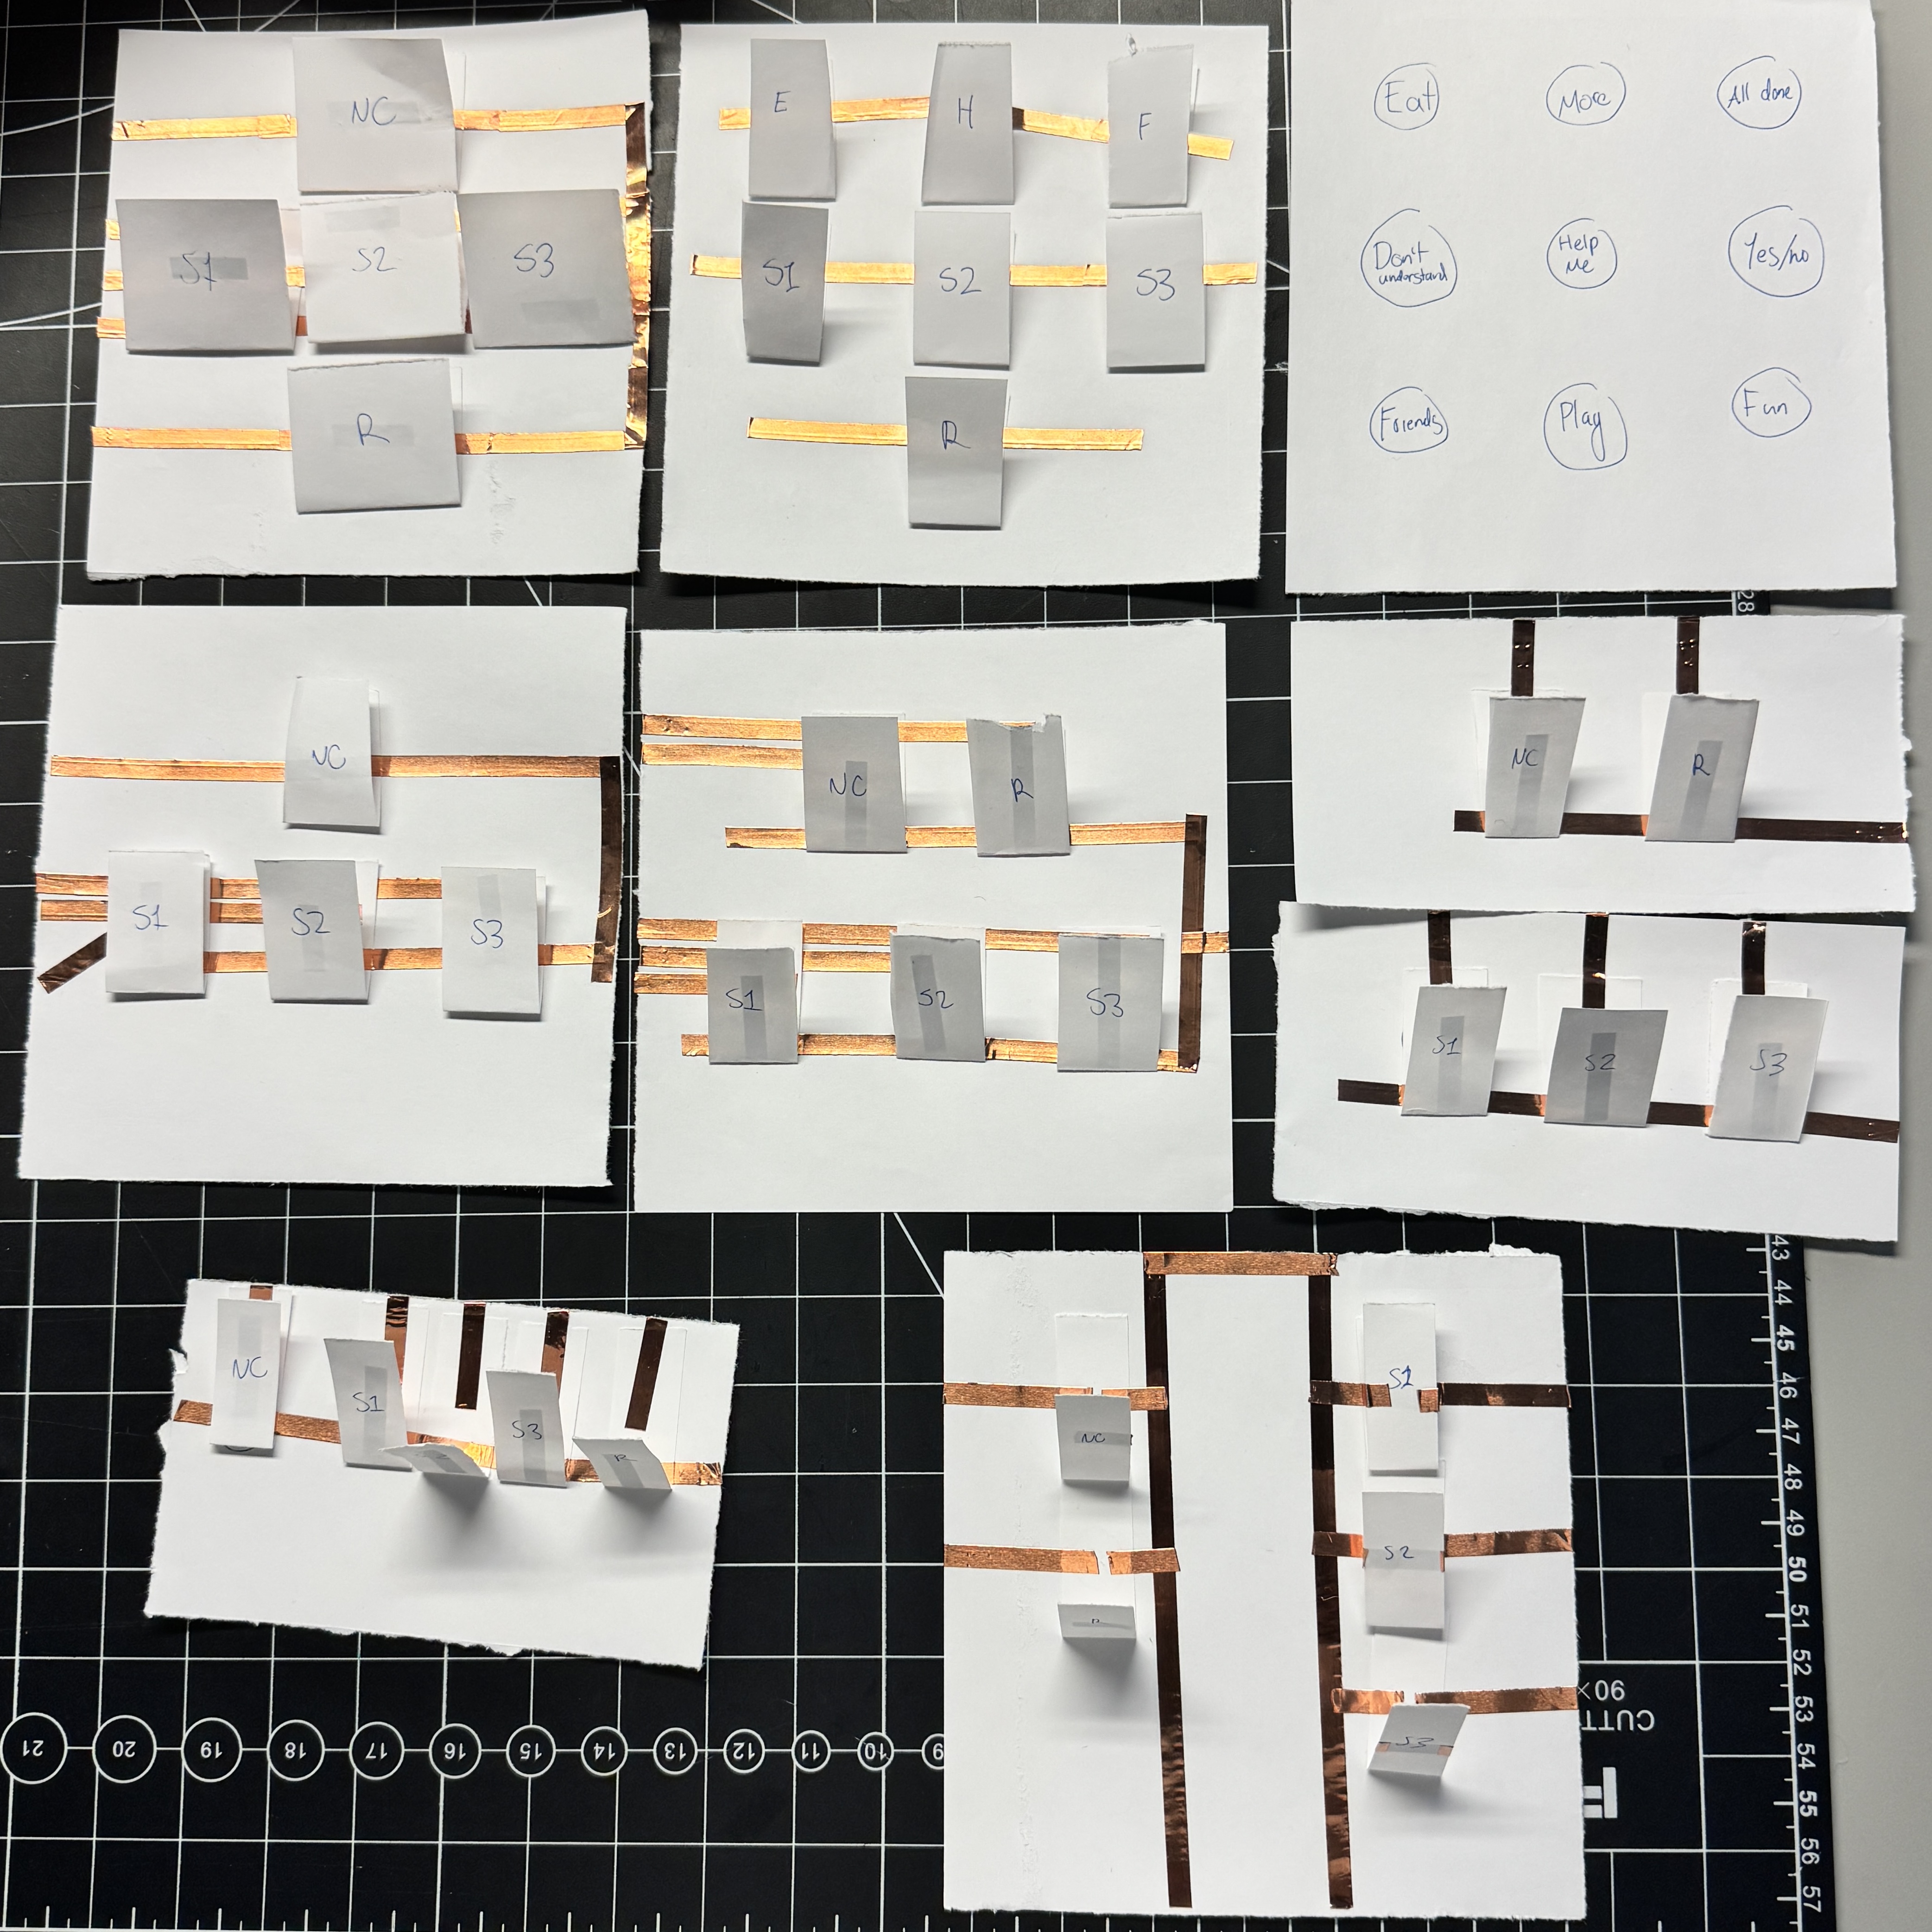
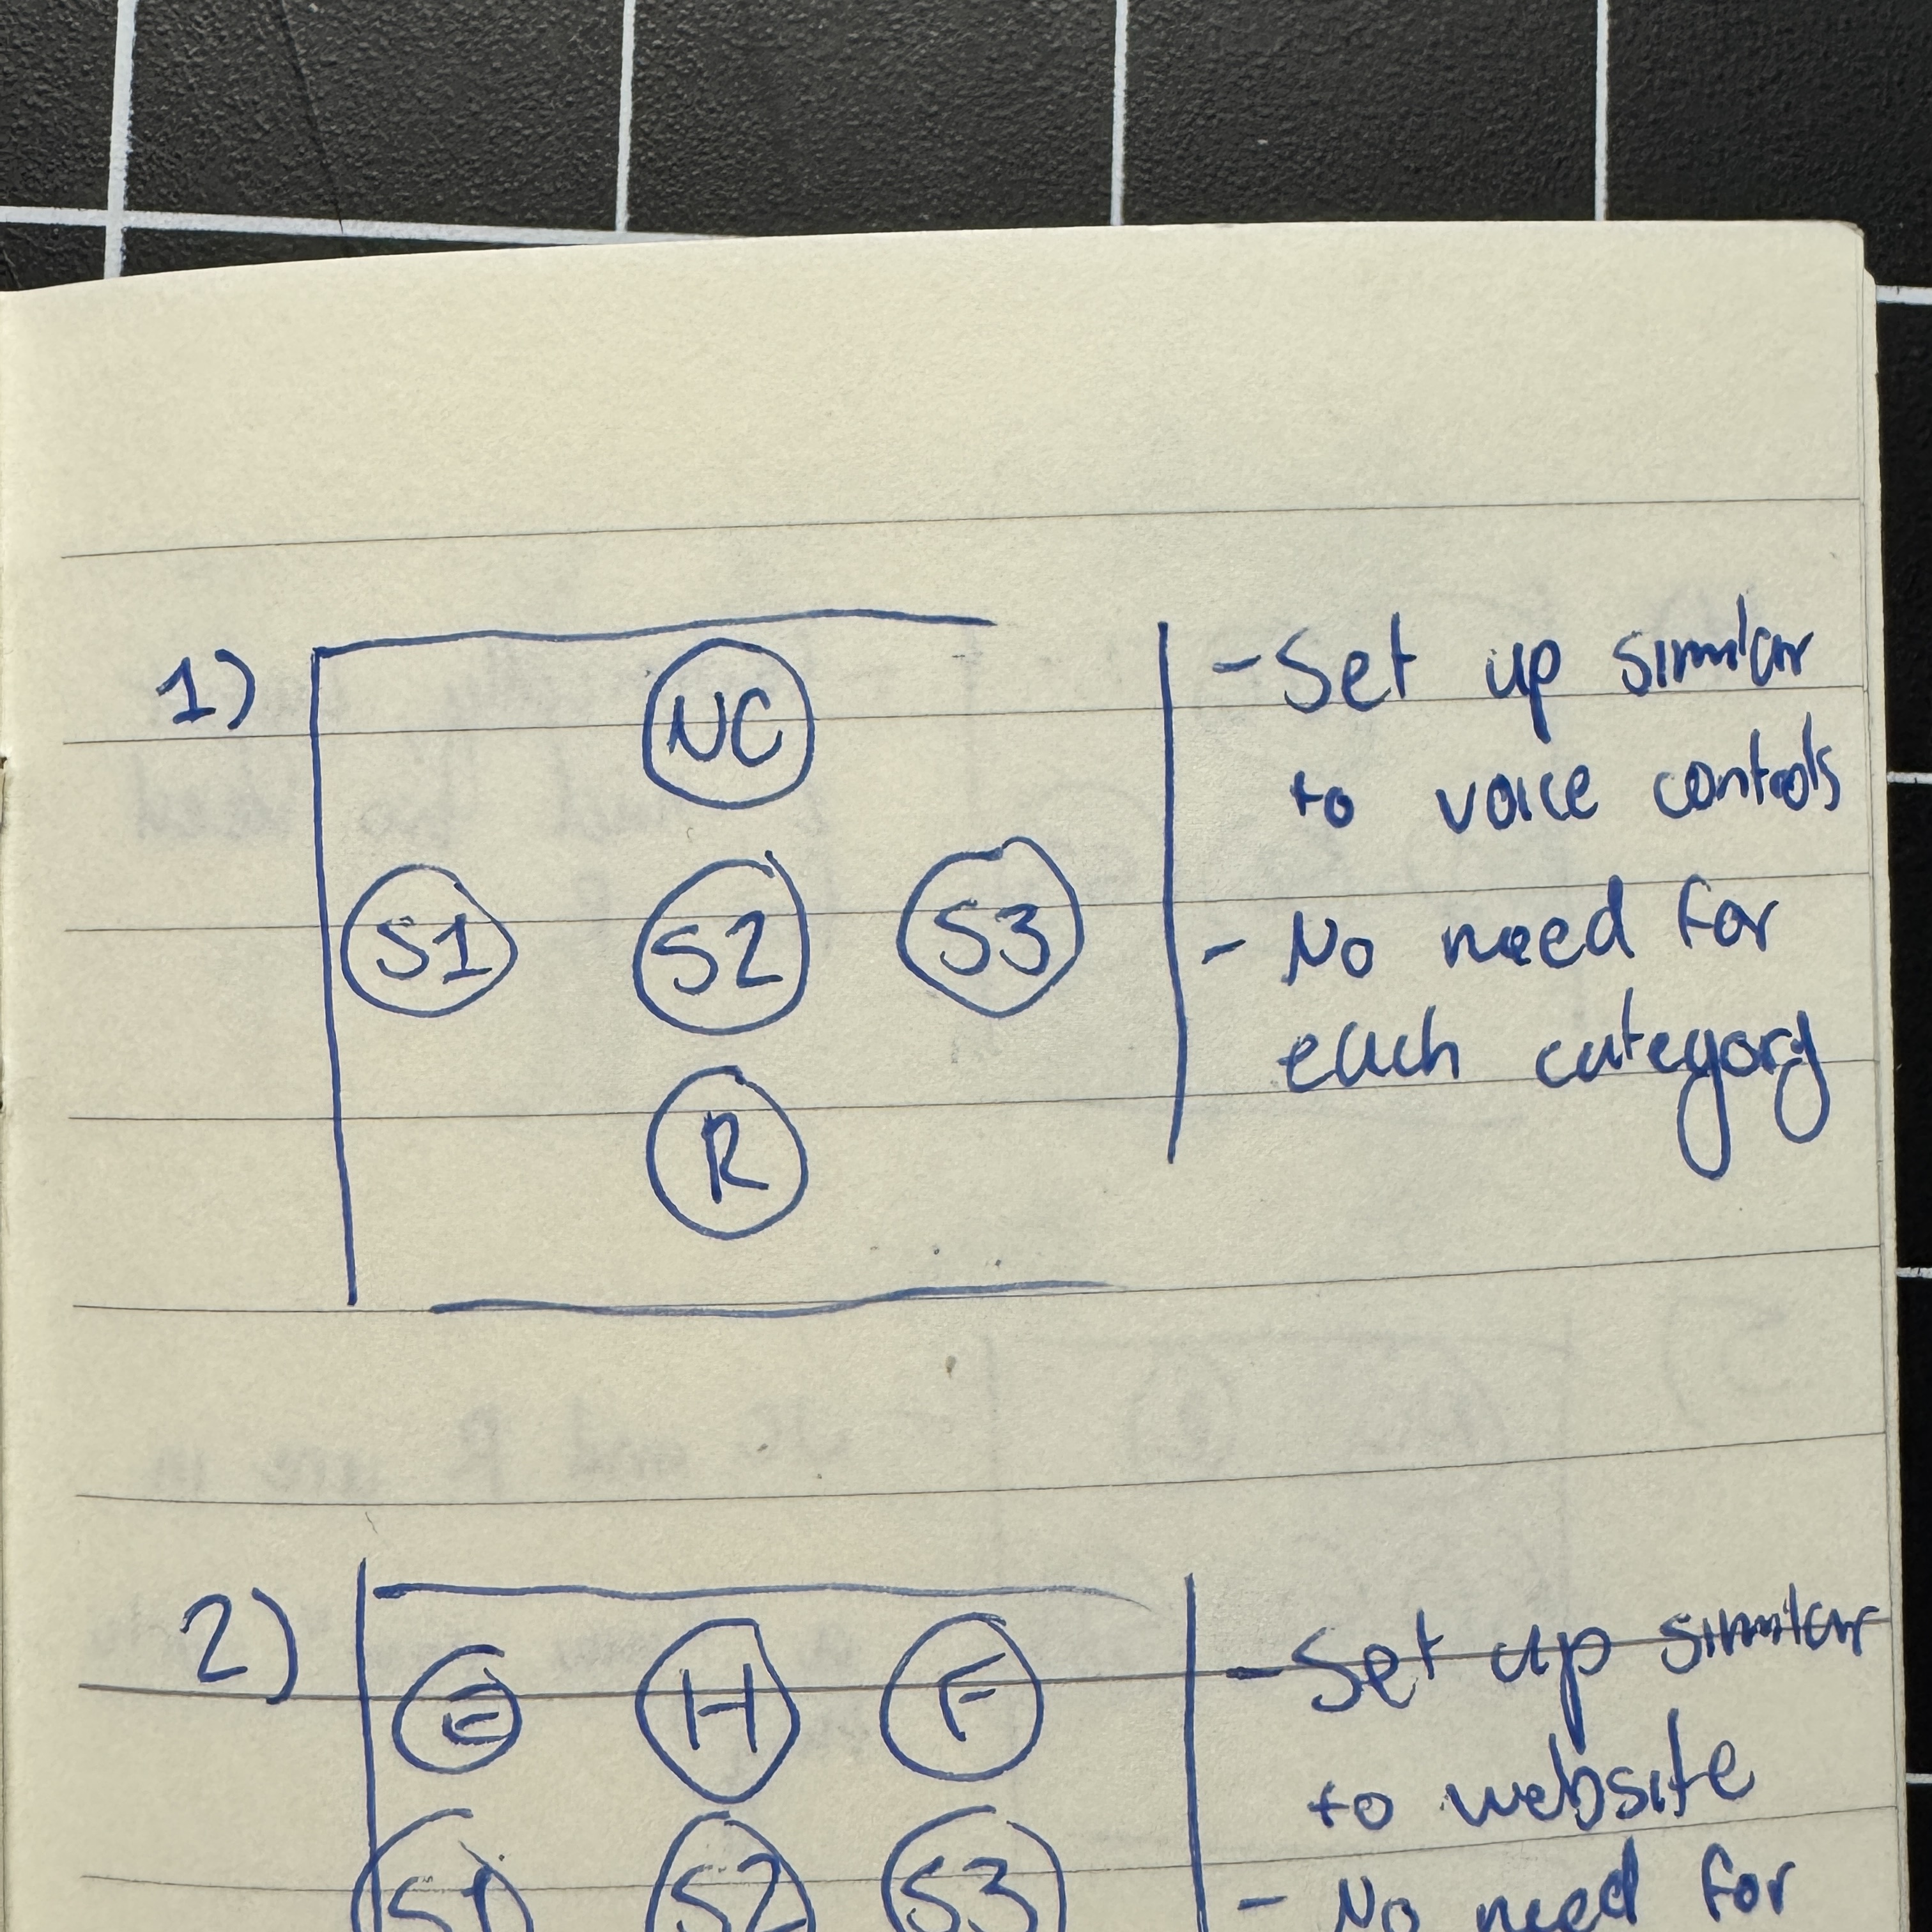
Activity 1


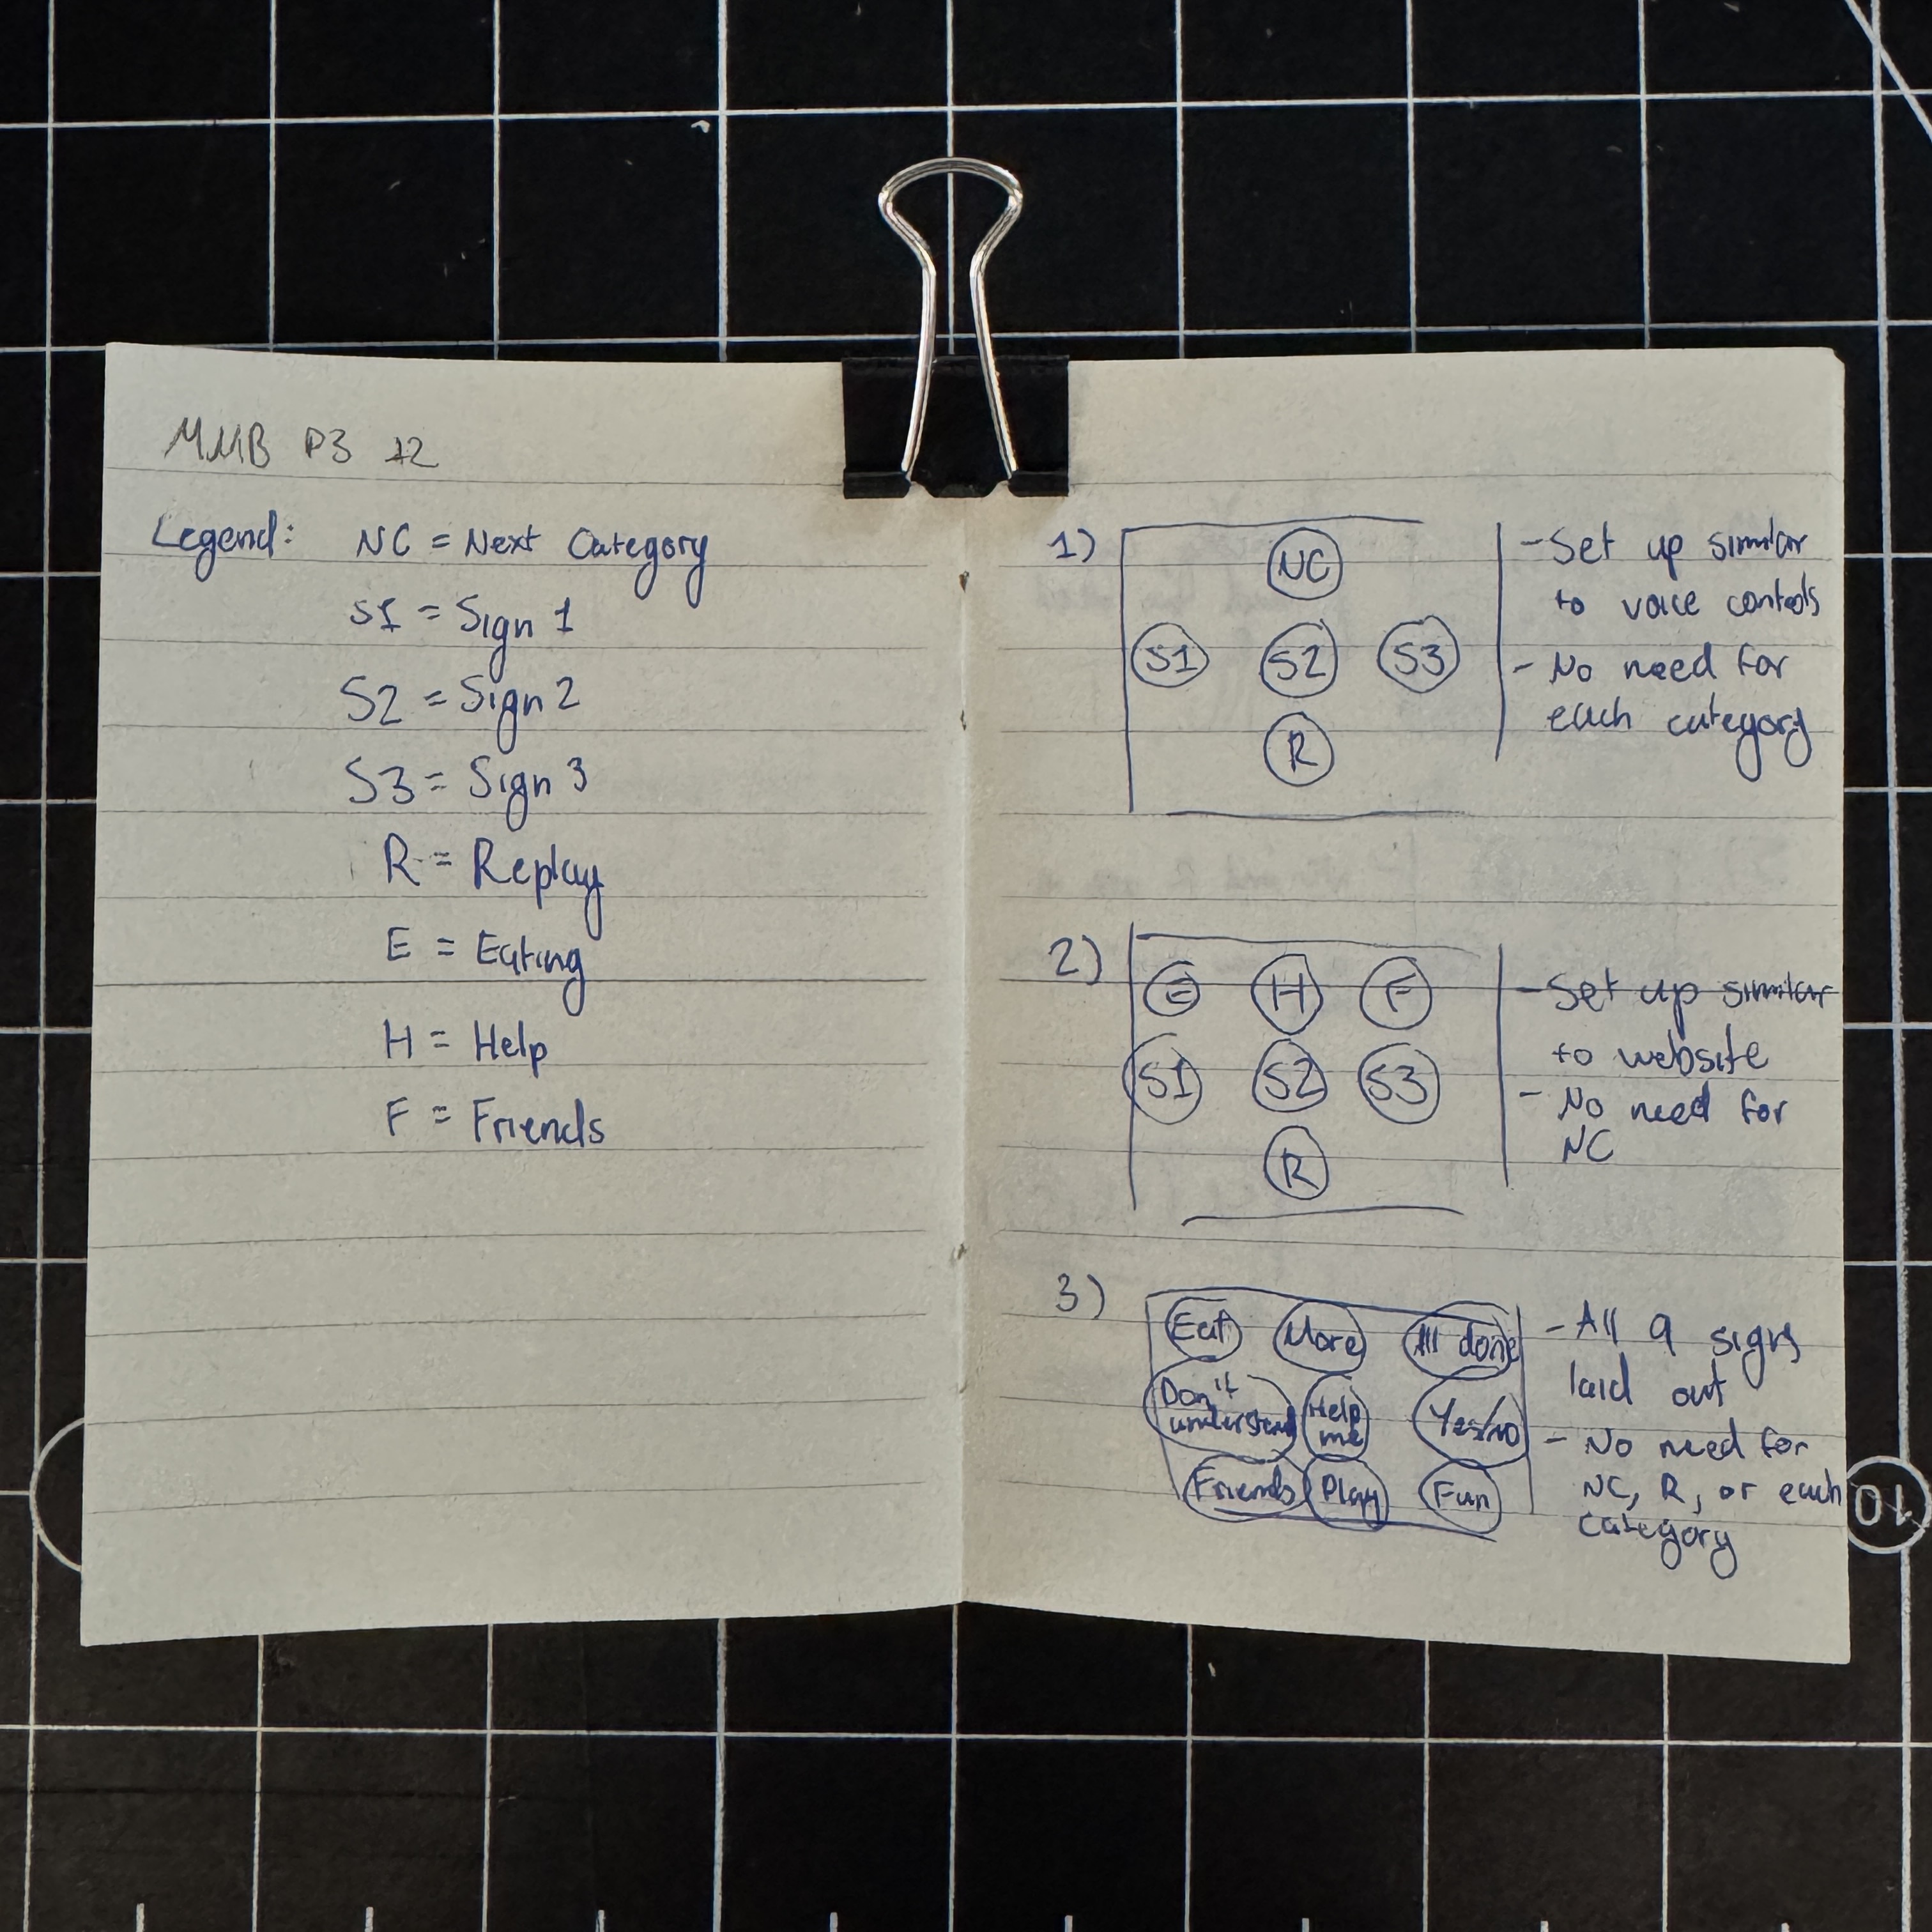
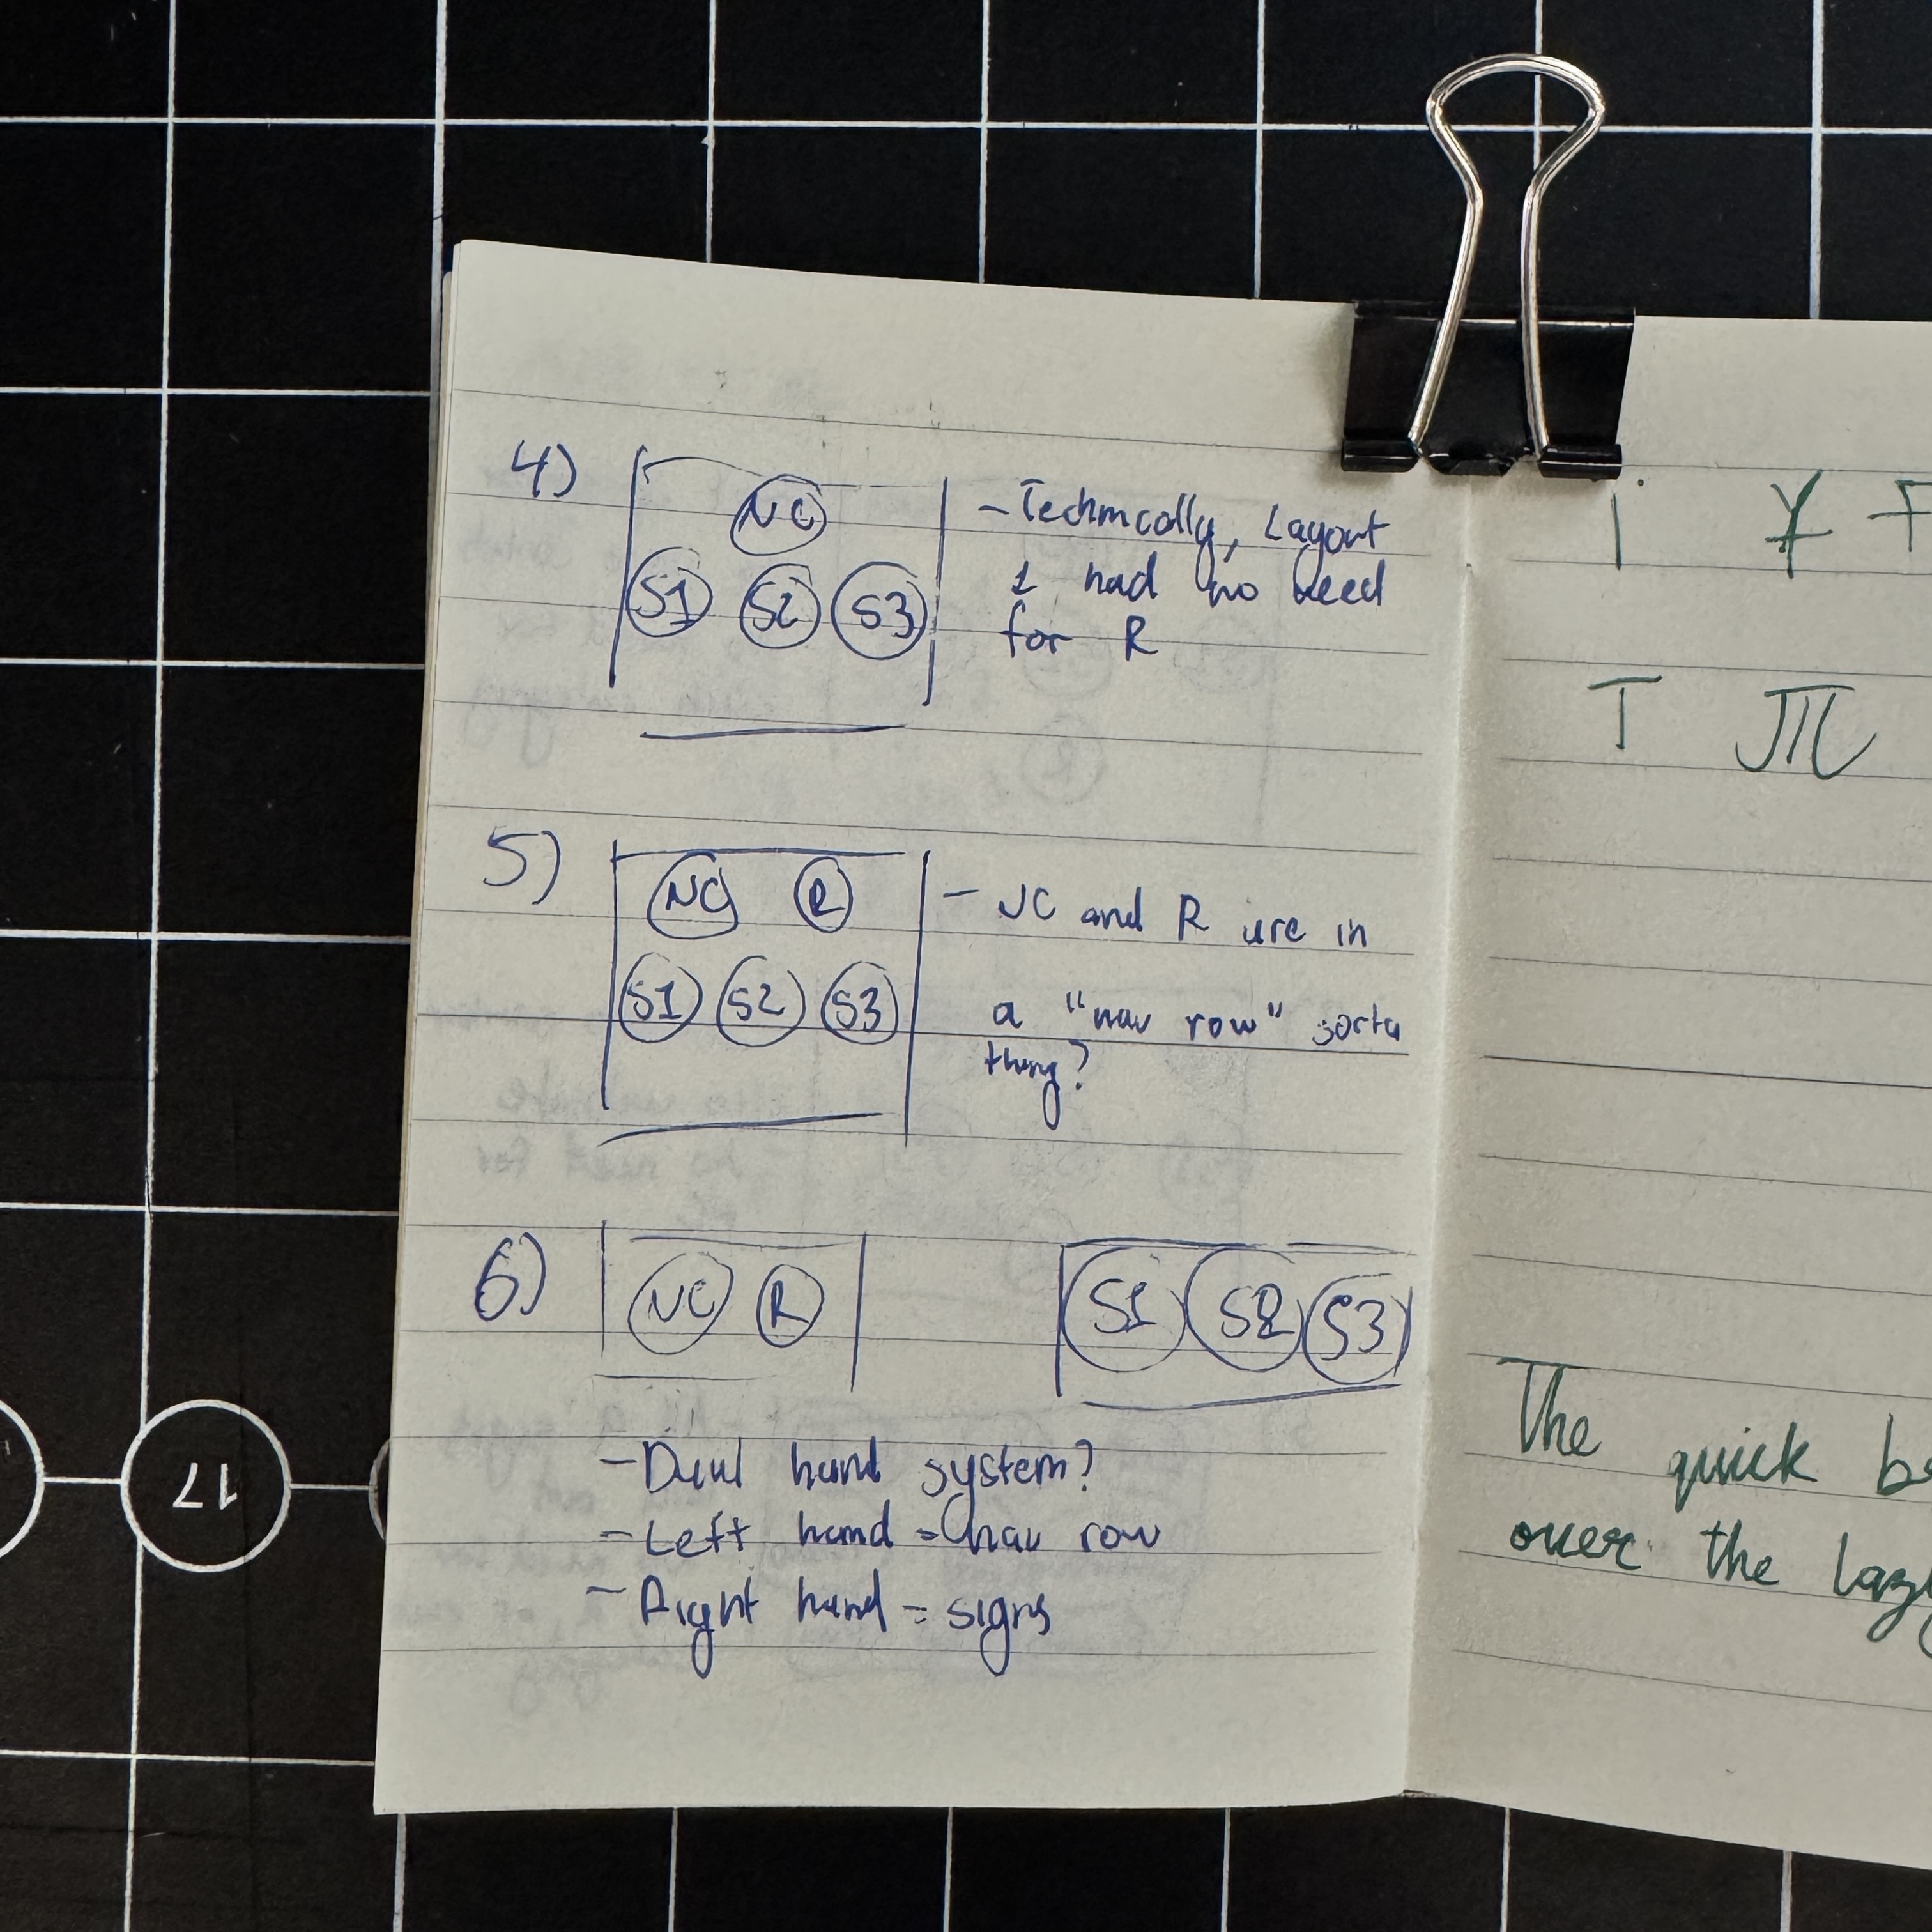
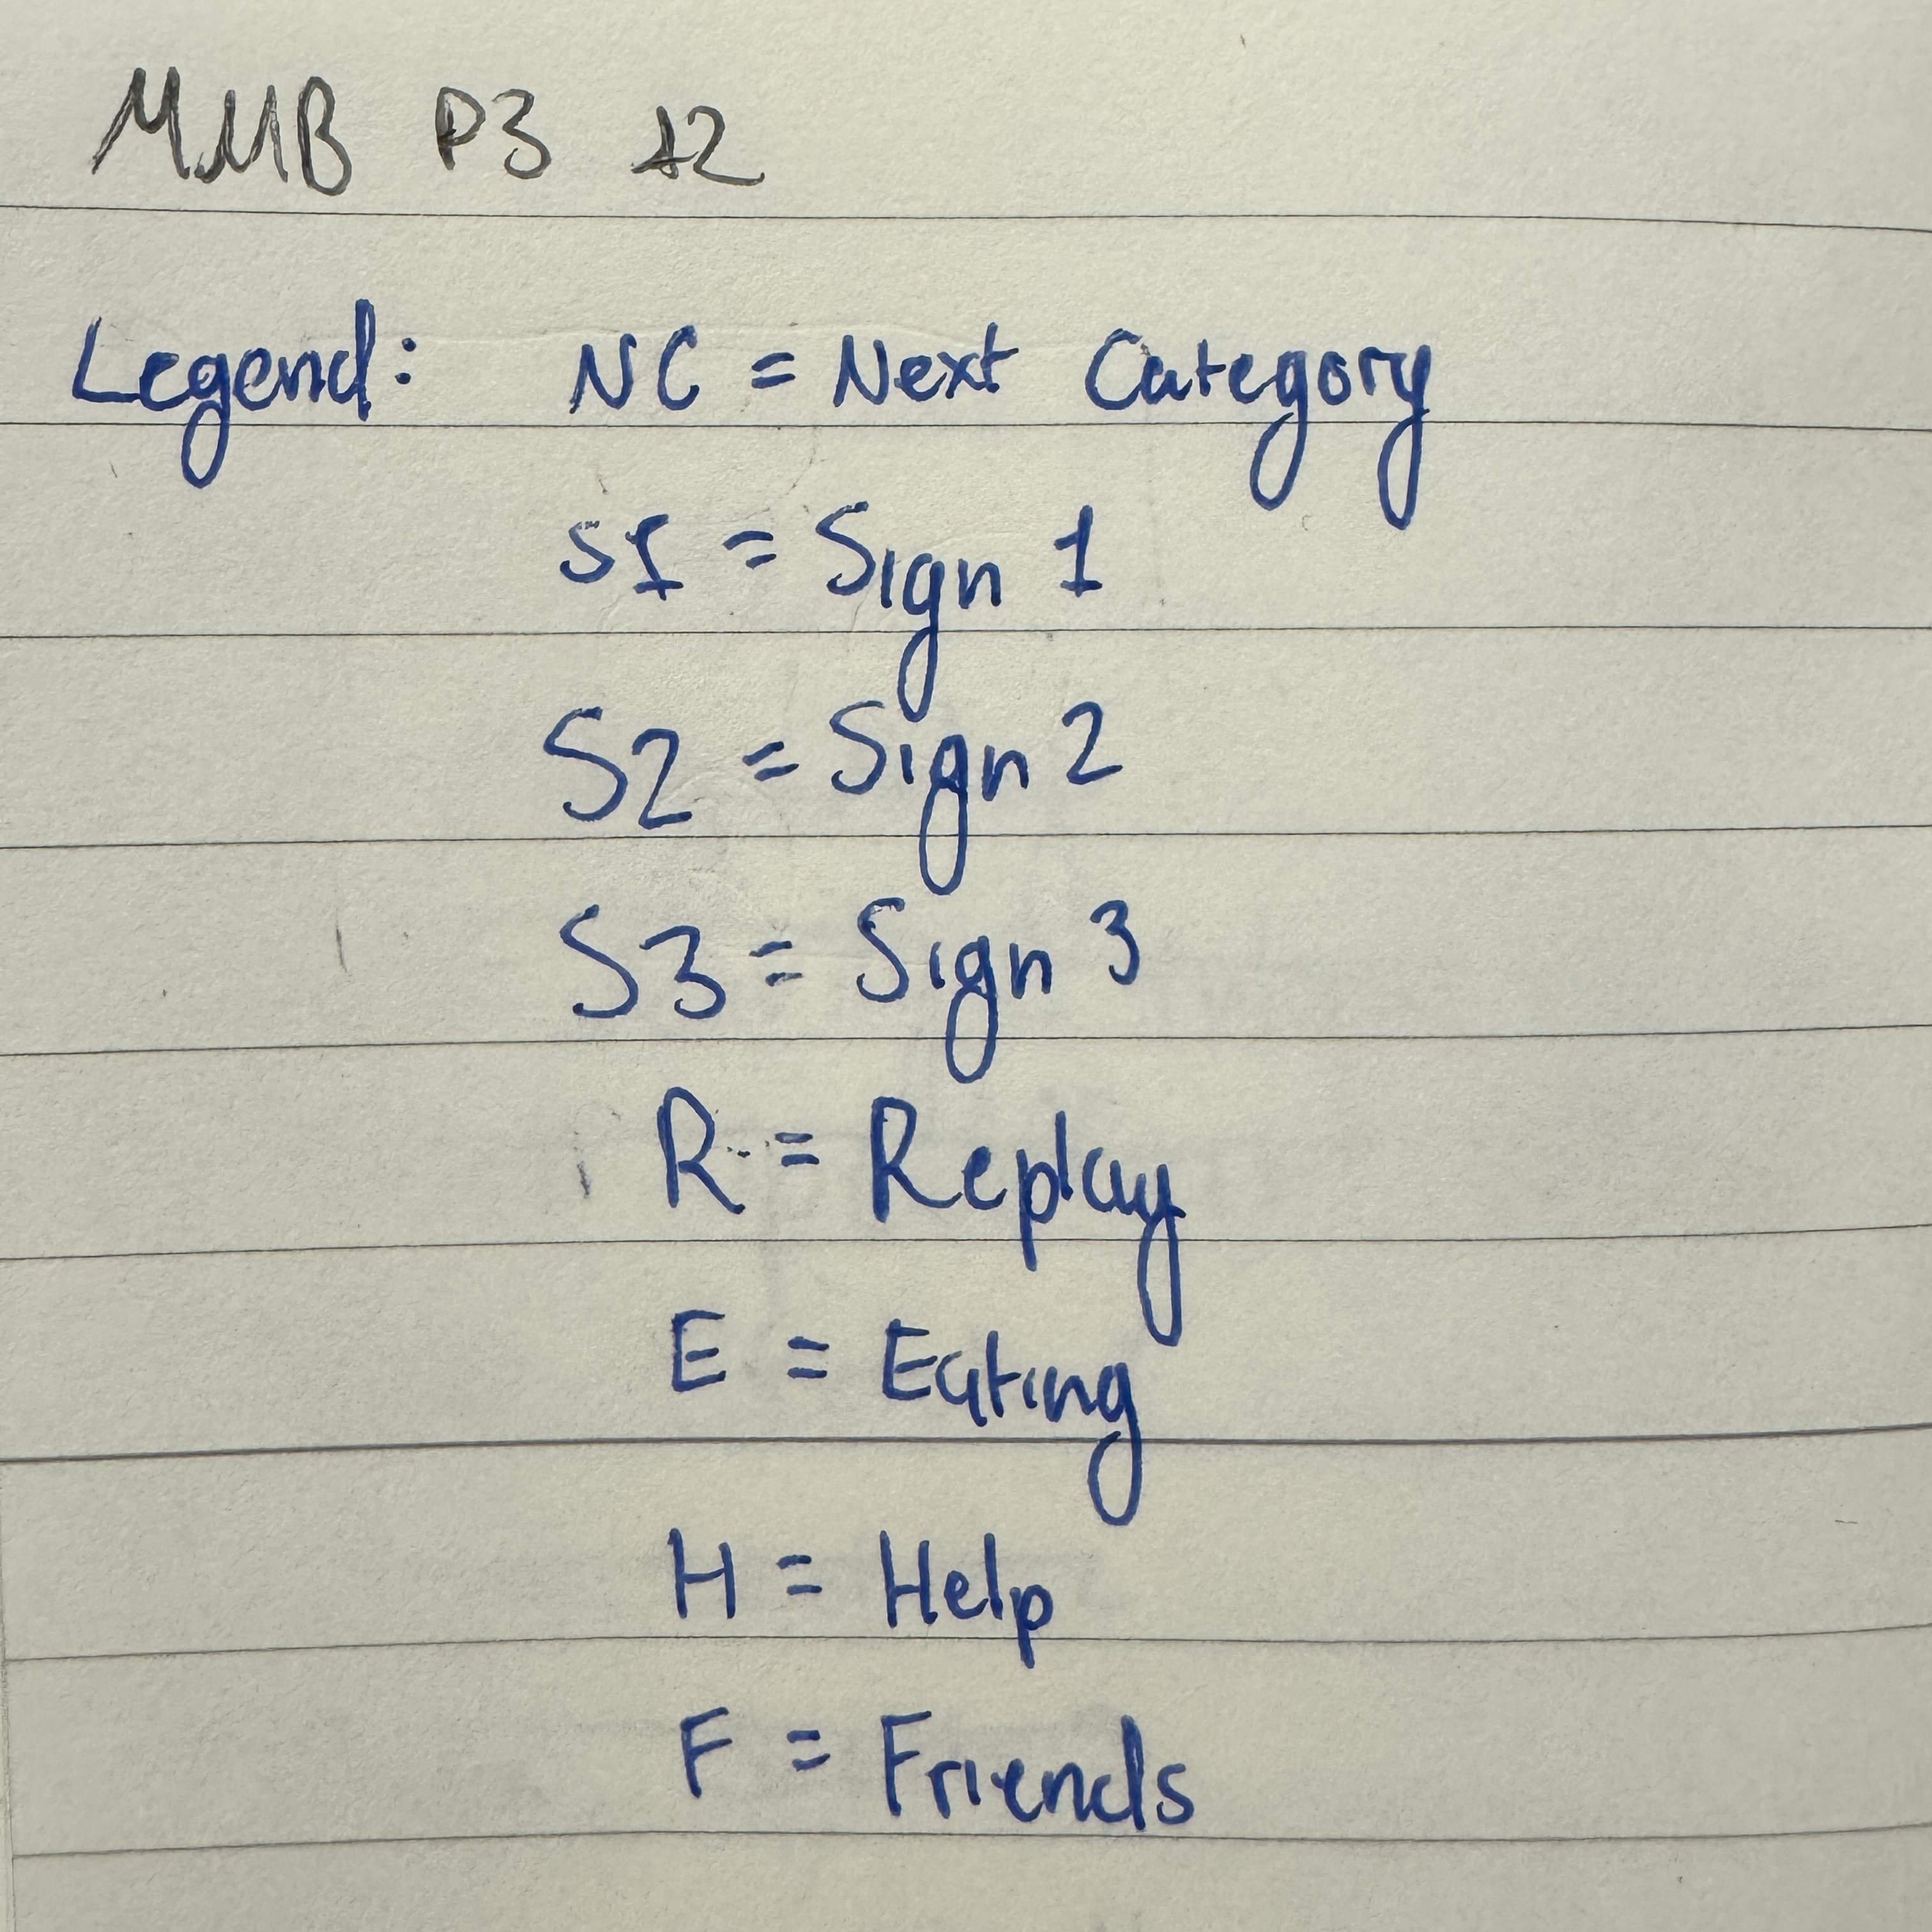
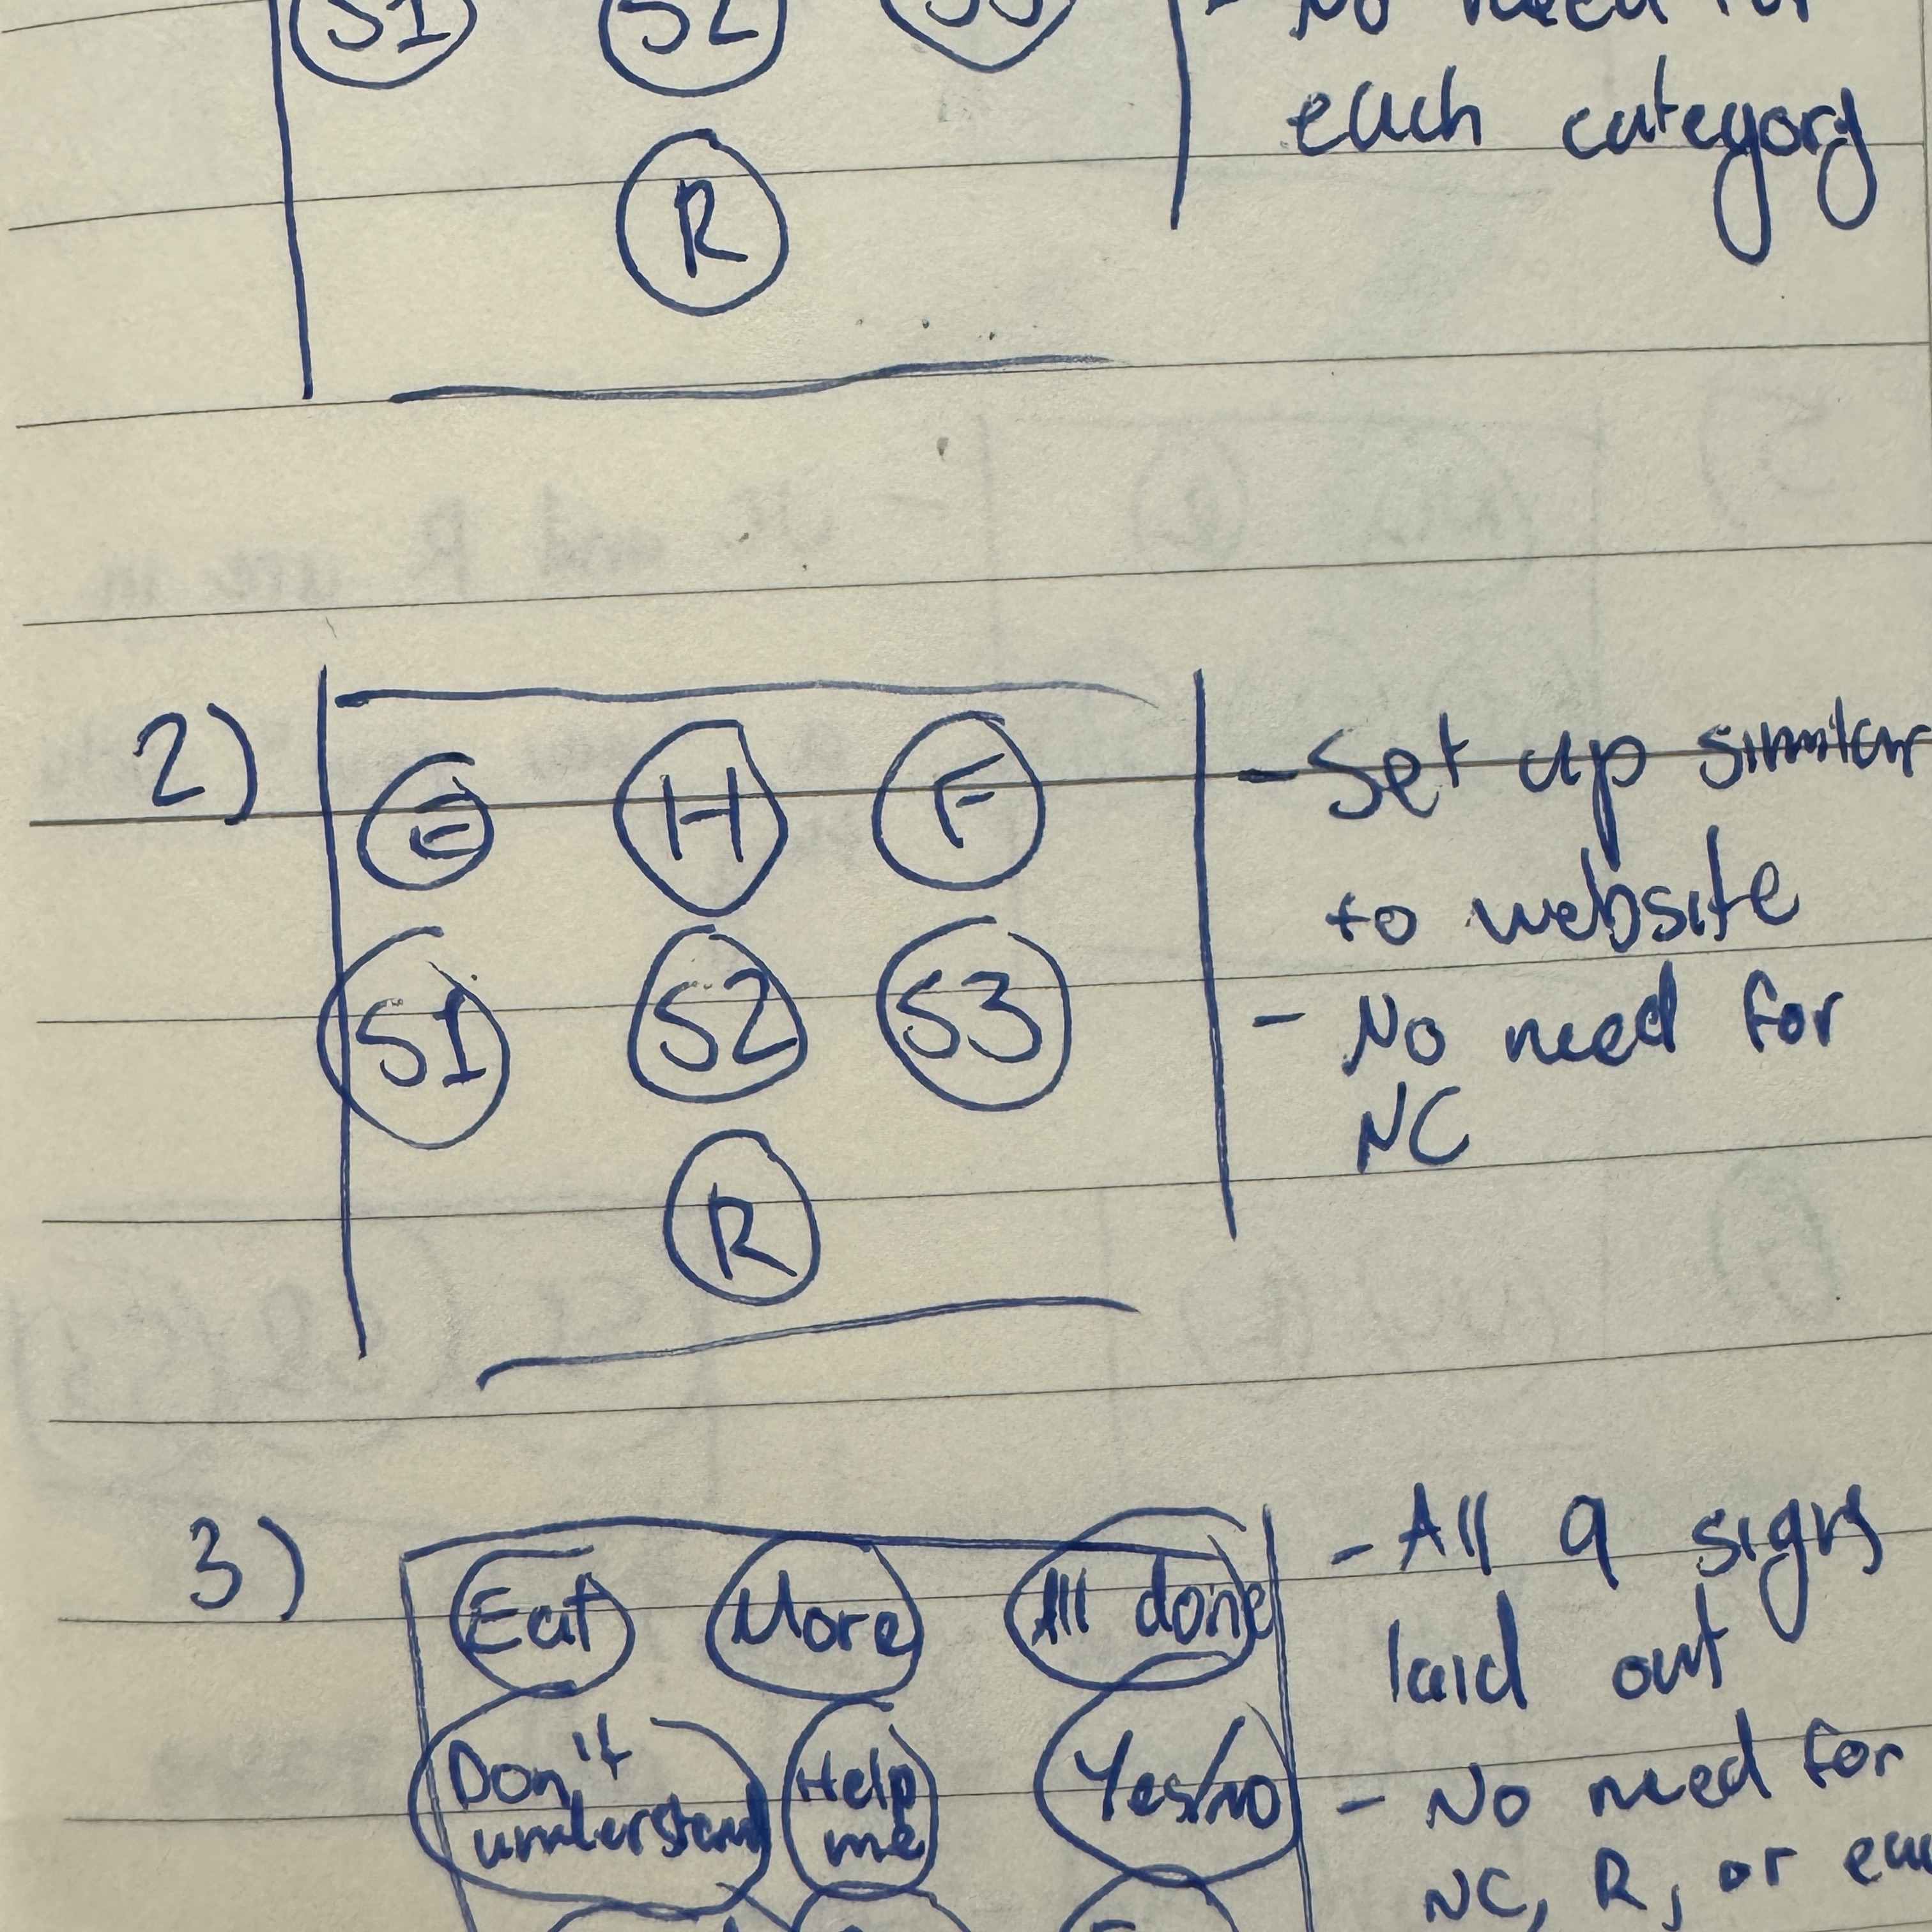
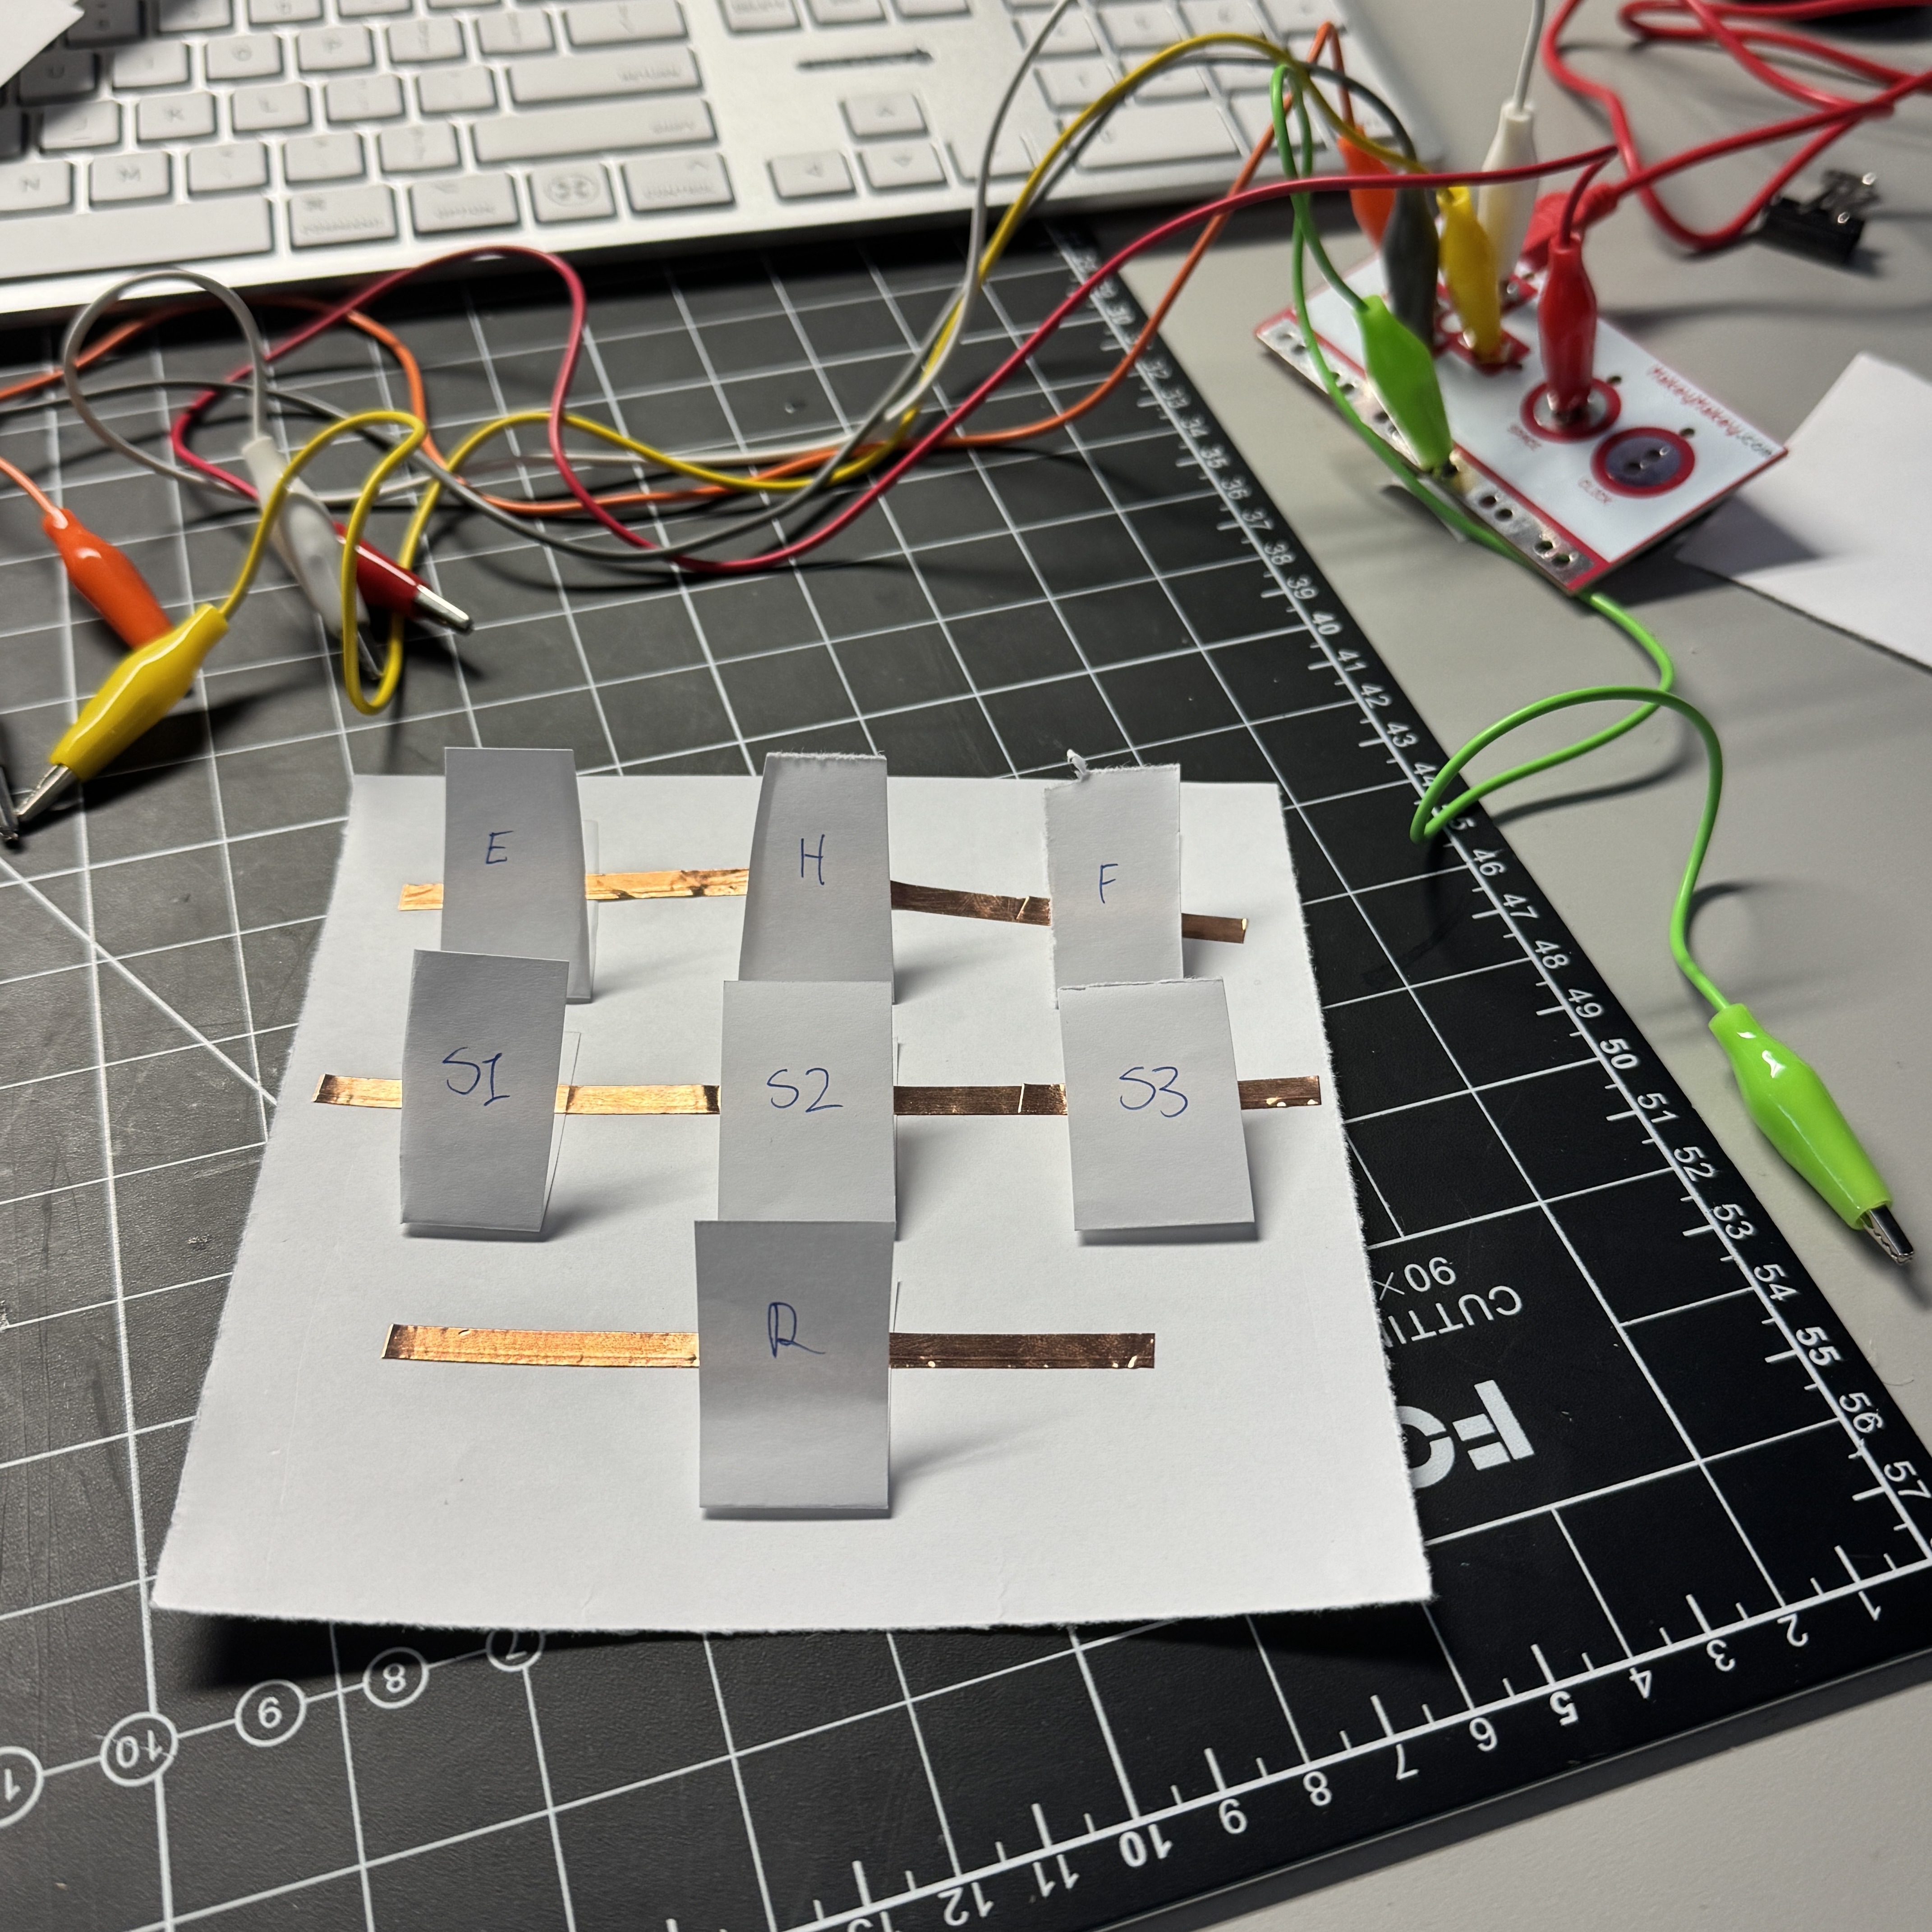
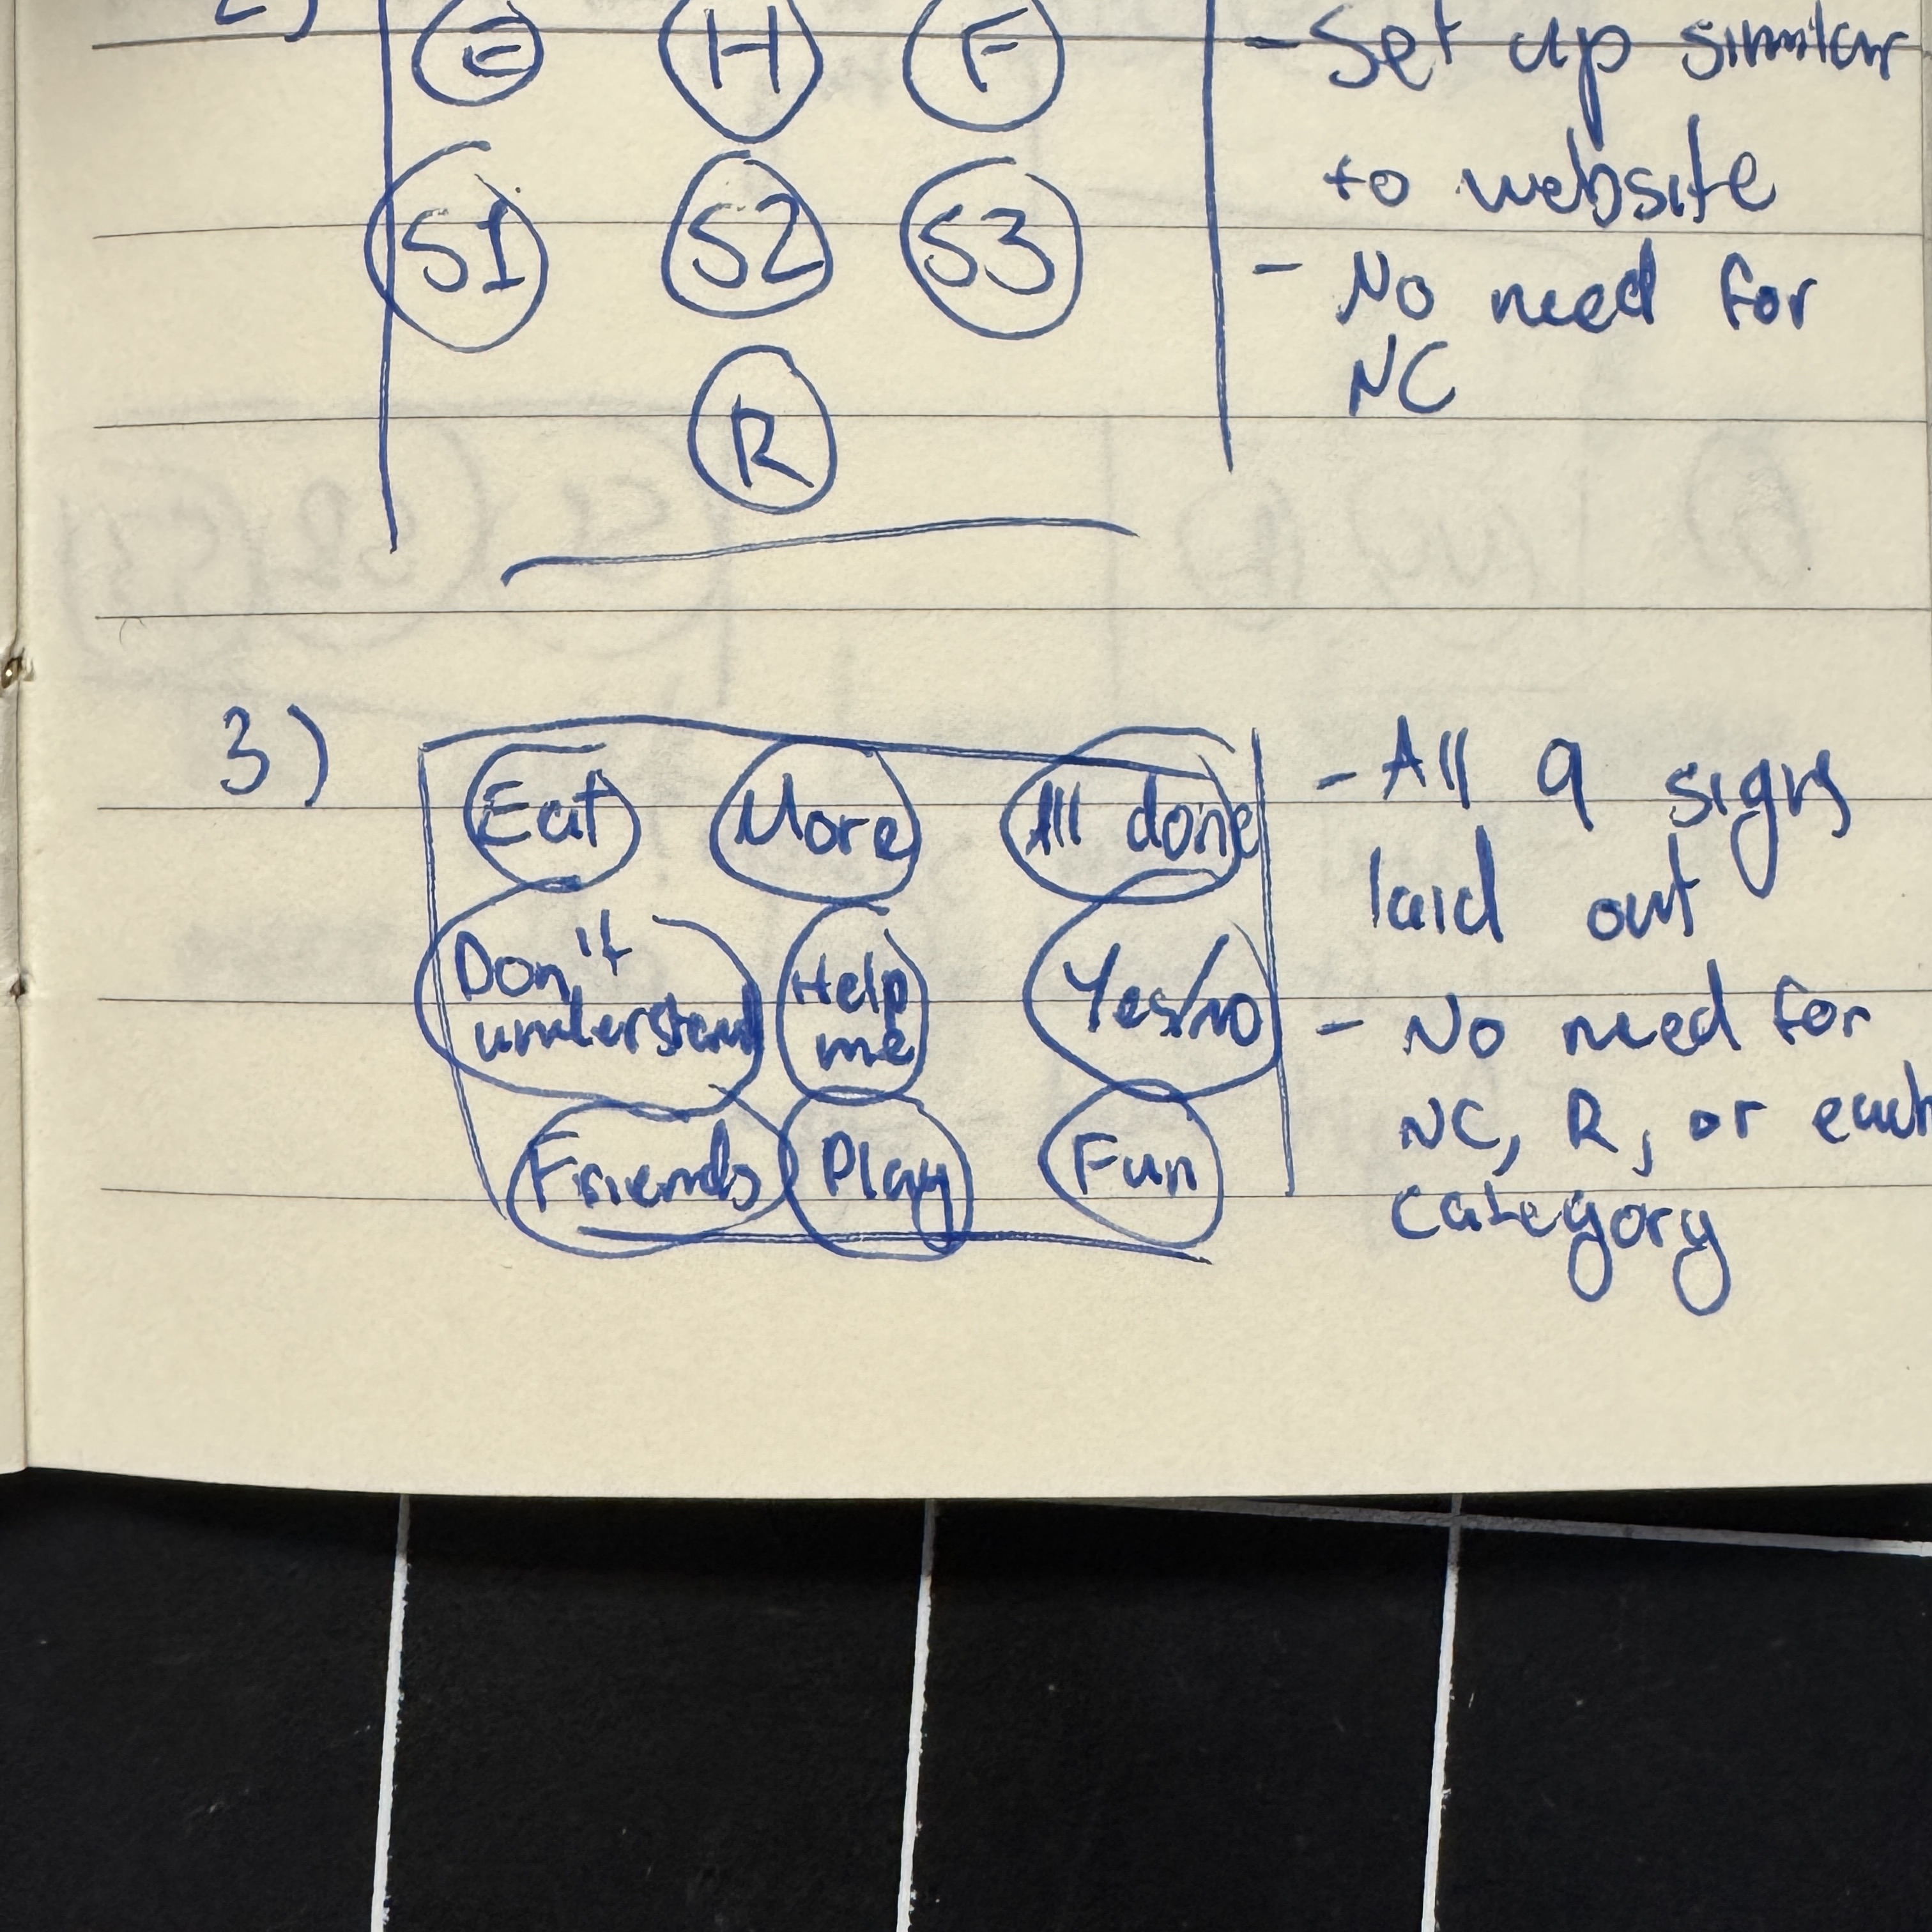
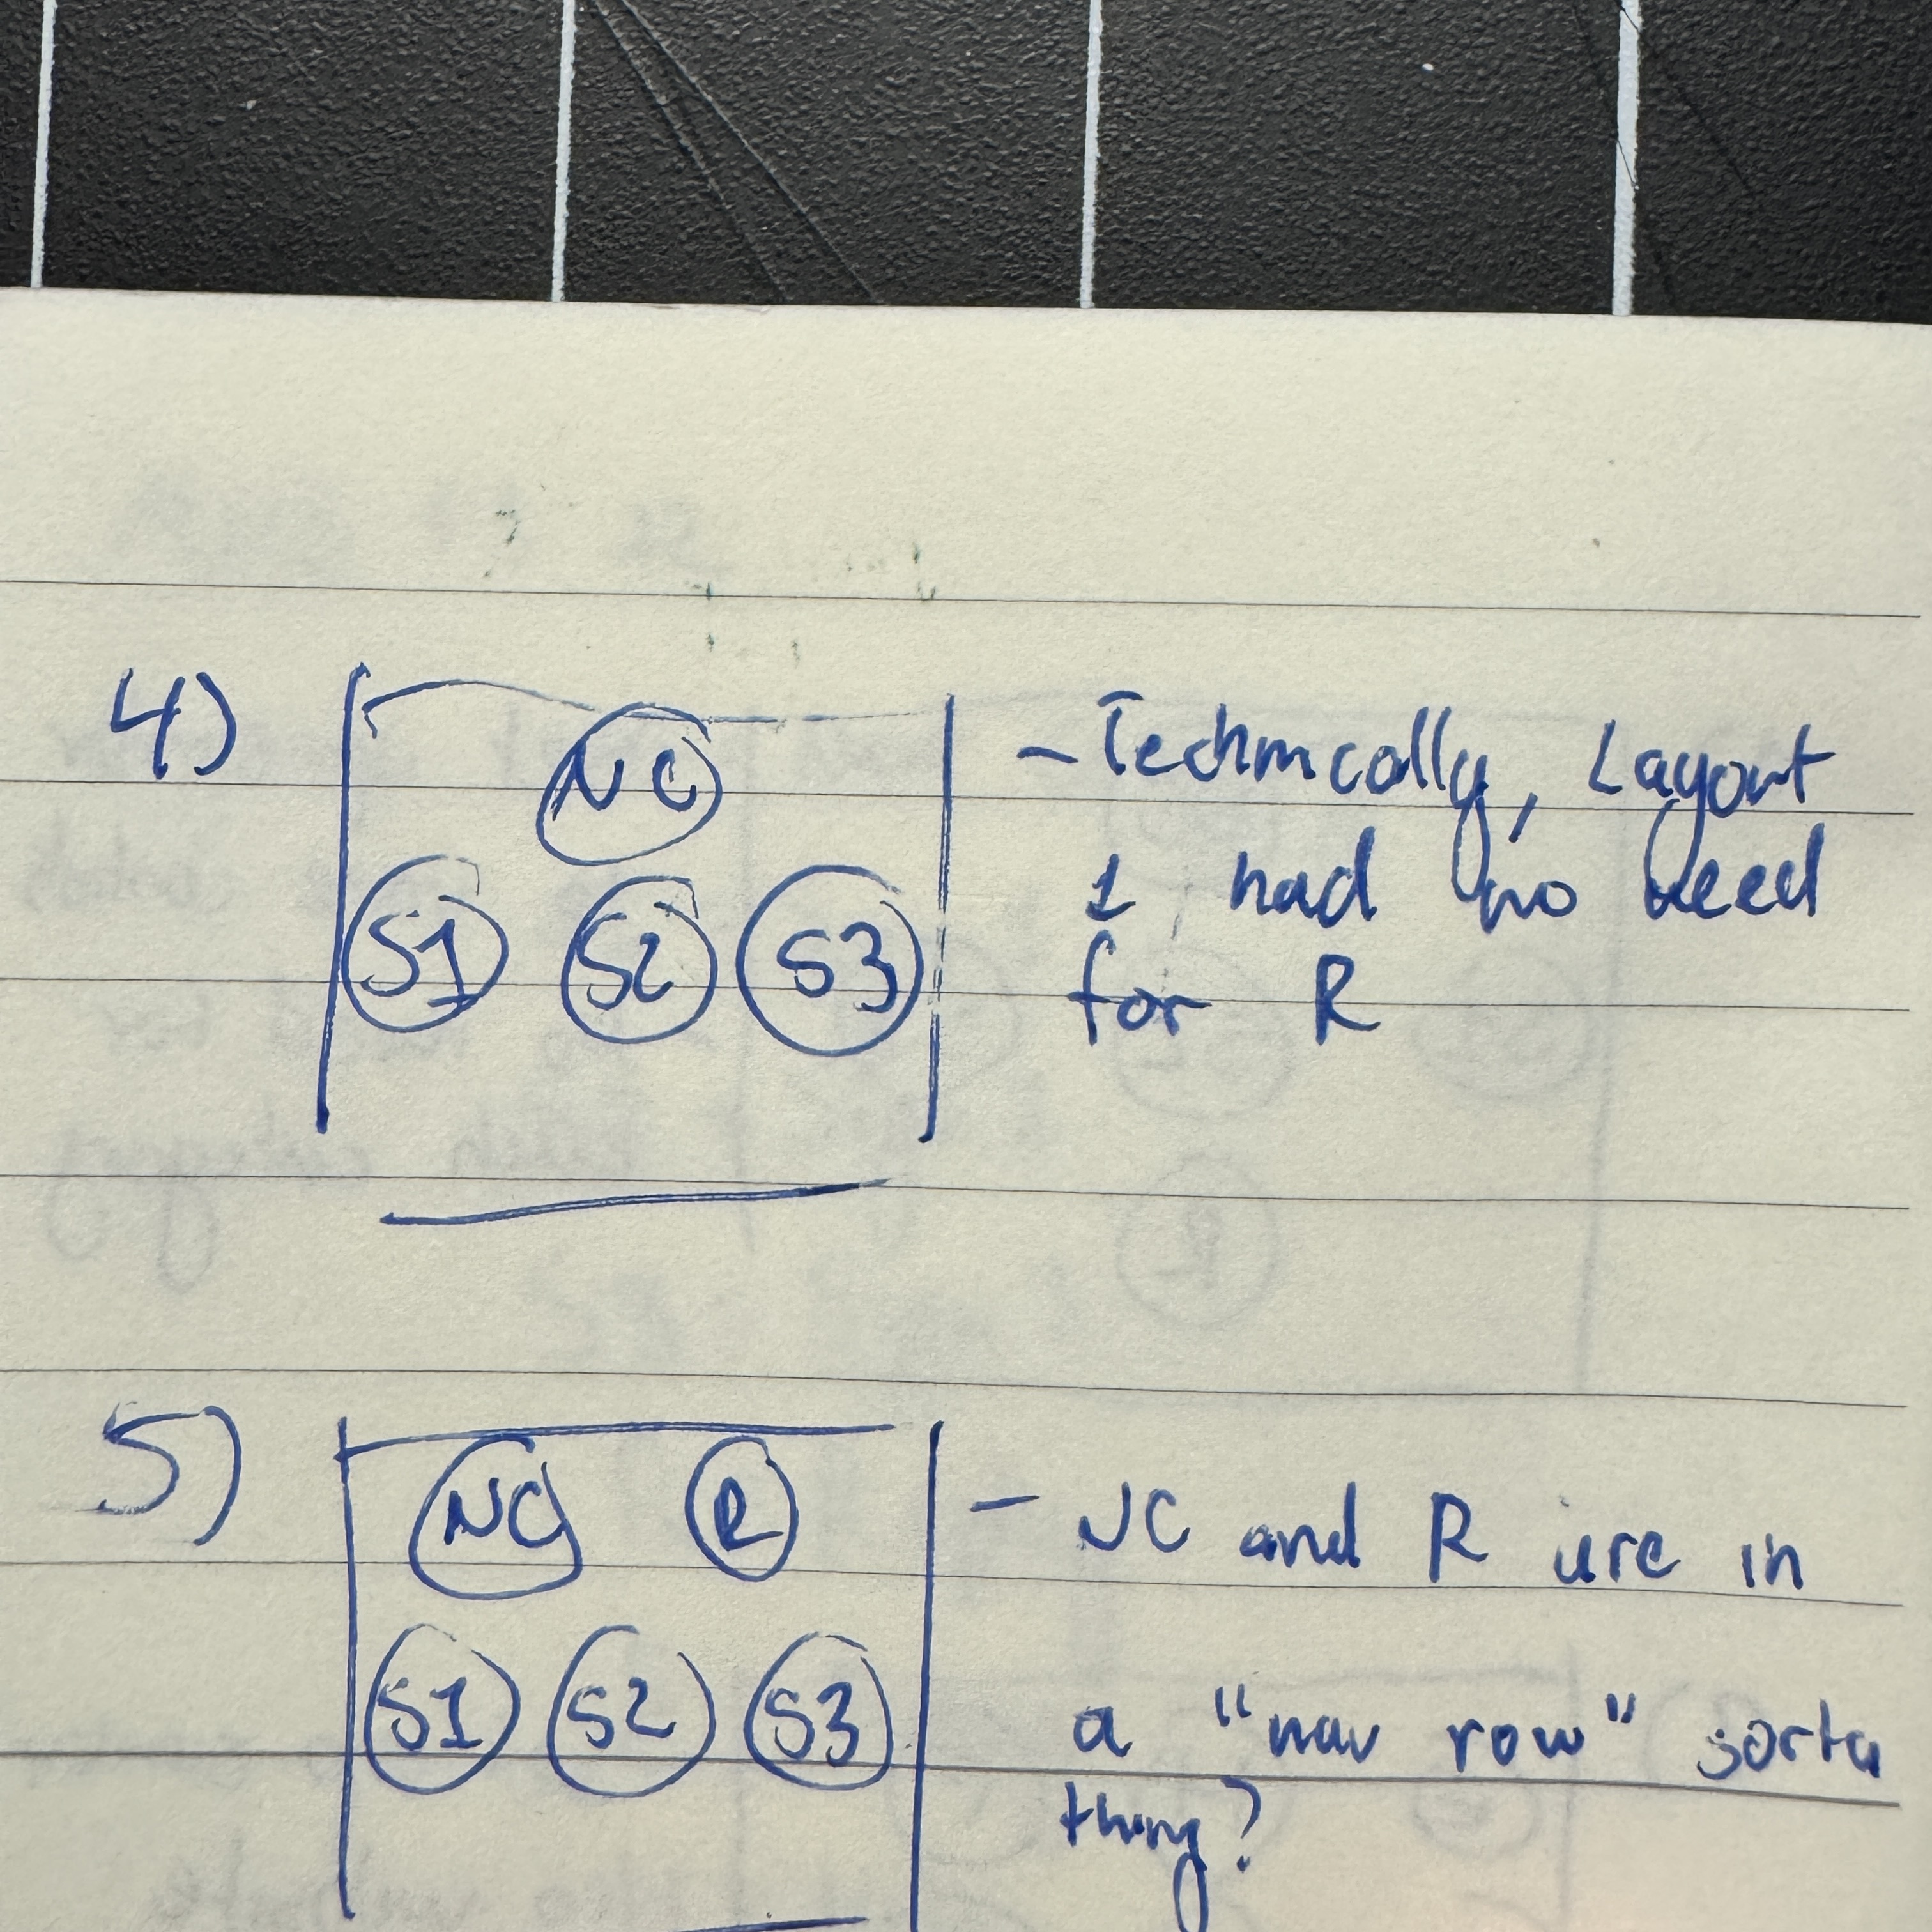
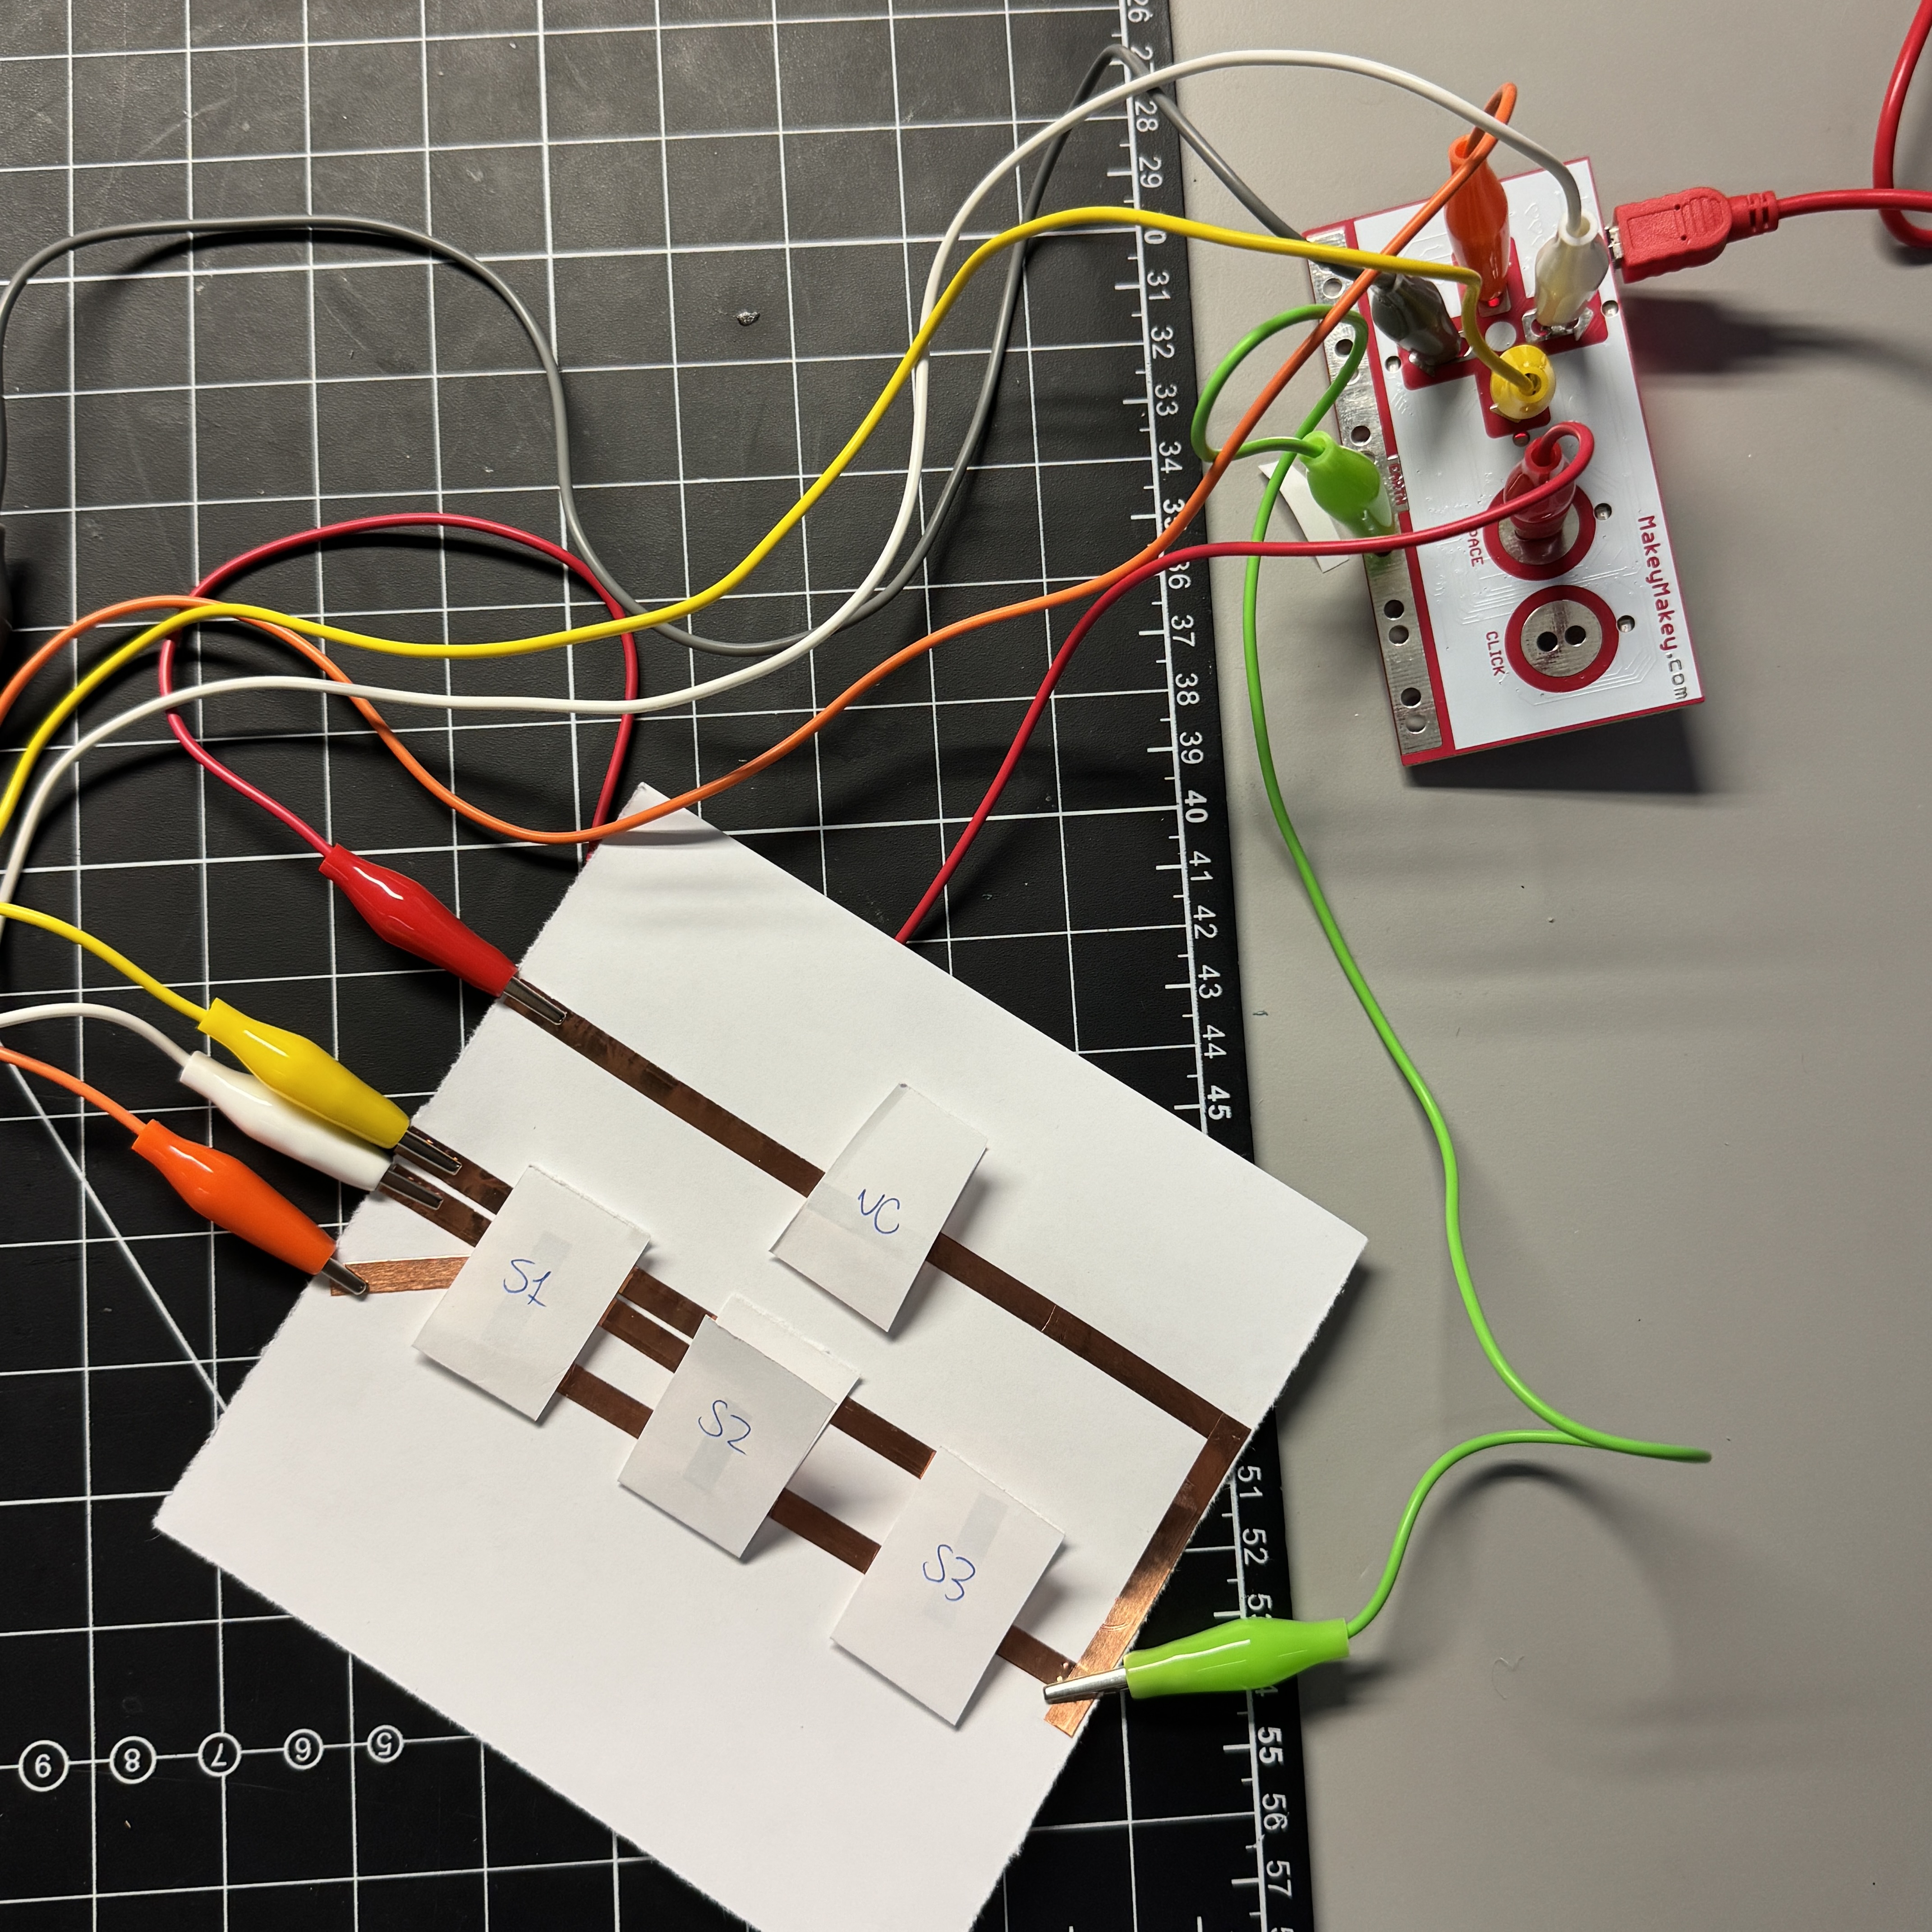
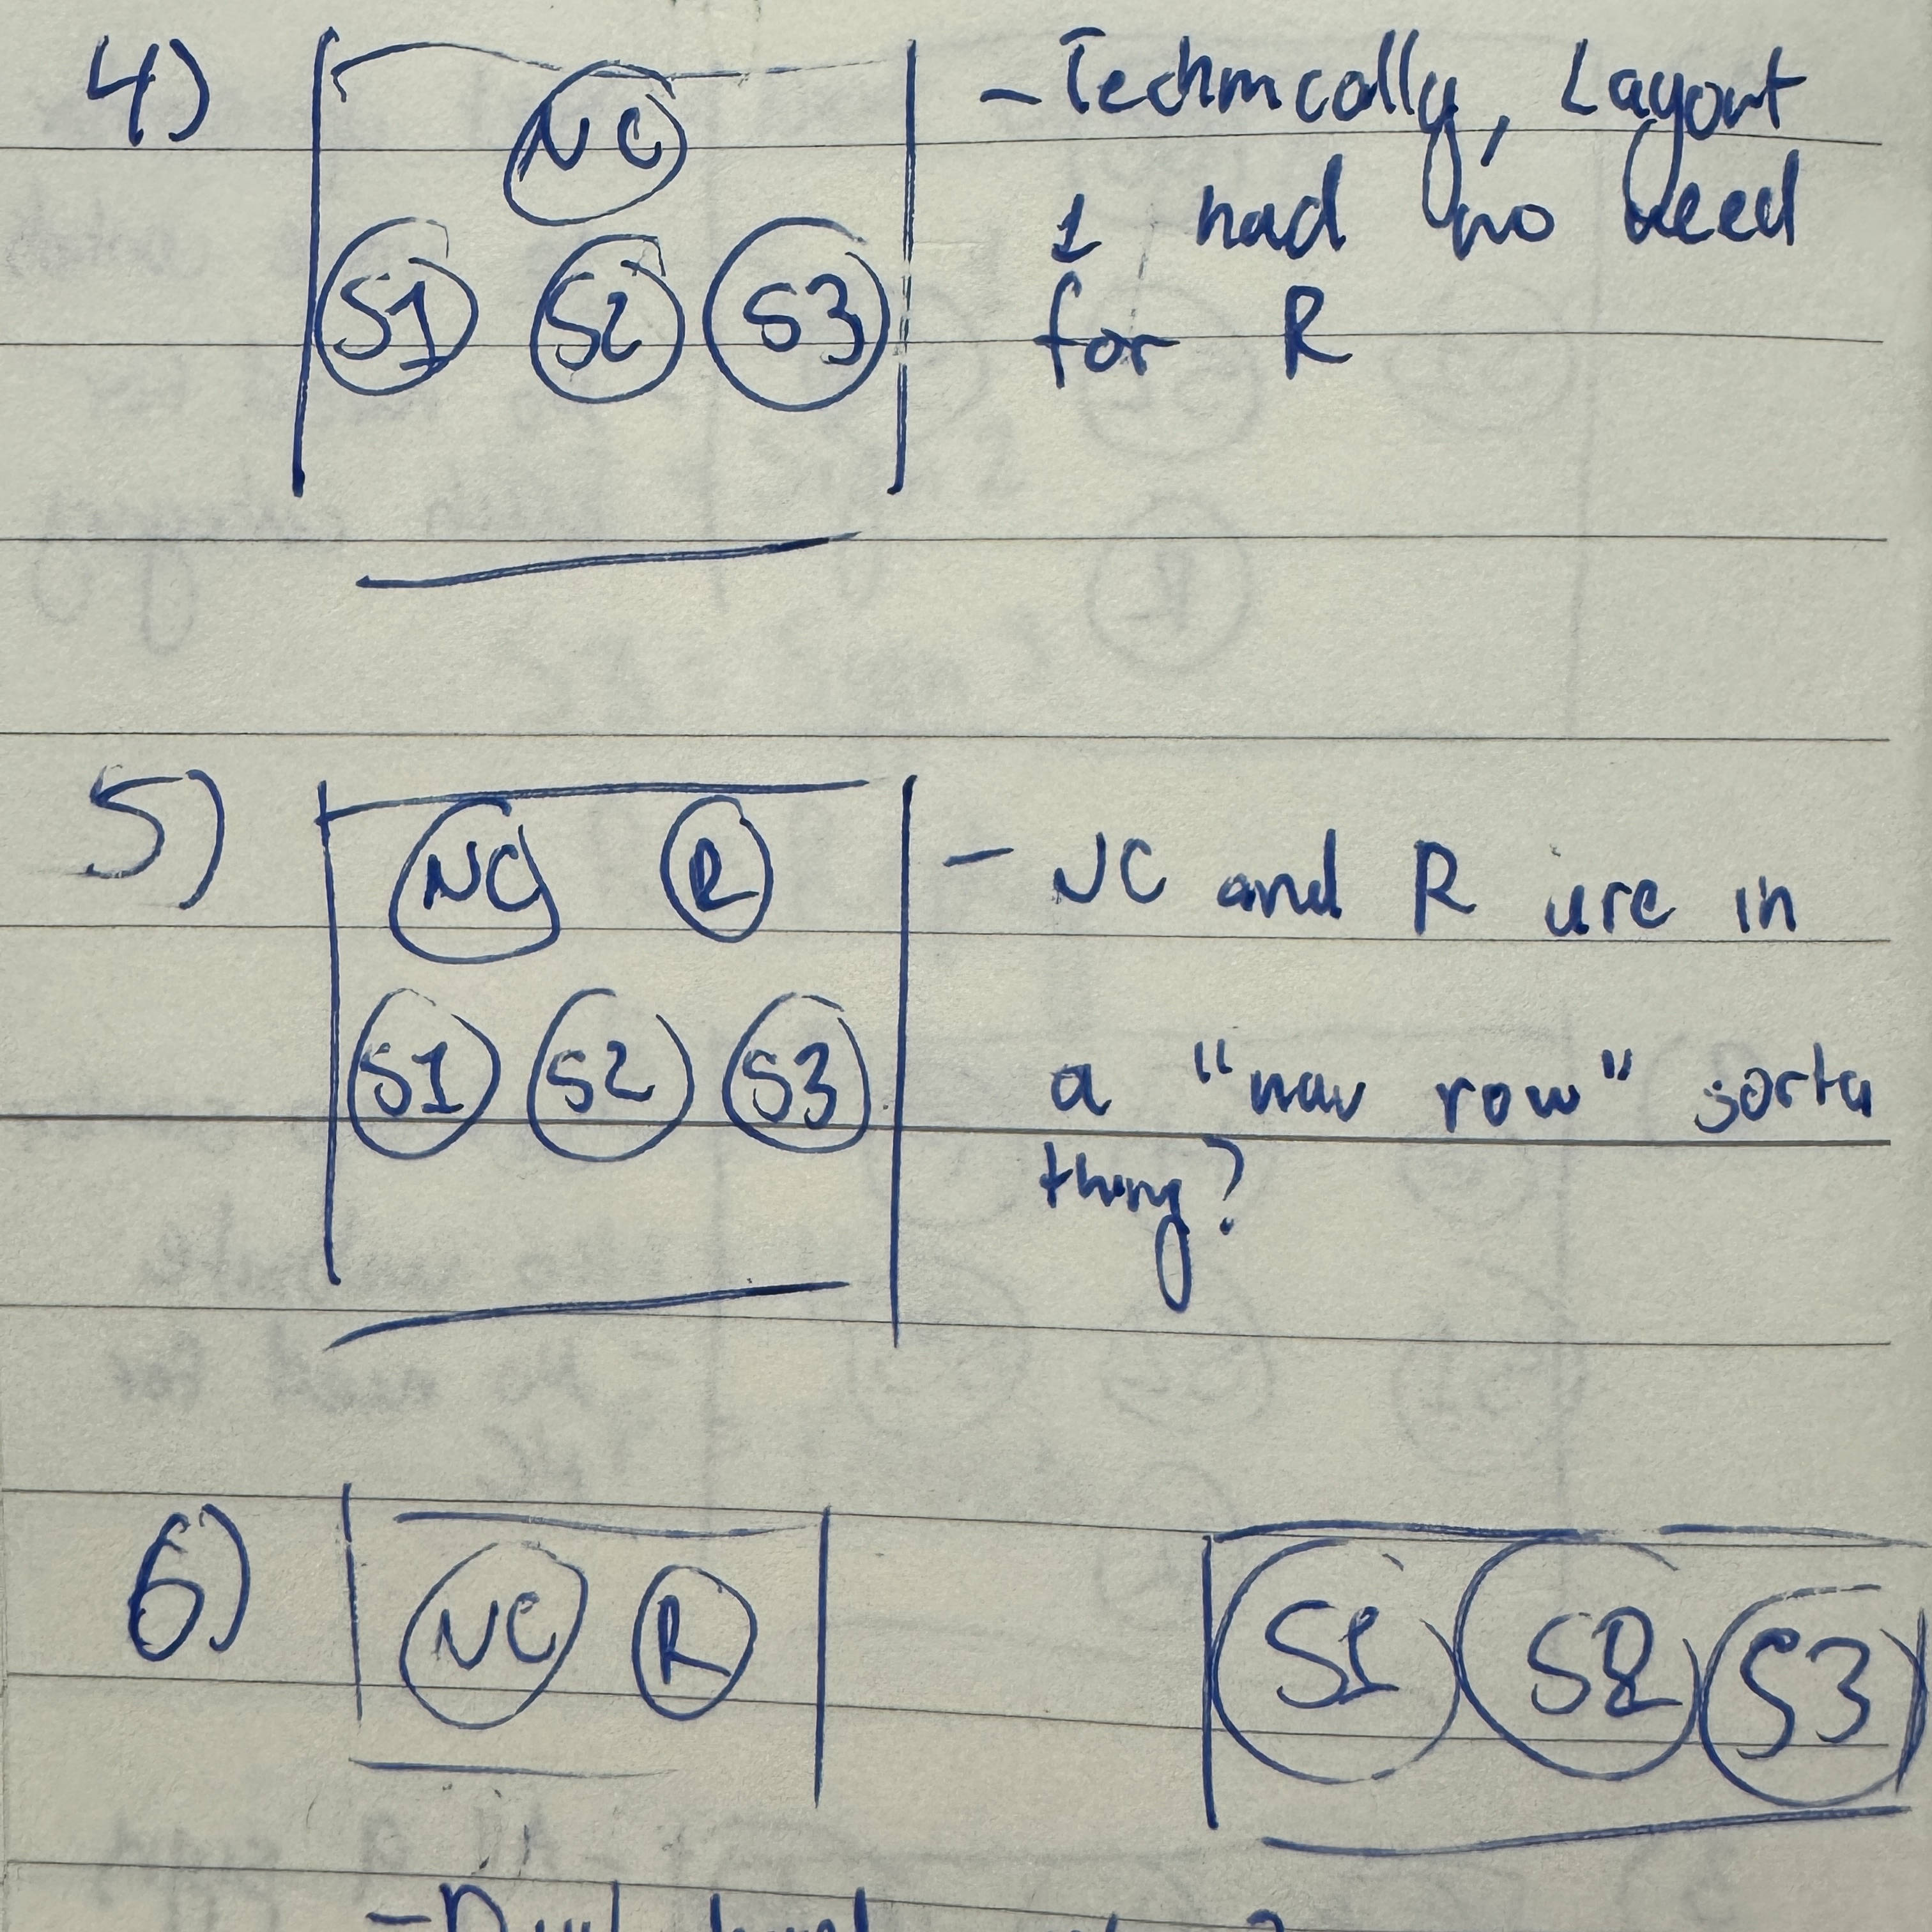
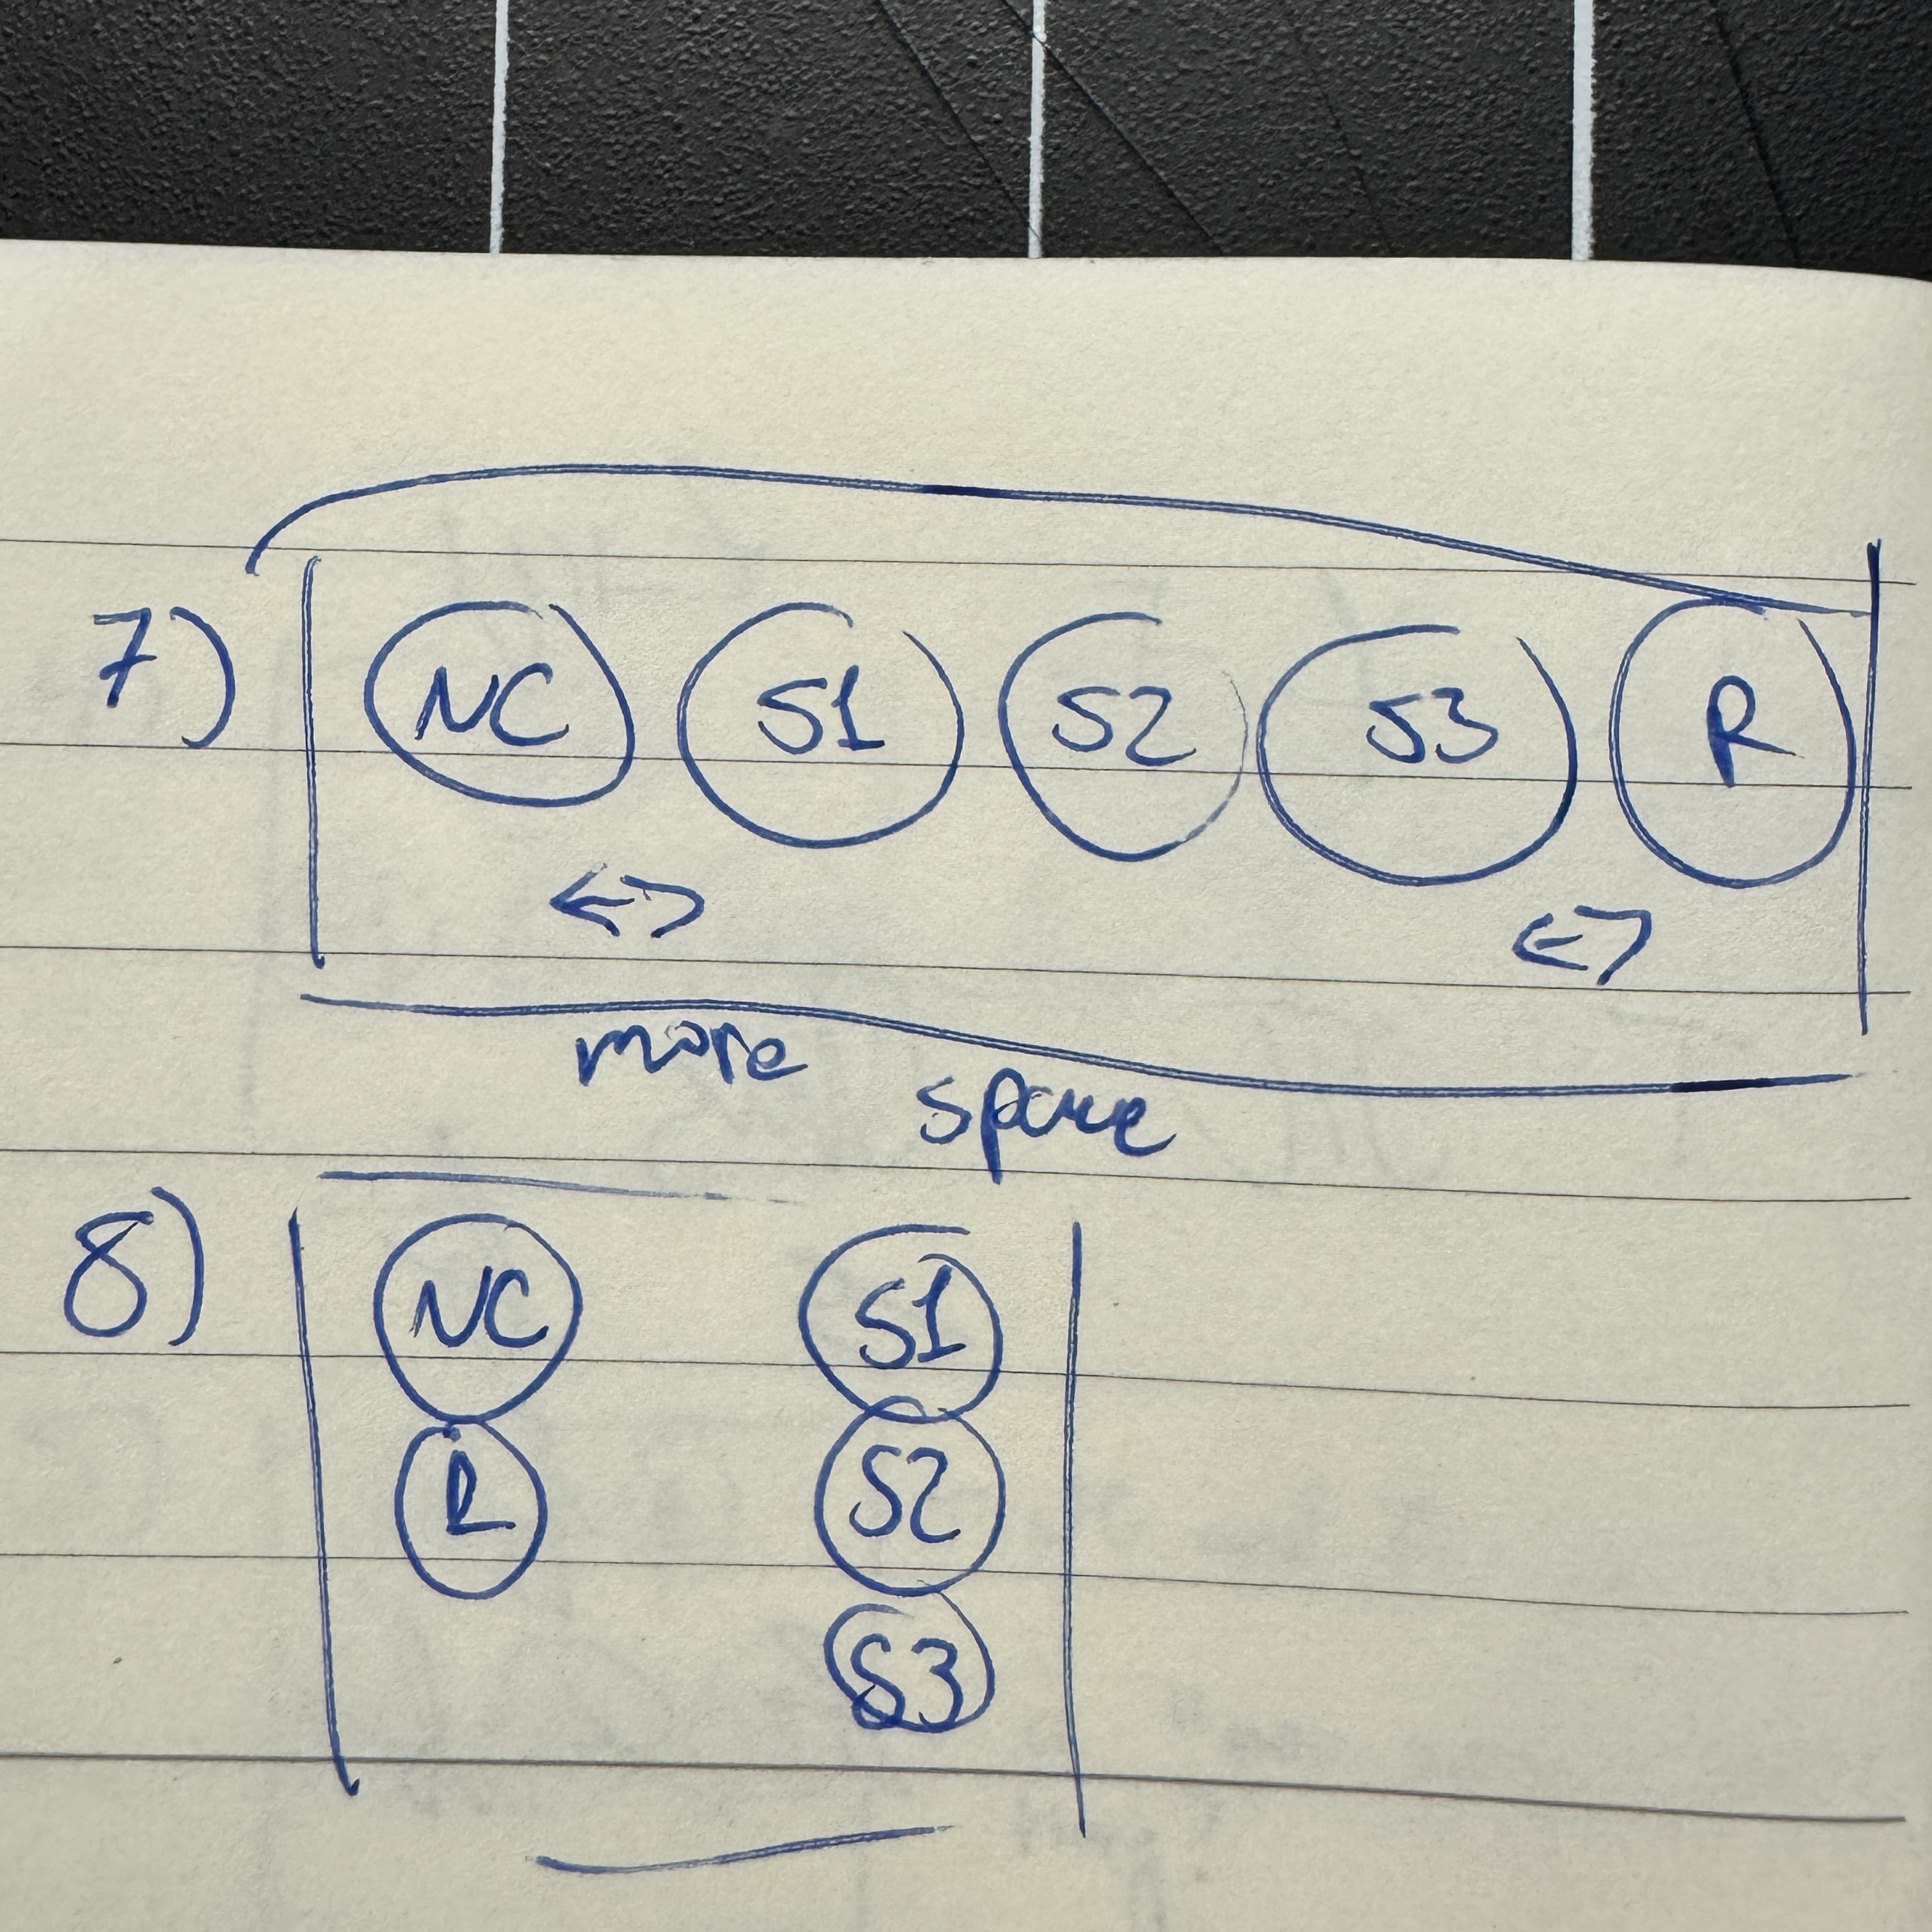
Activity 2

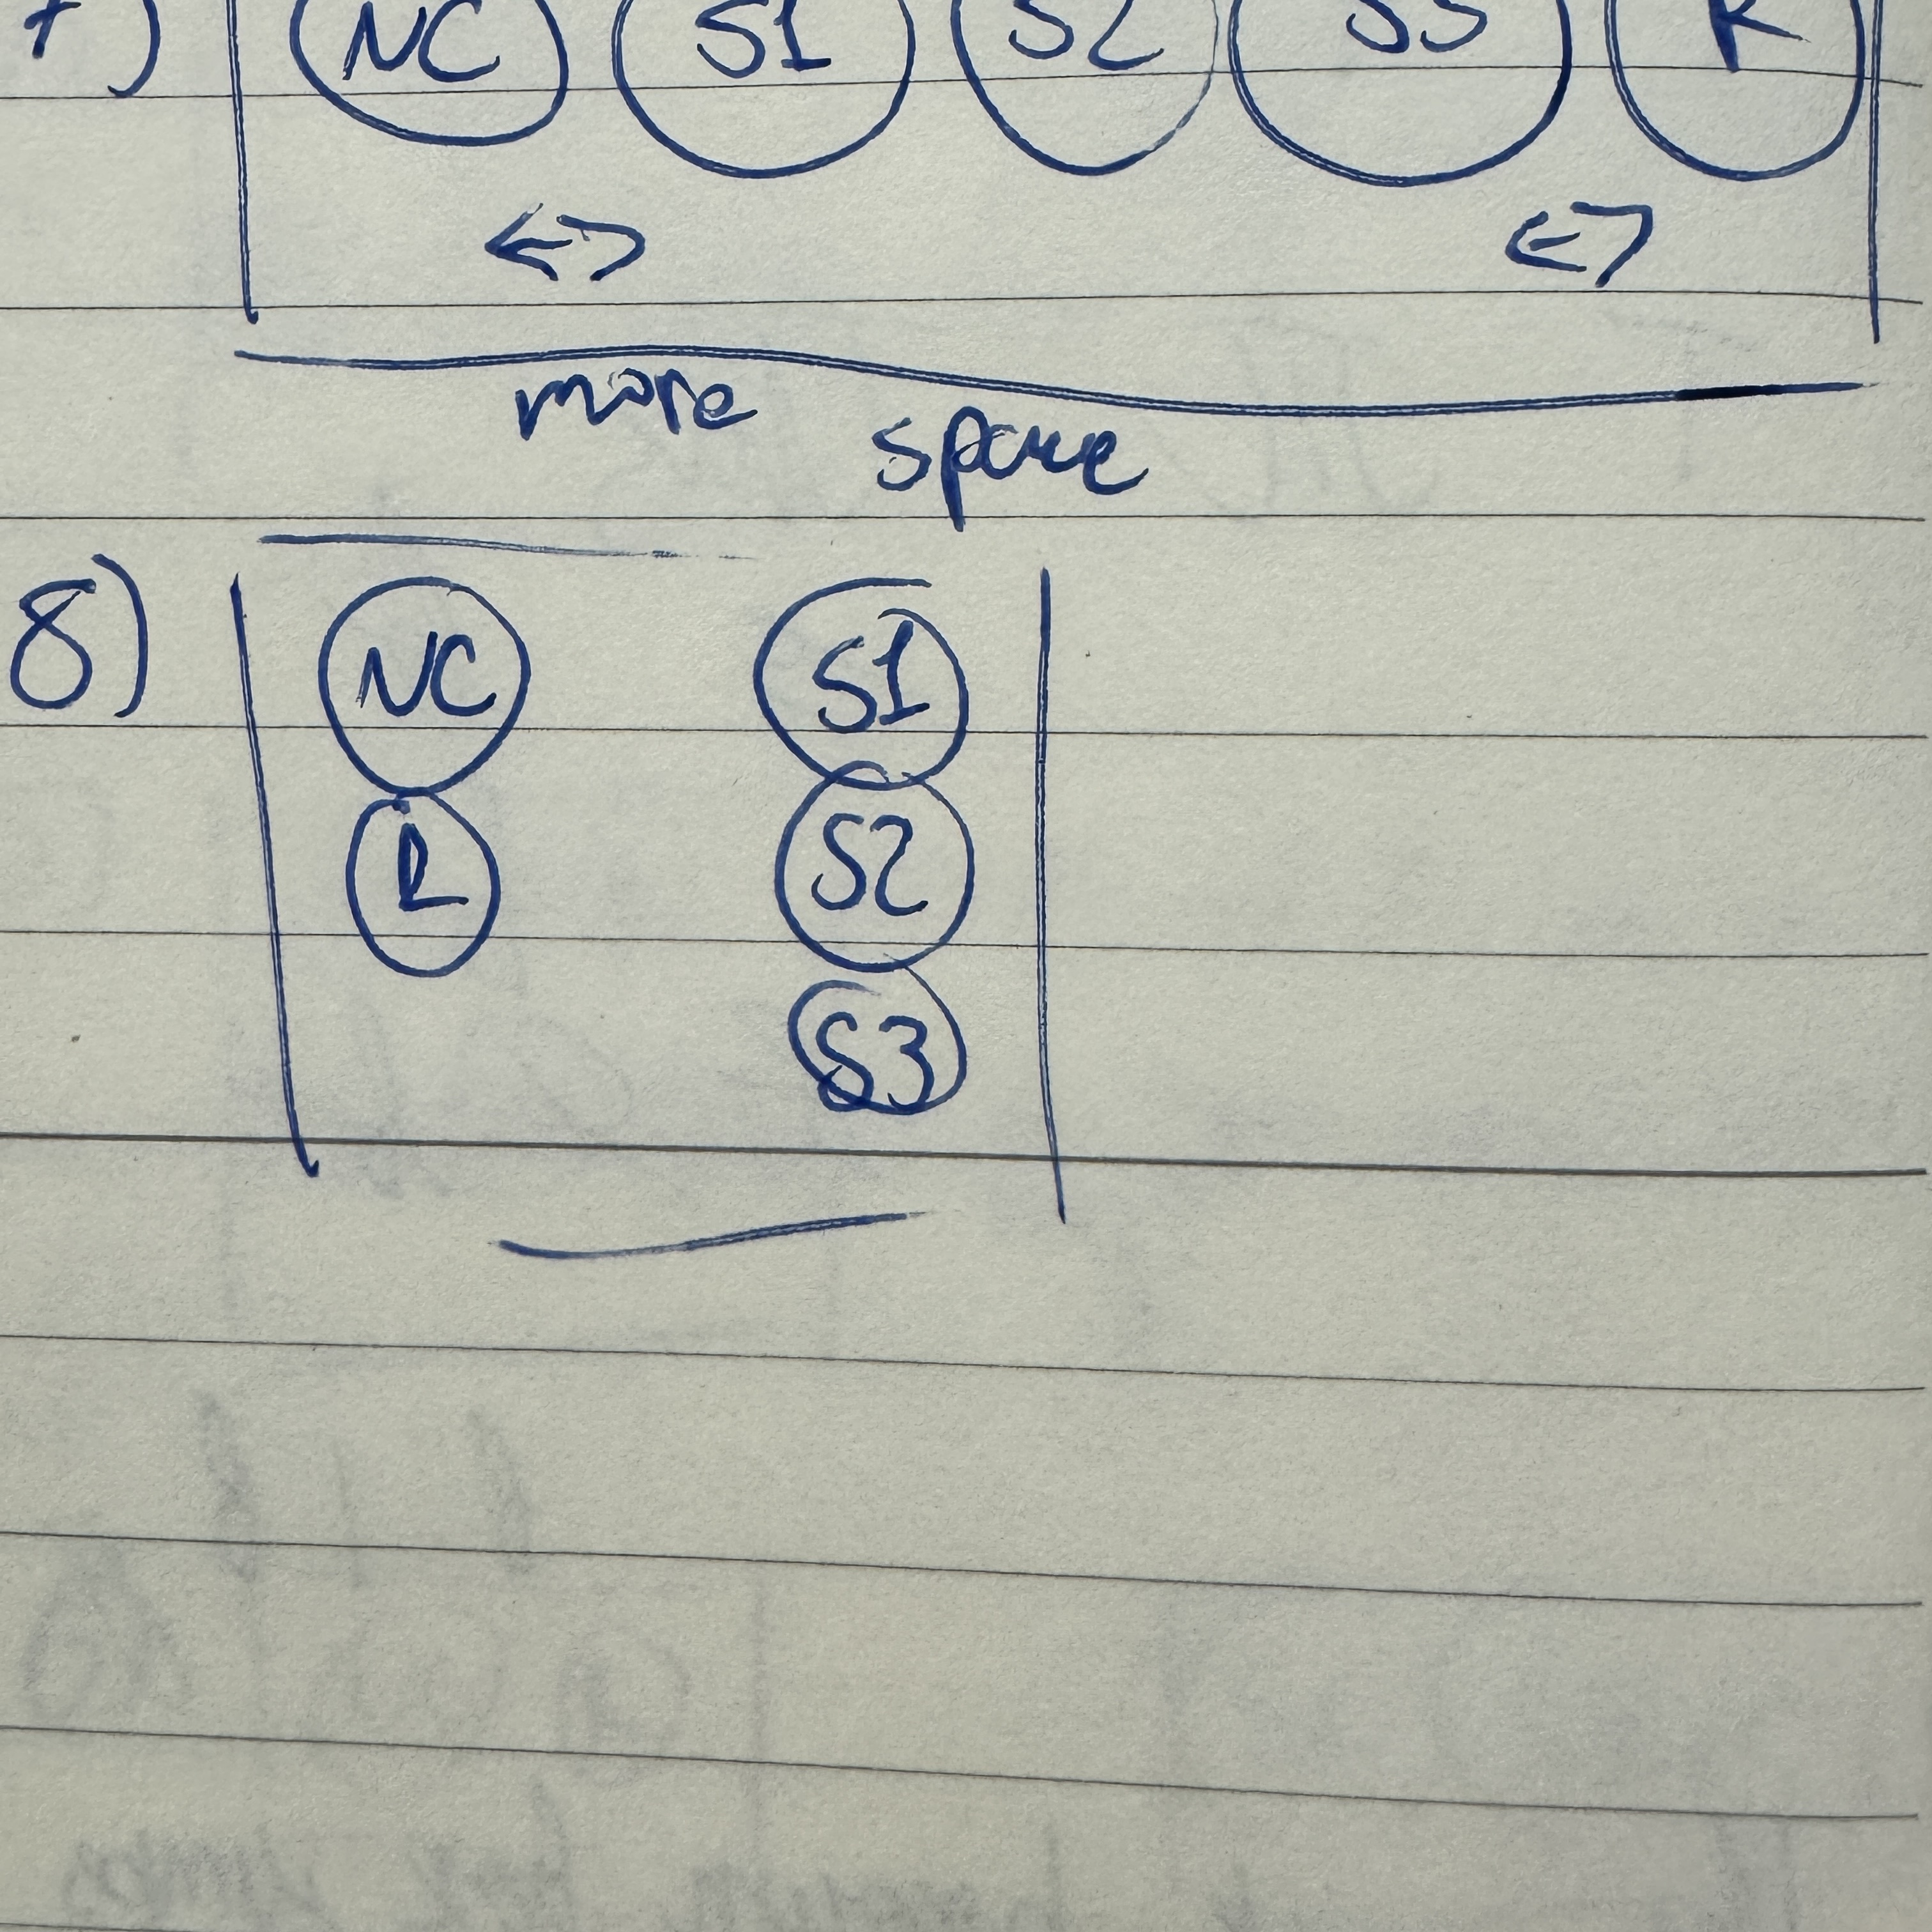
Project 3
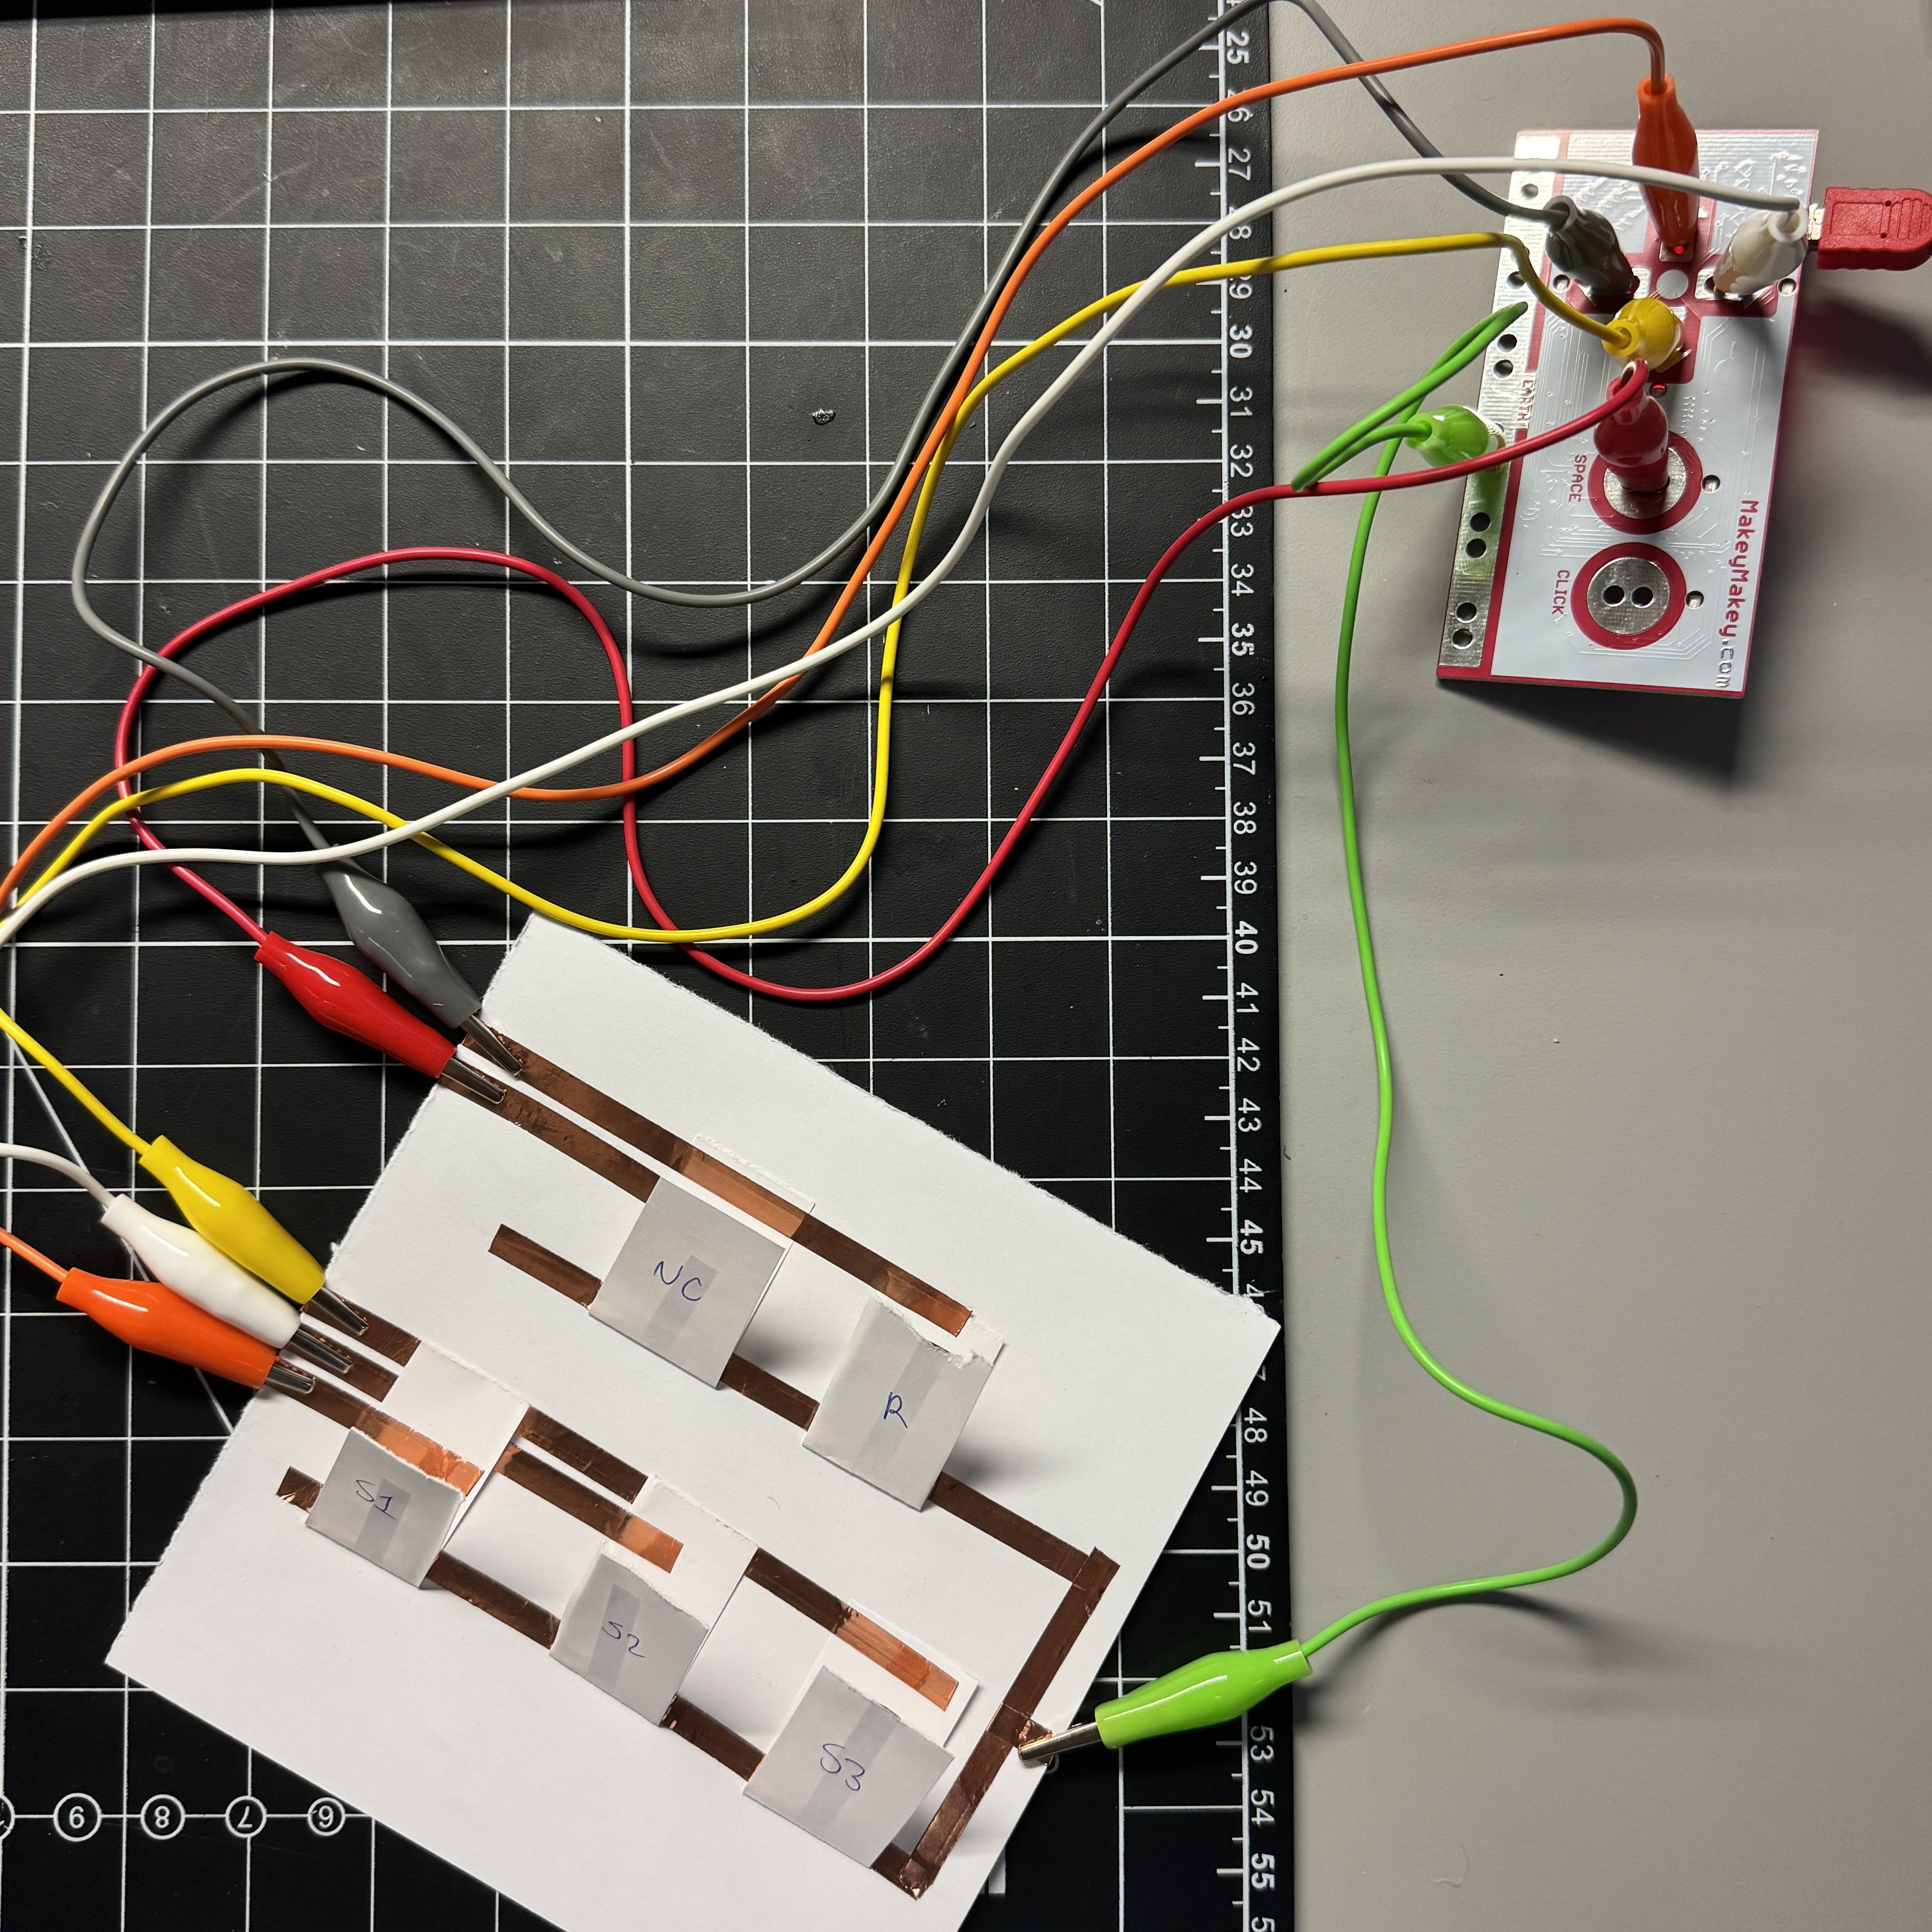
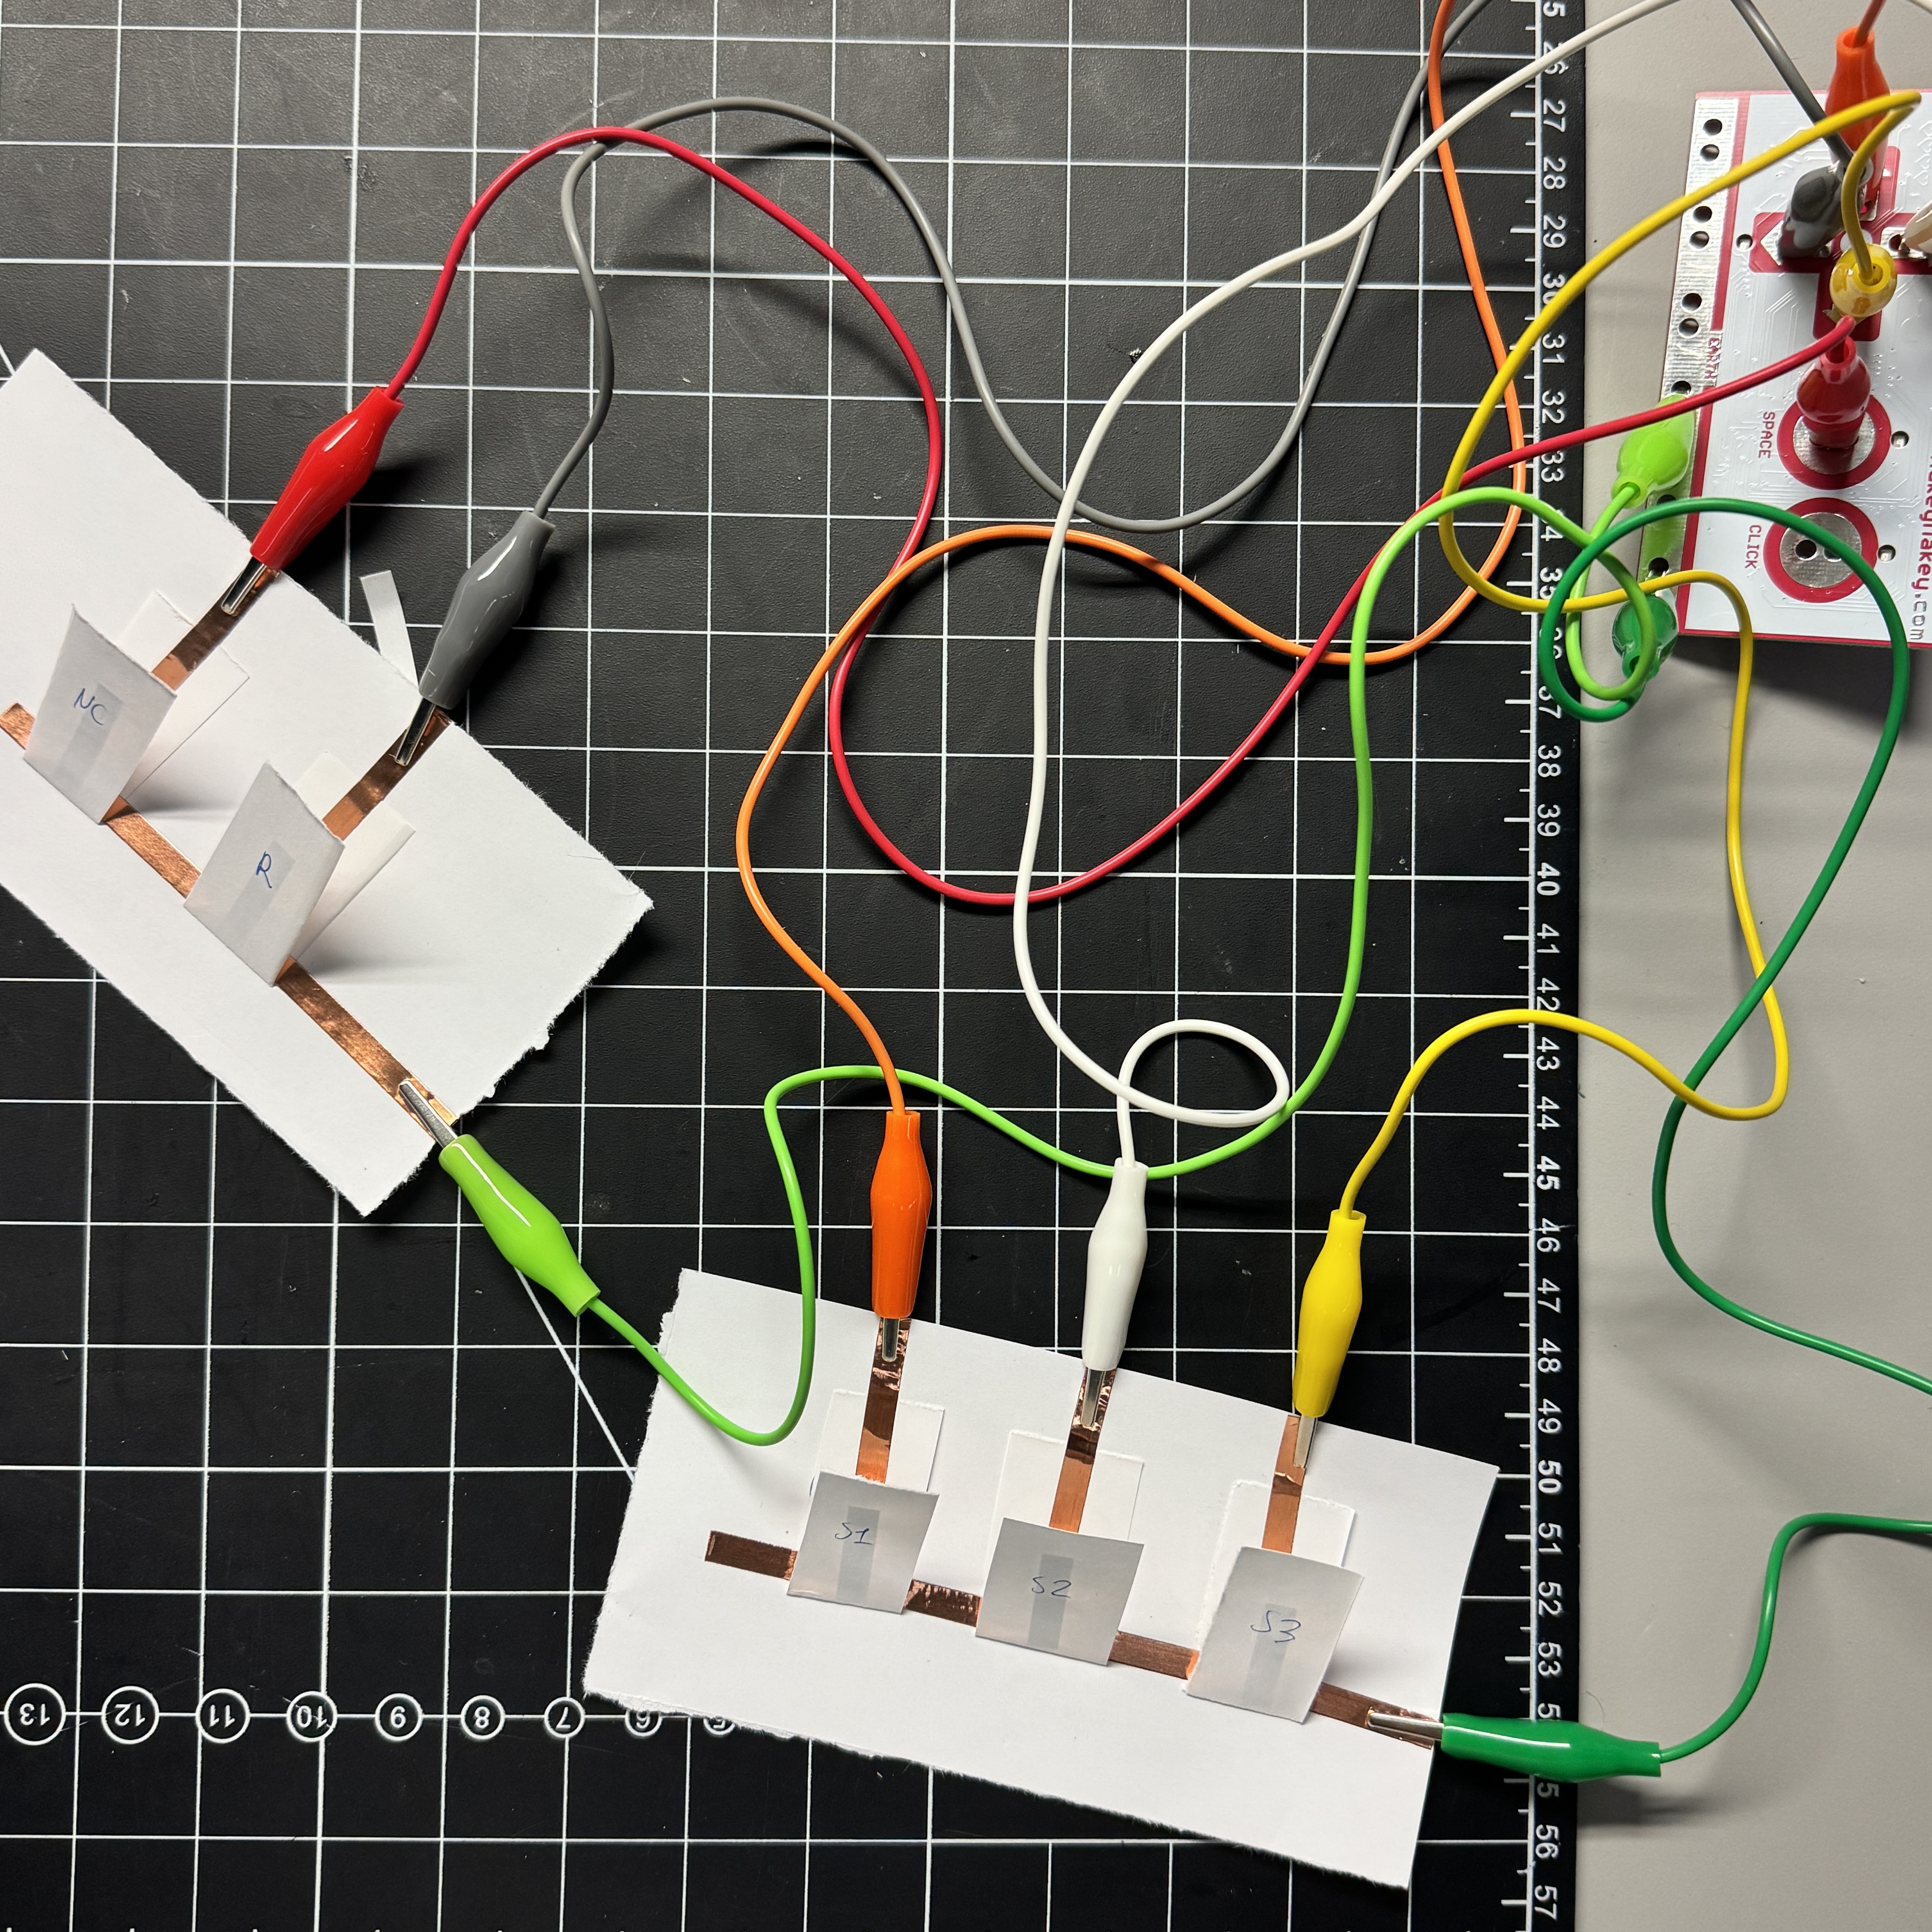
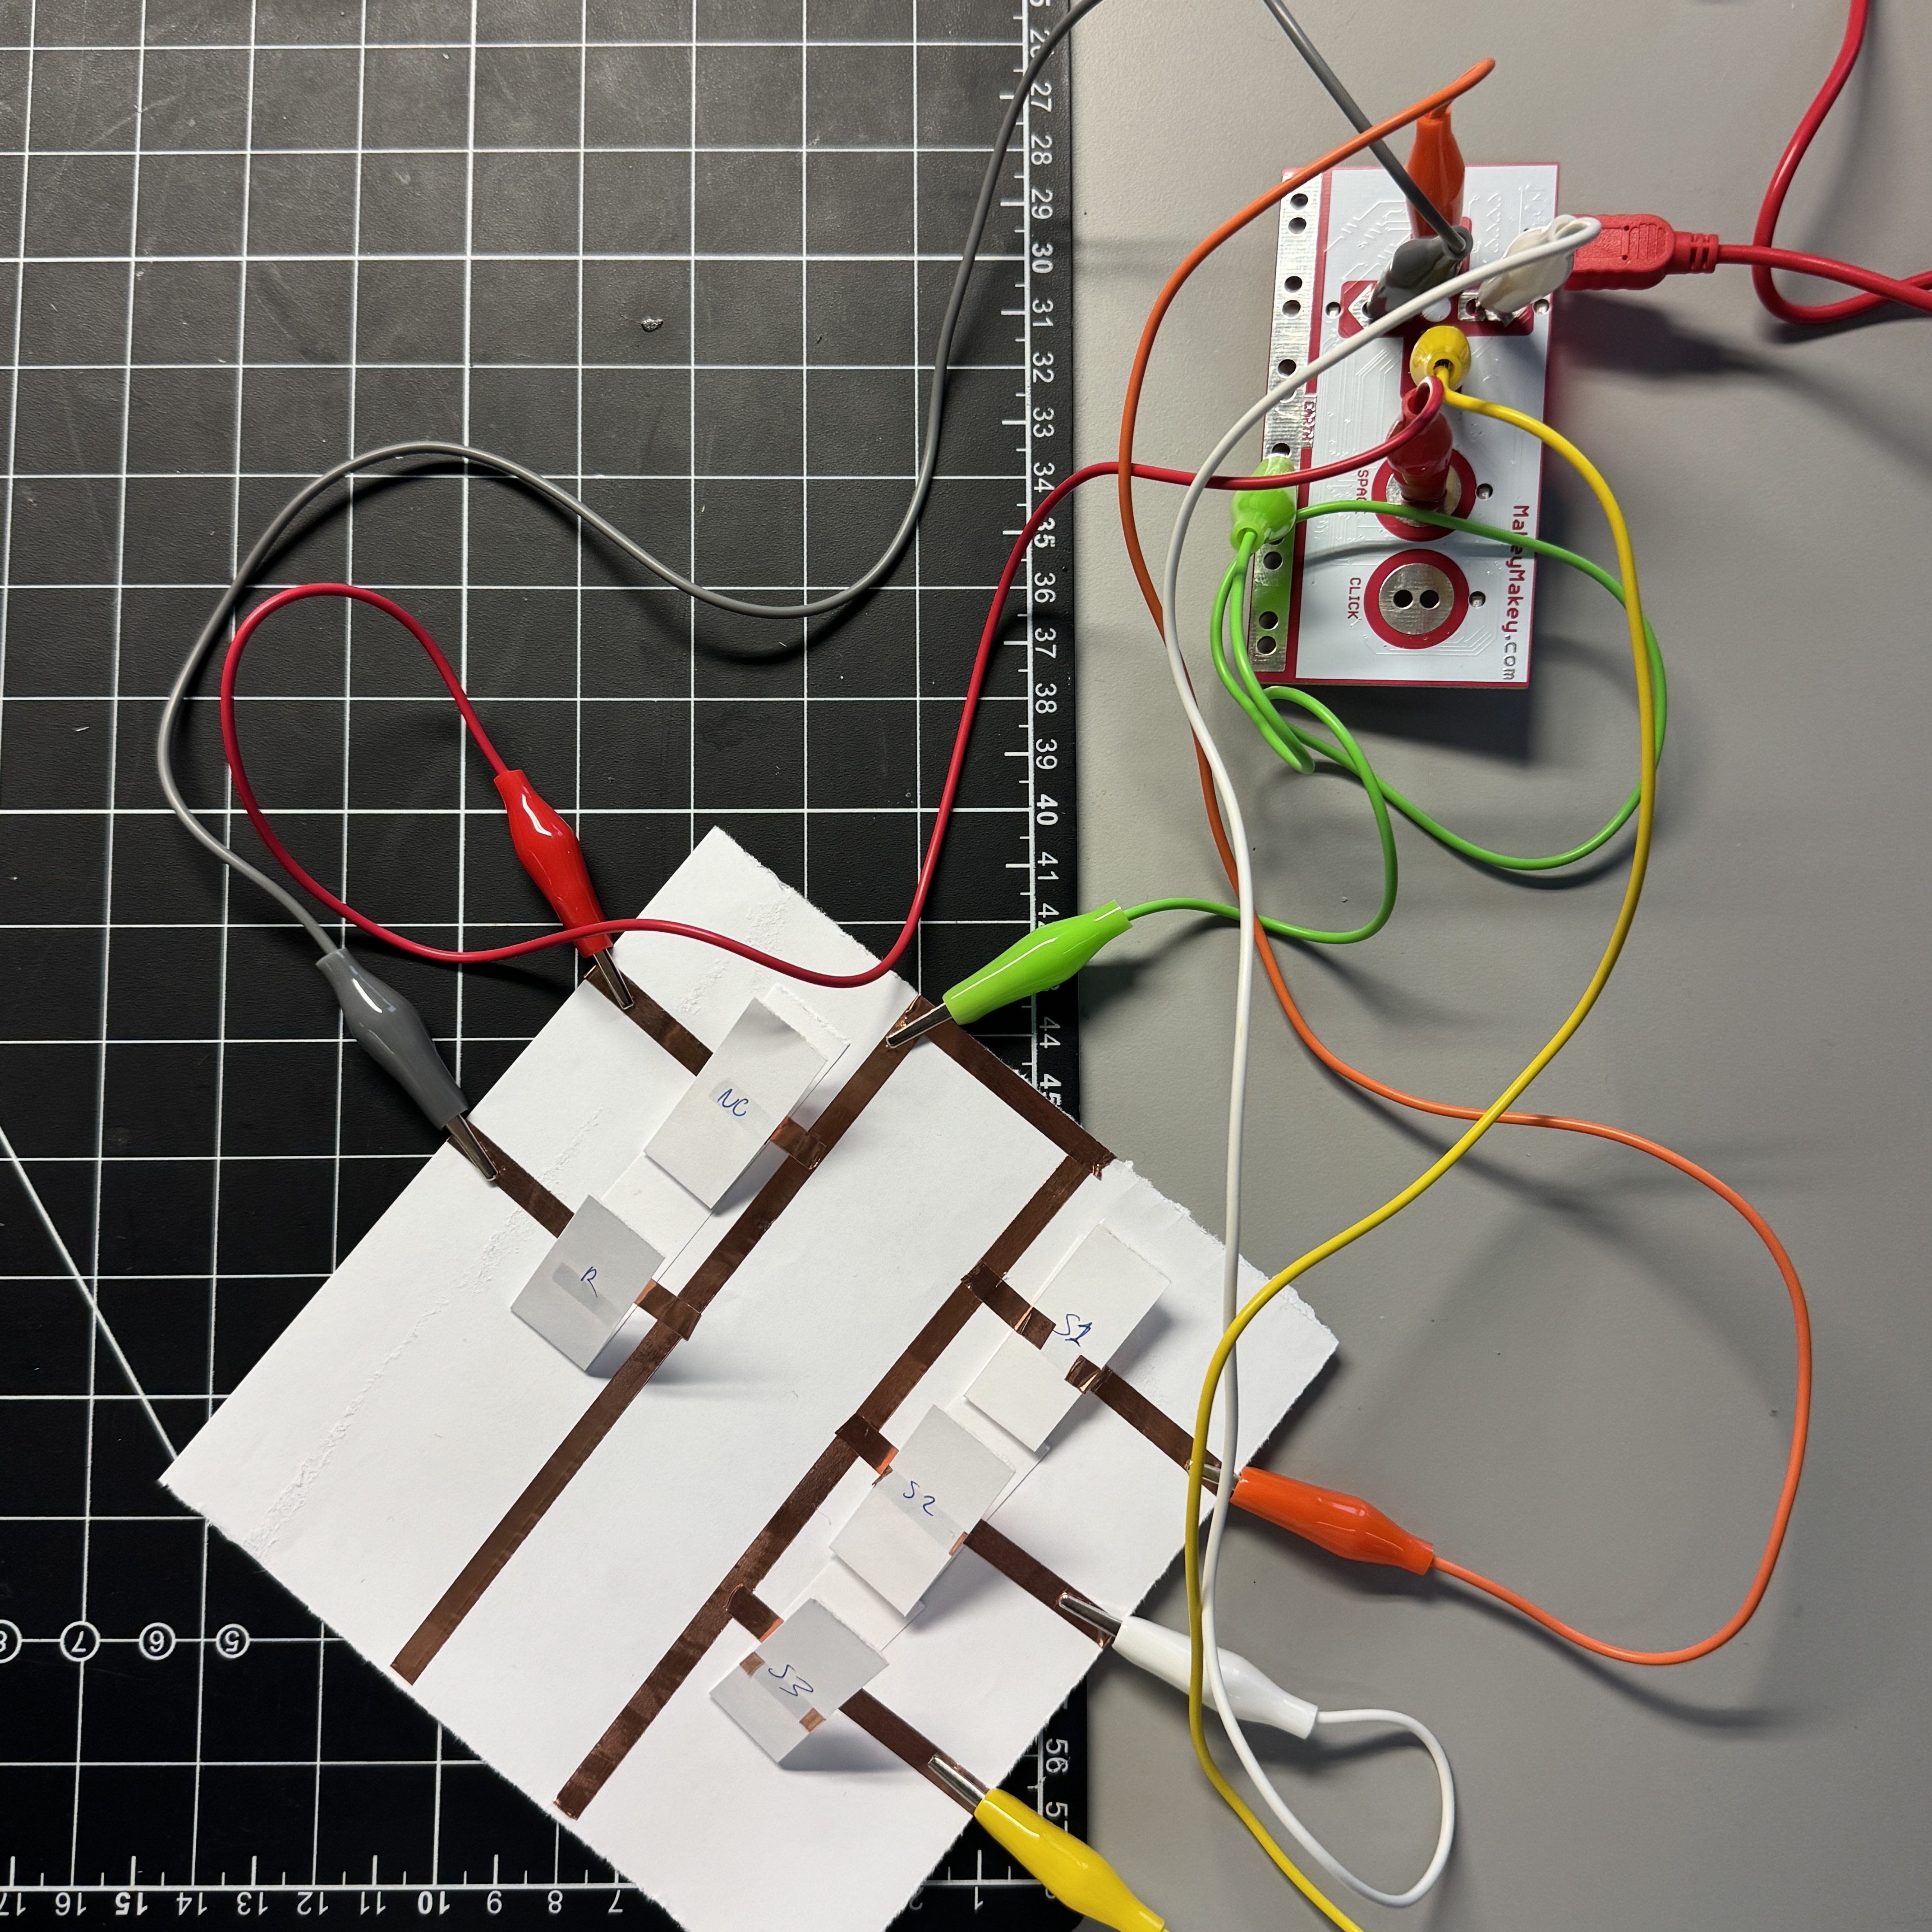
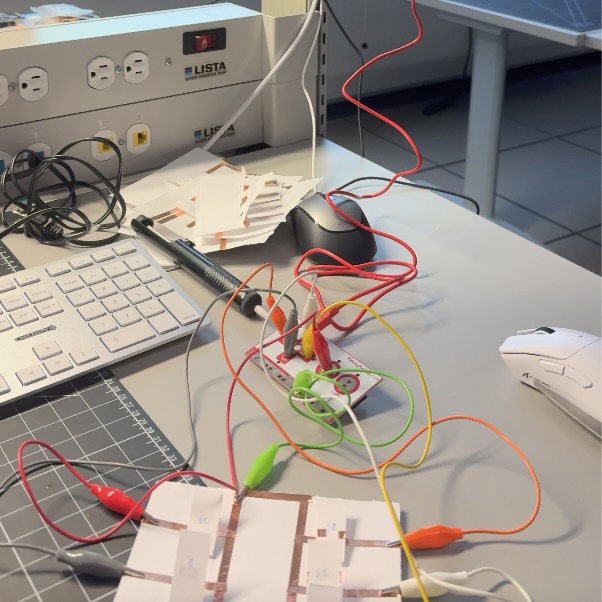
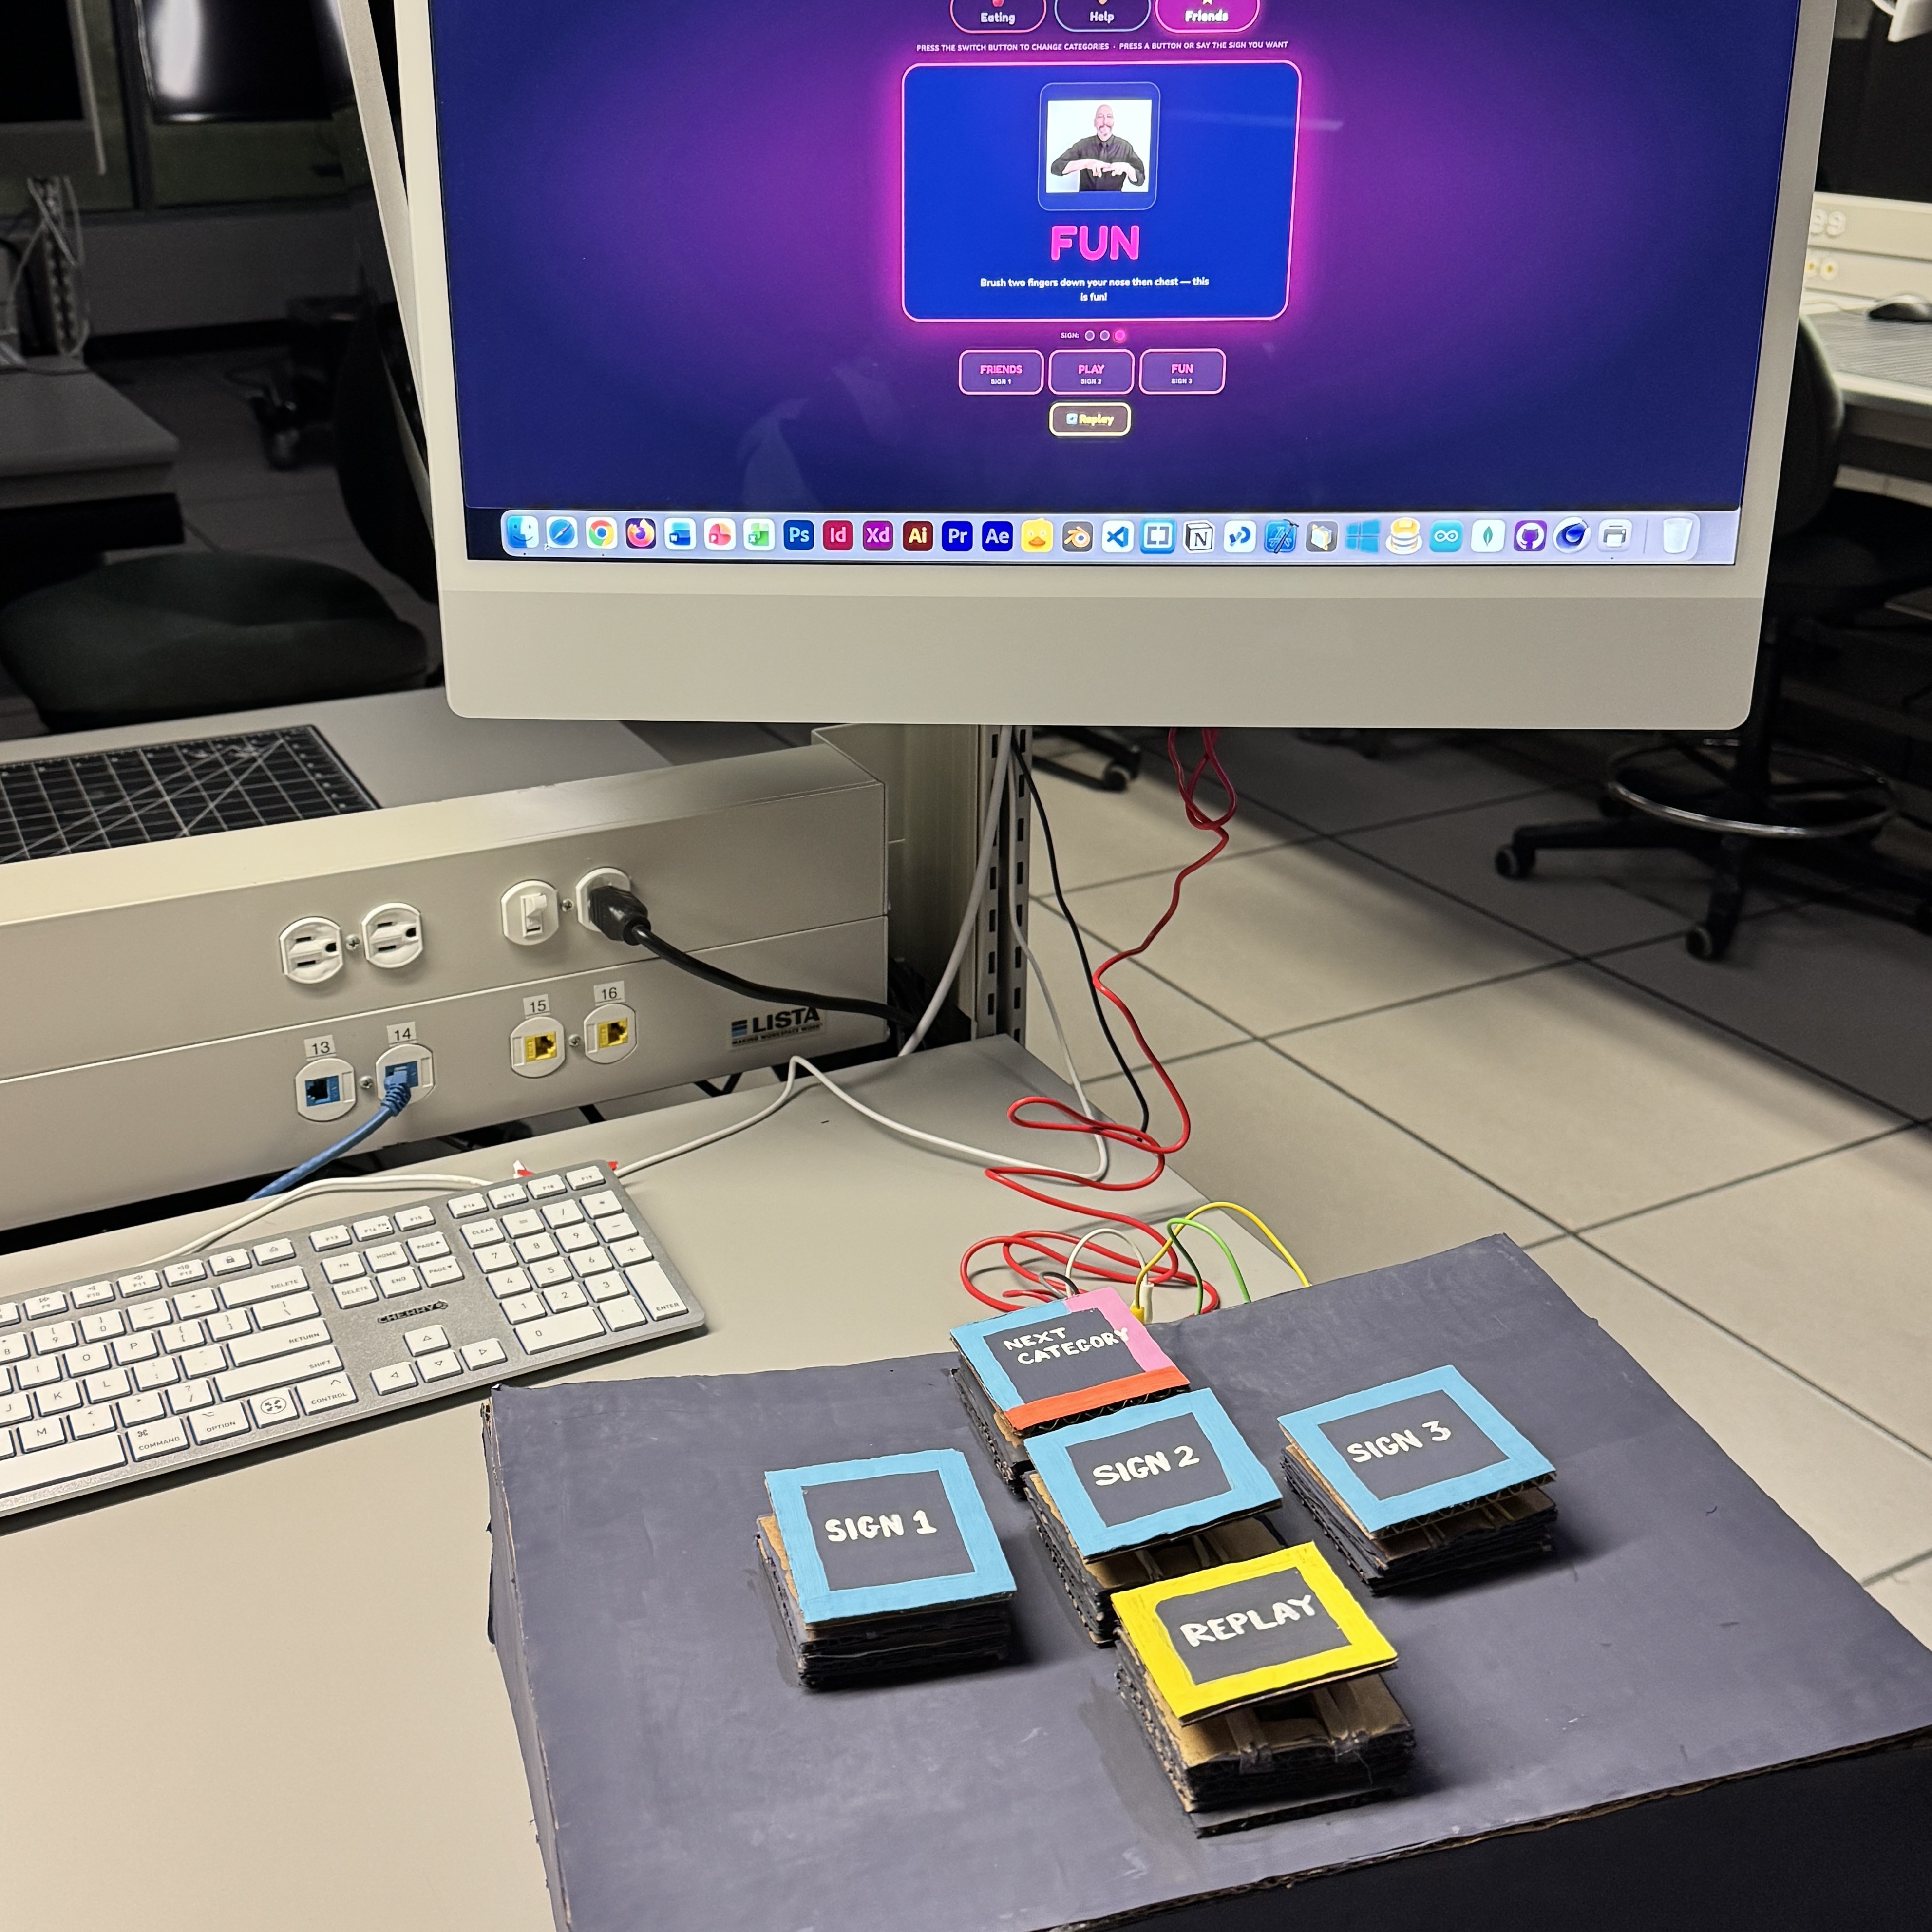
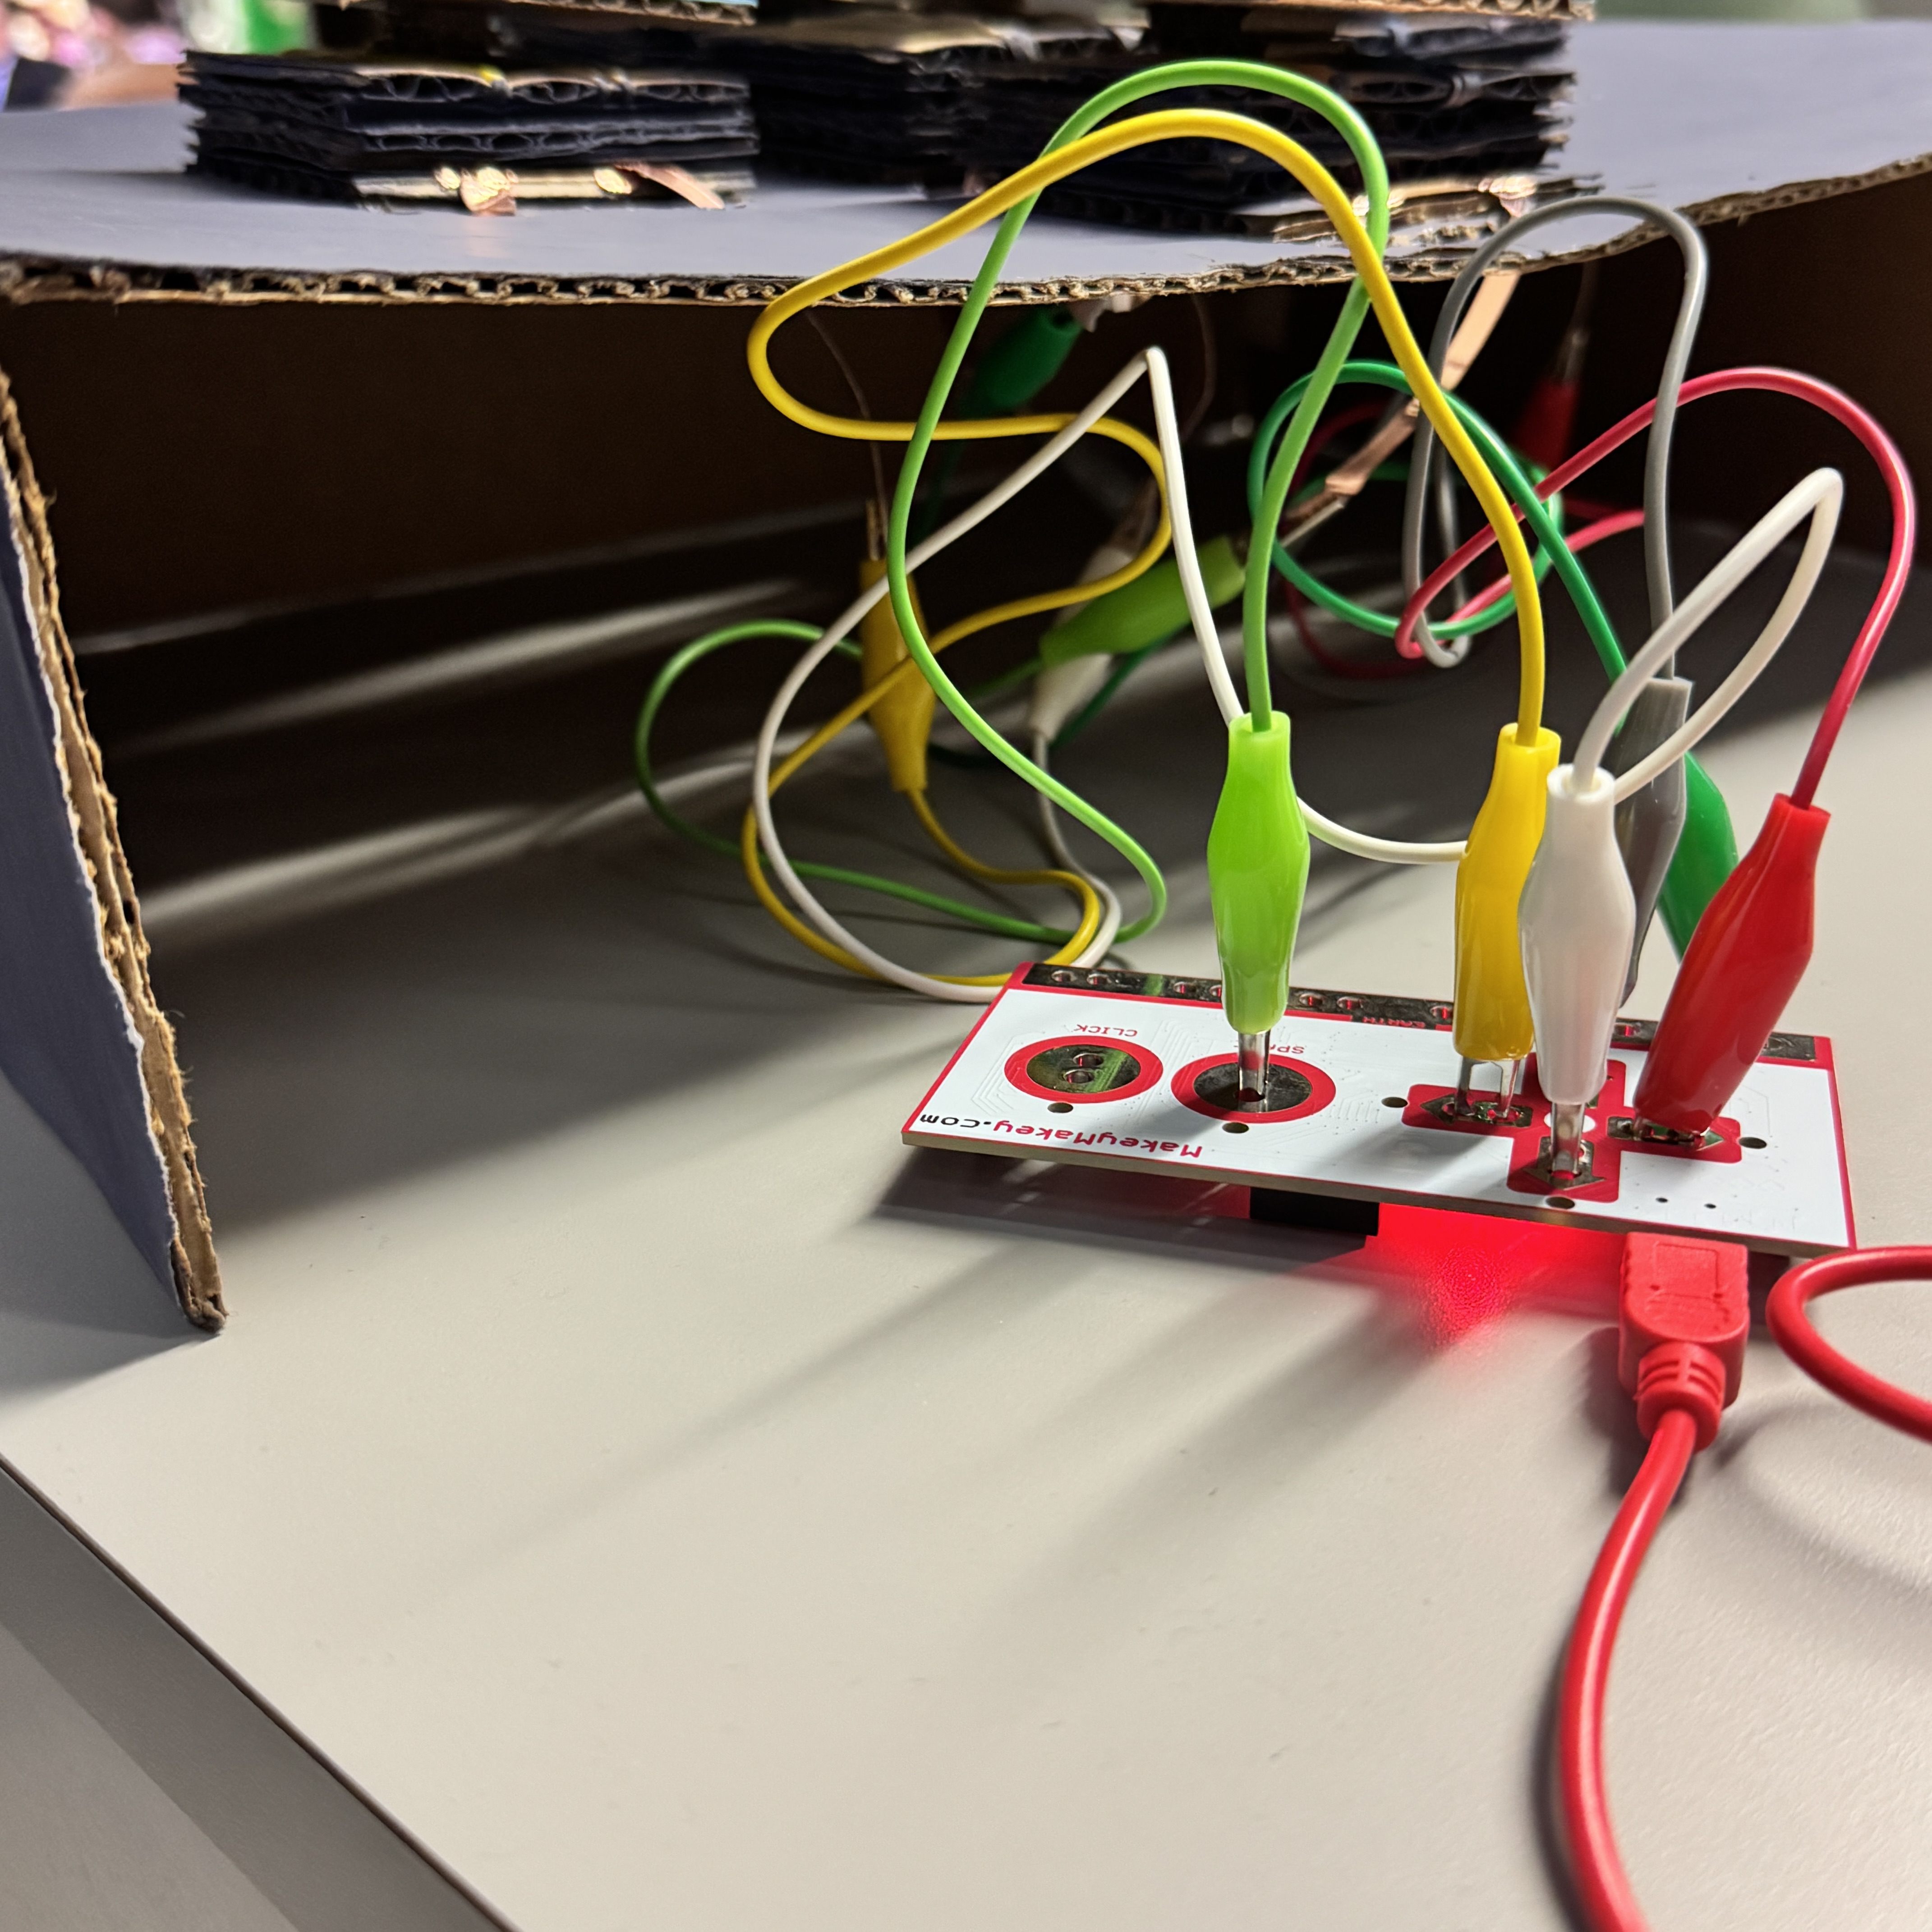
Final Project 3 Design
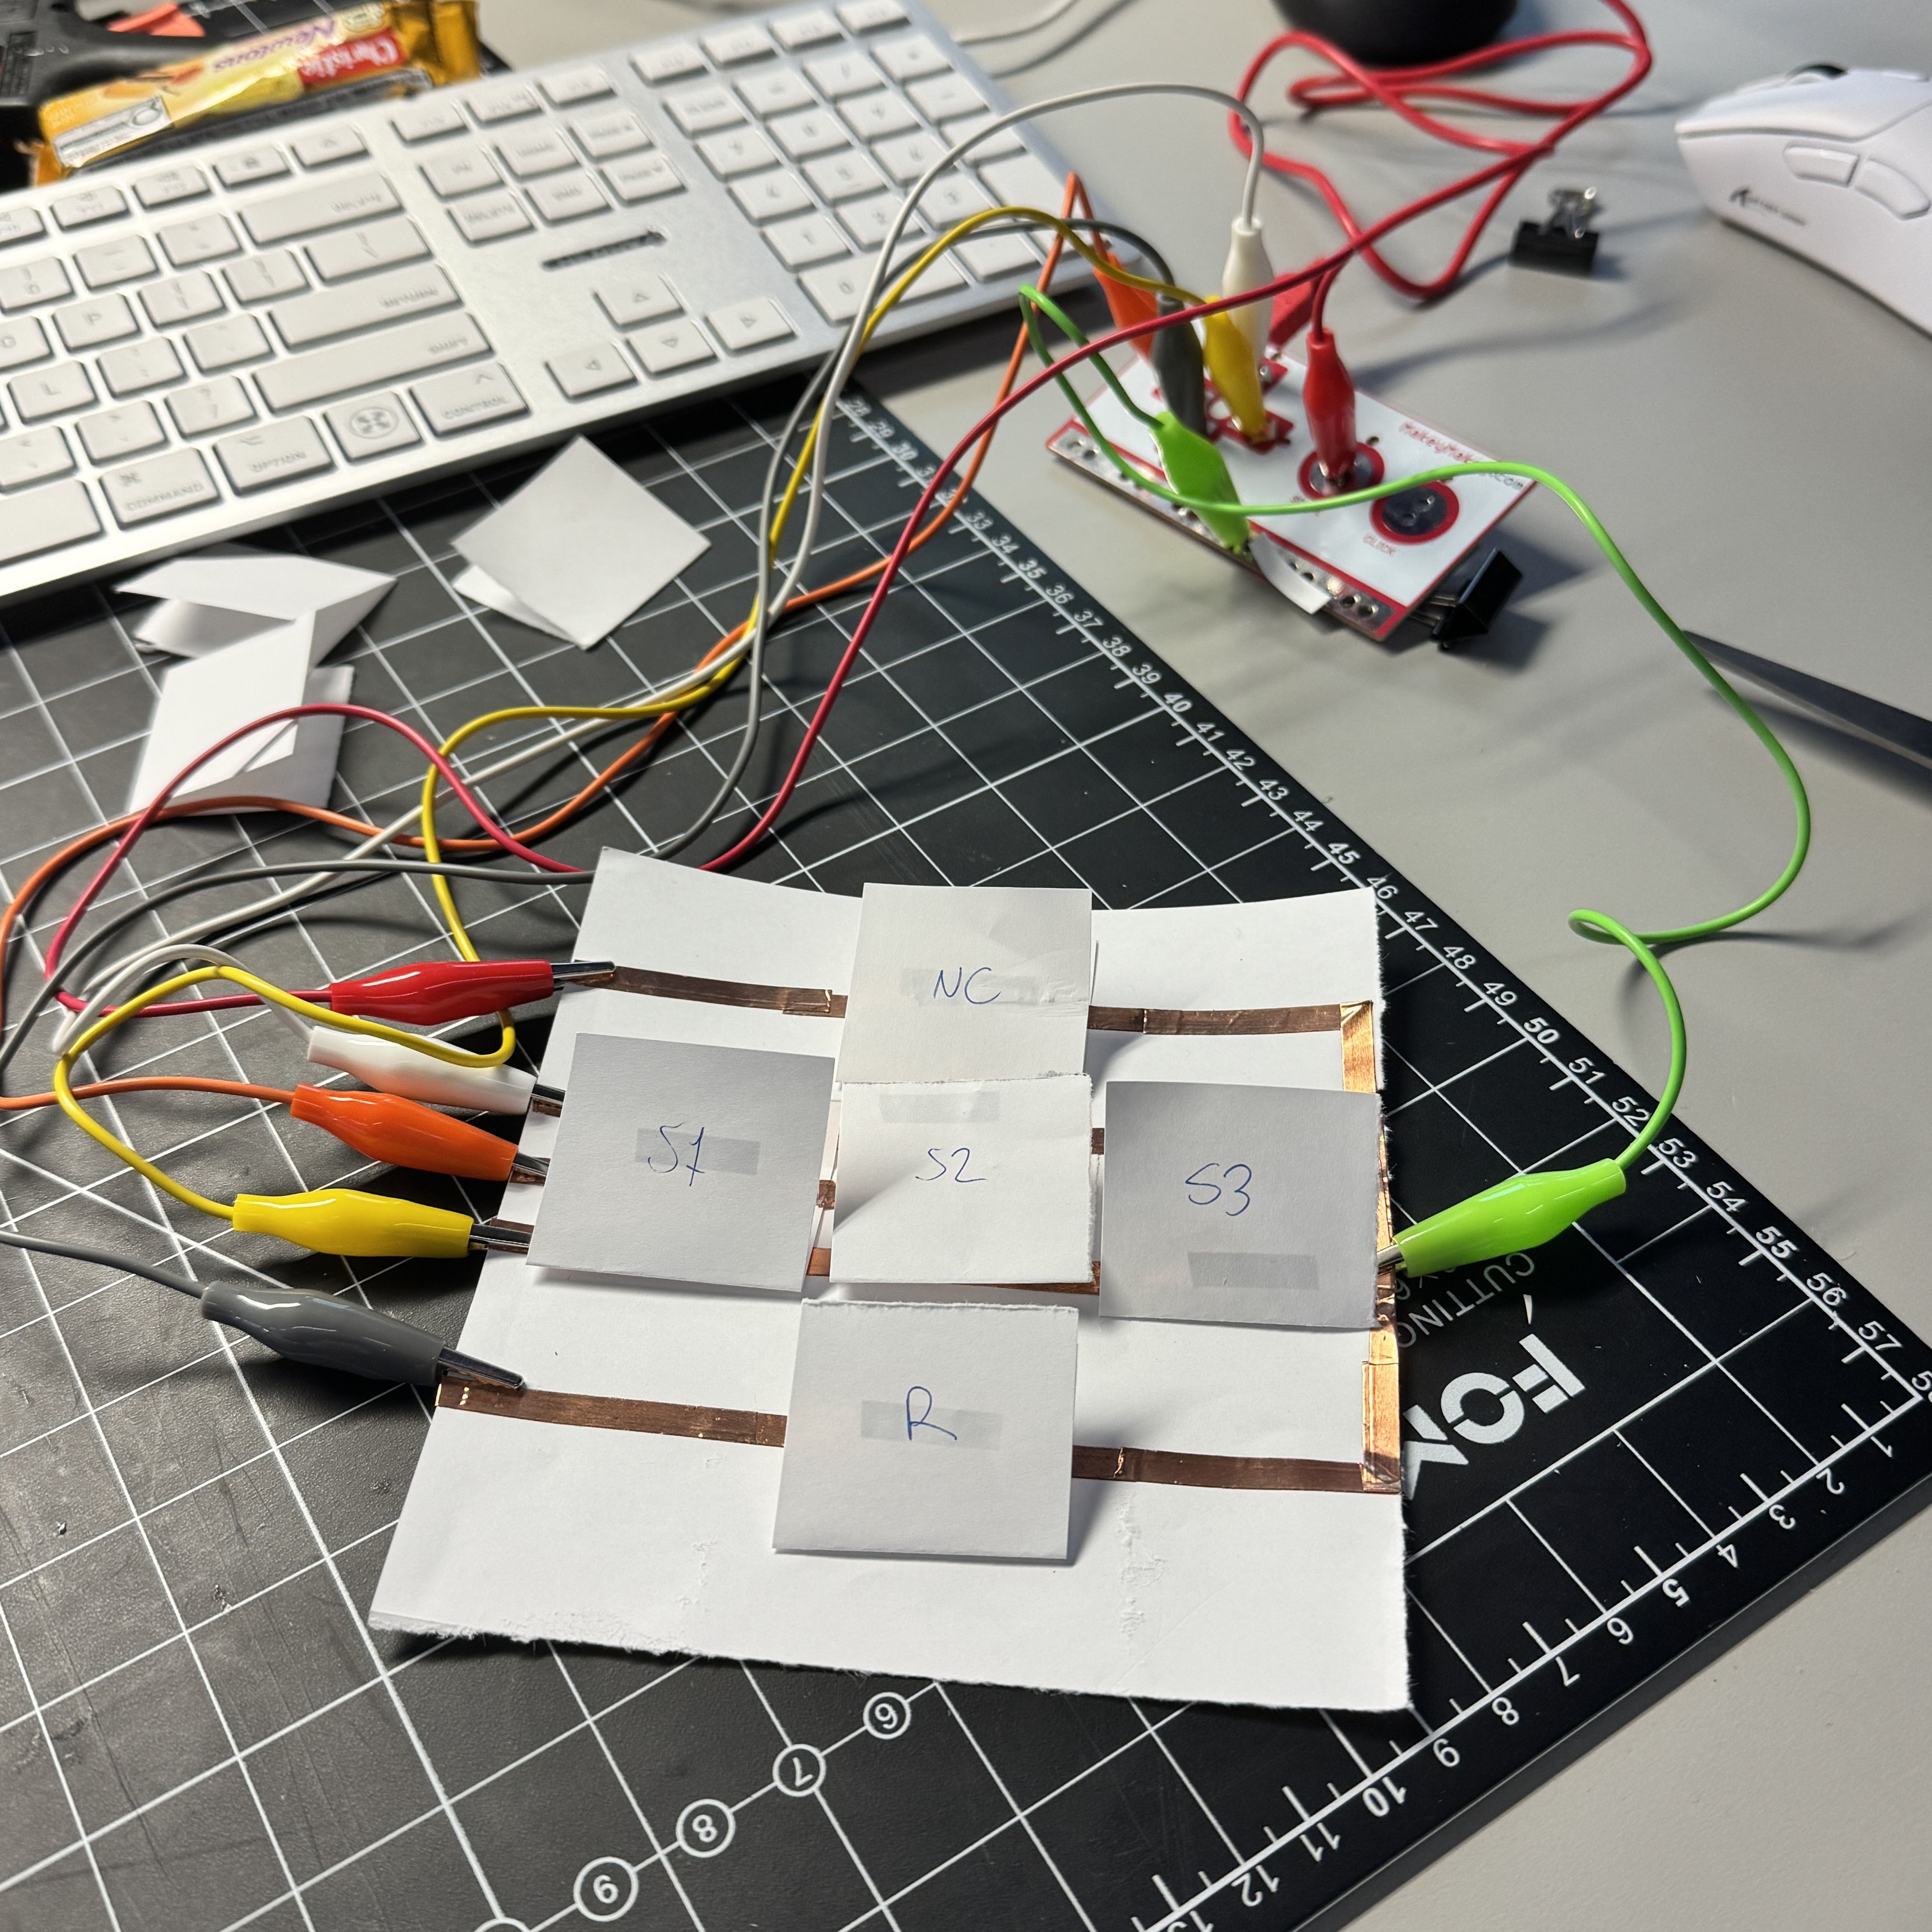
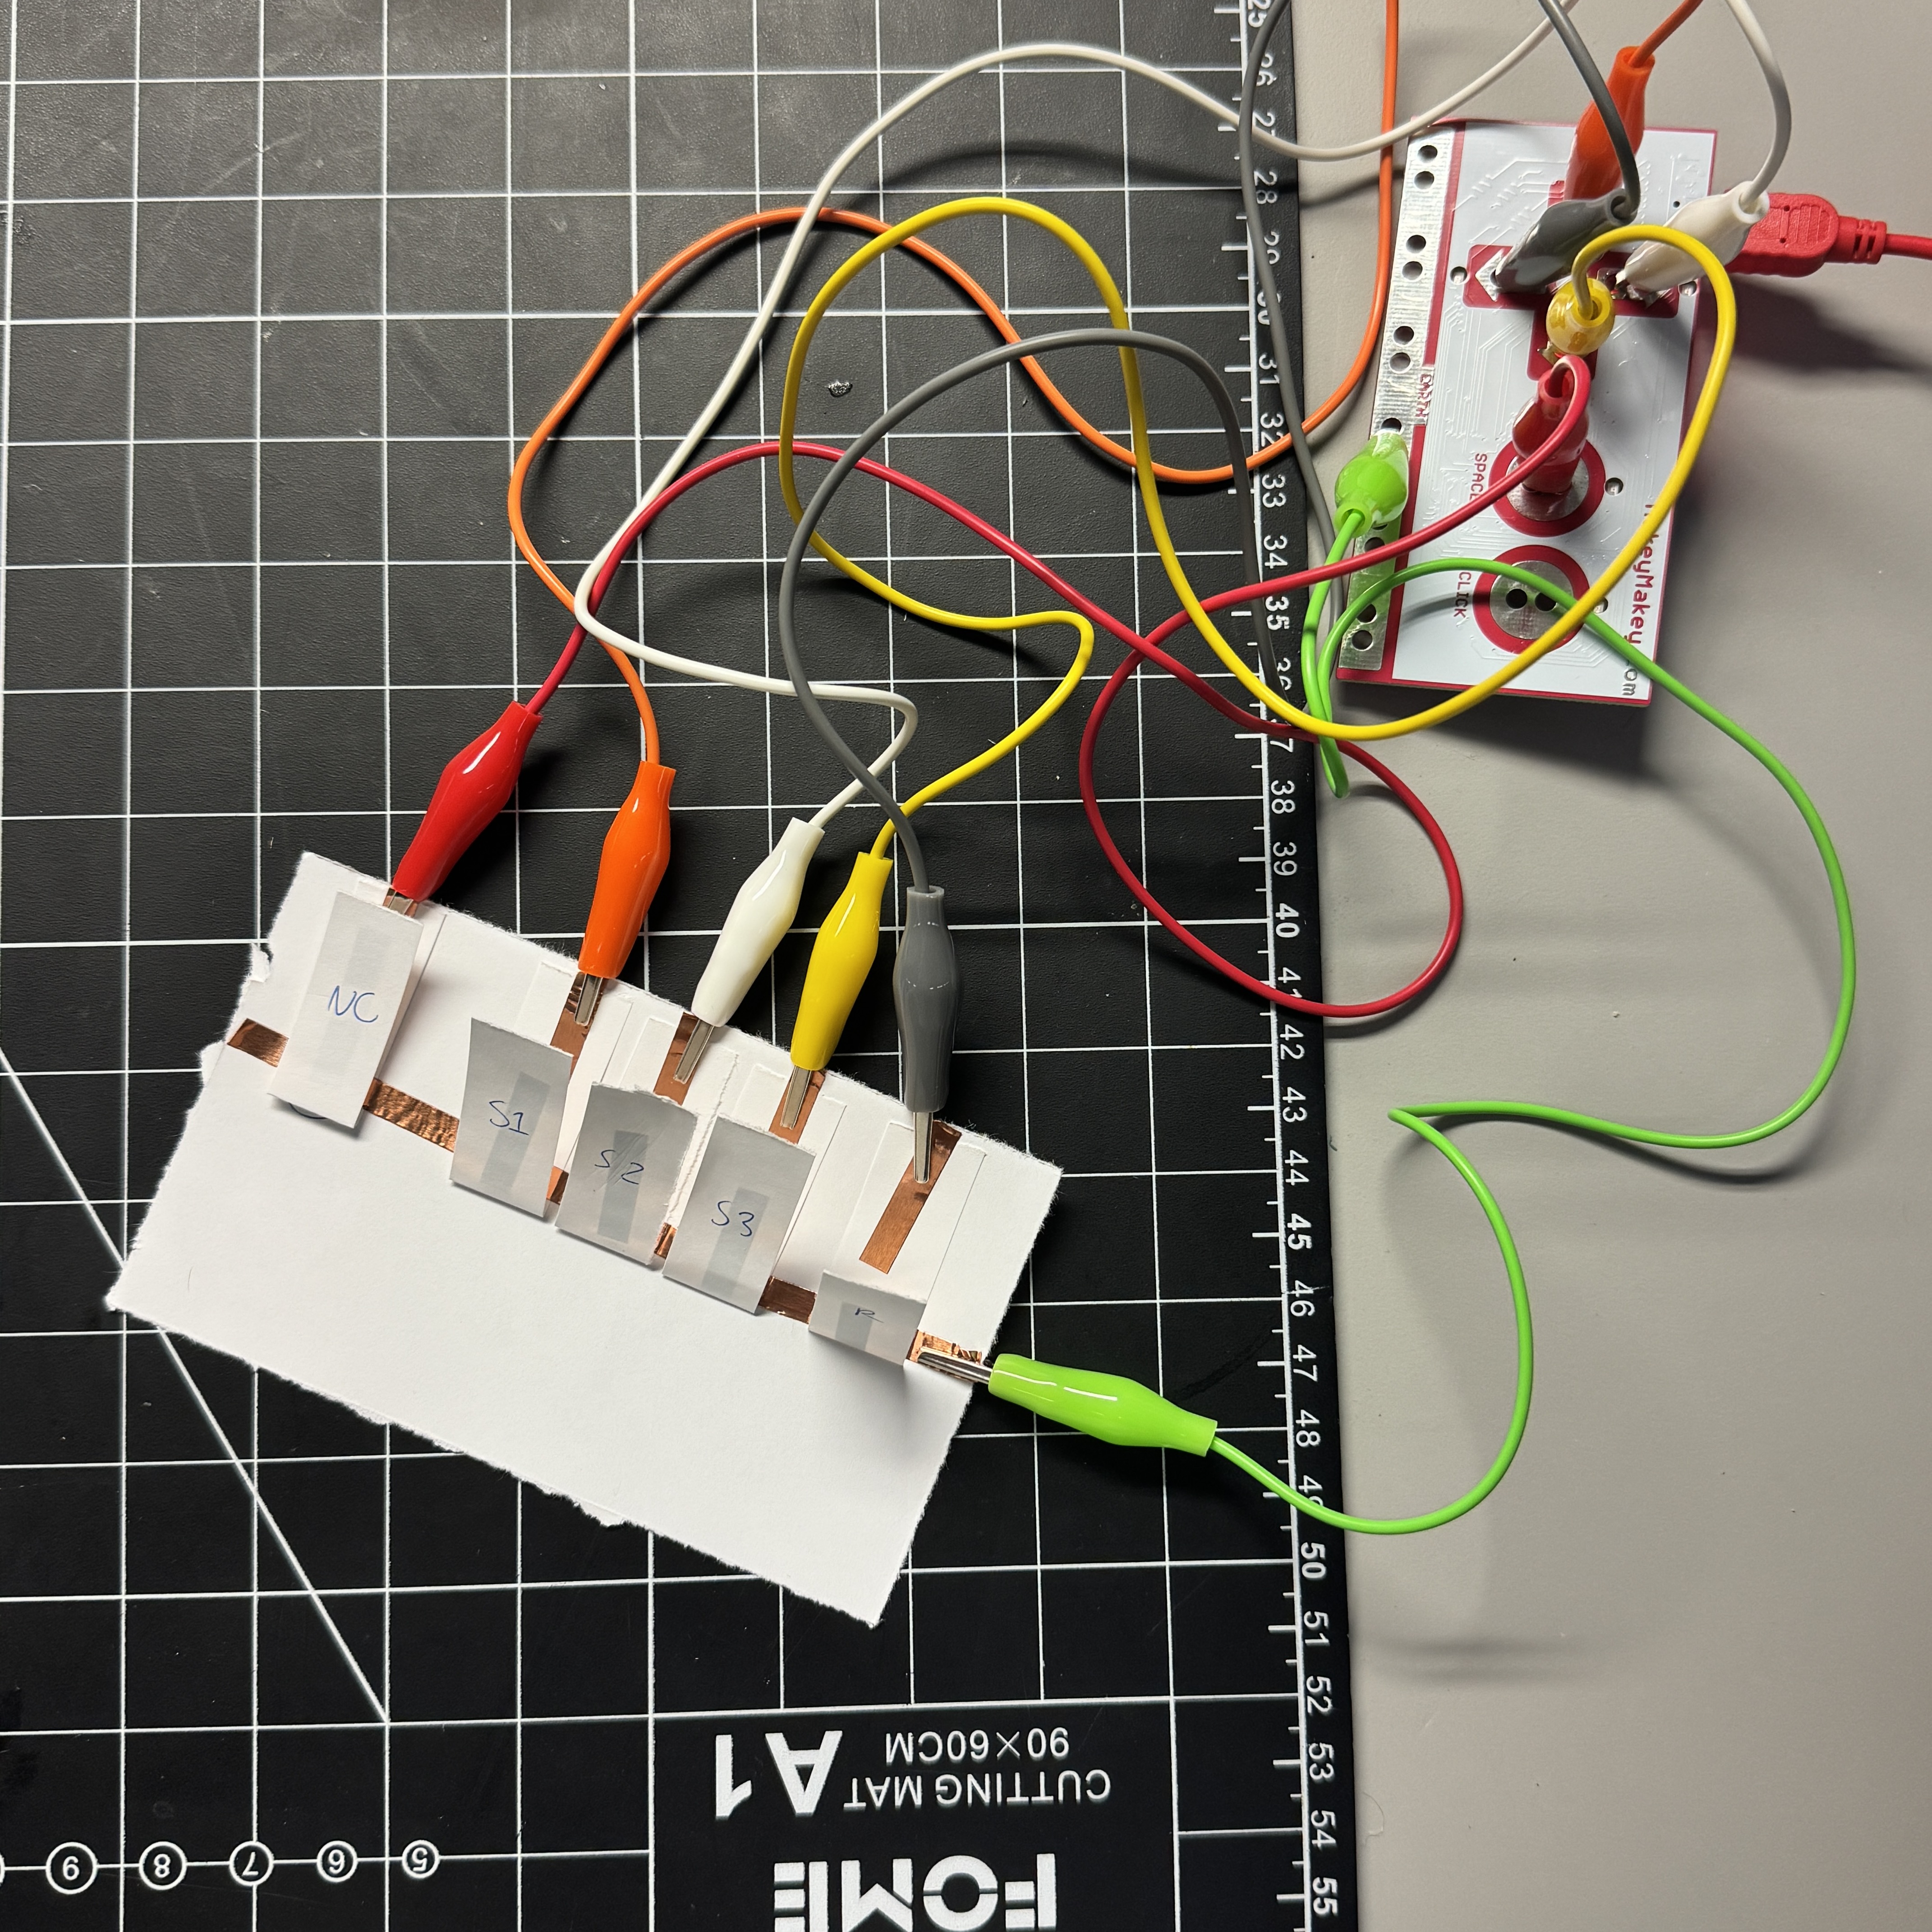
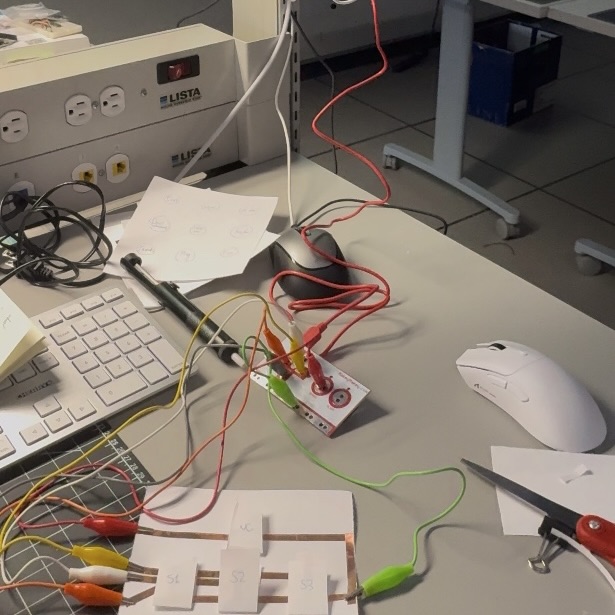
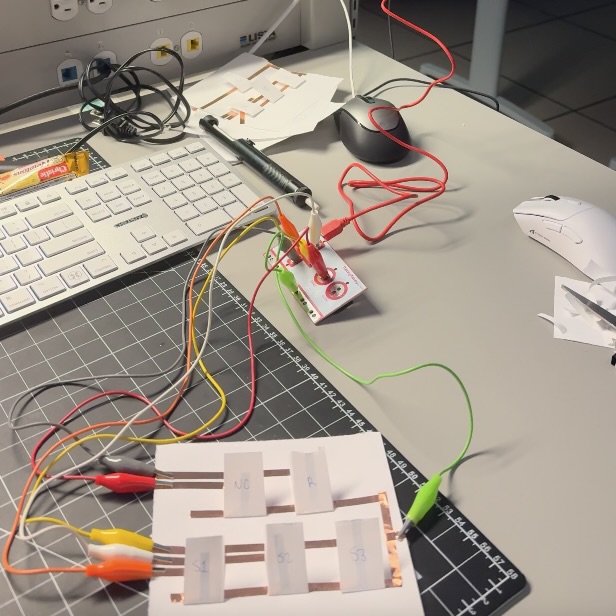
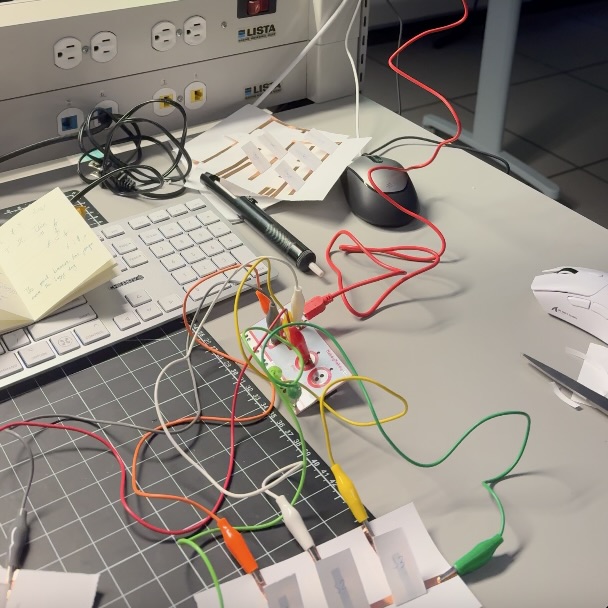
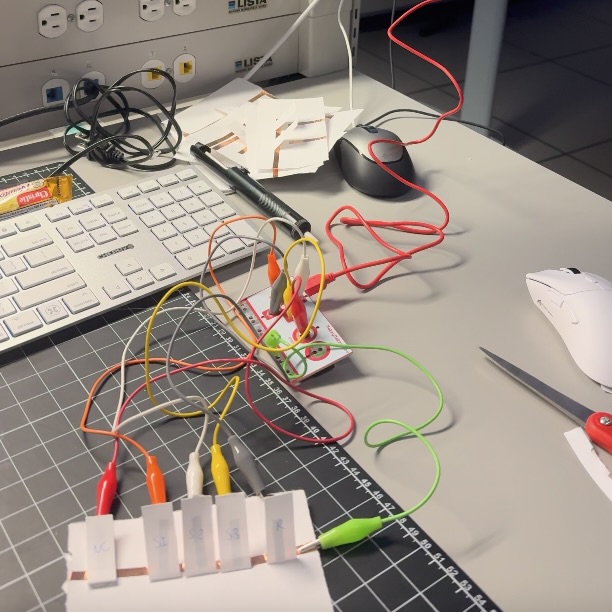
The Makey-Makey Control Panel
Powered by w3.css